
A STARY NIGHT INSIDE A CAVE
20 SEPTEMBER 2022
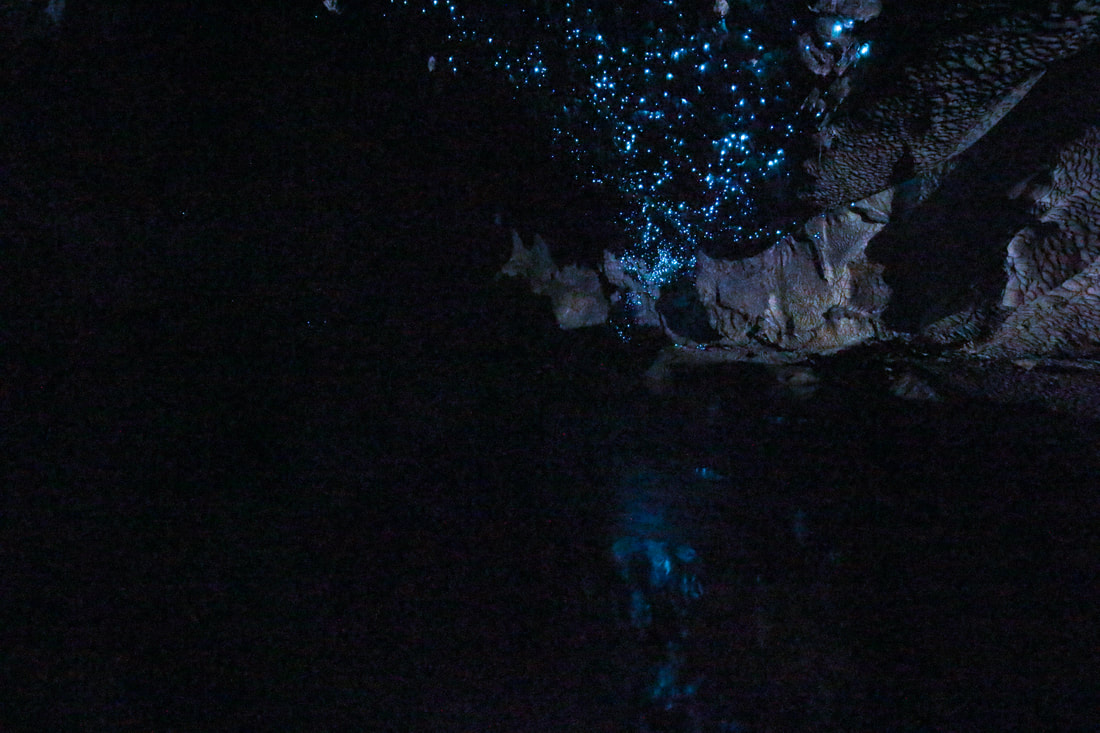
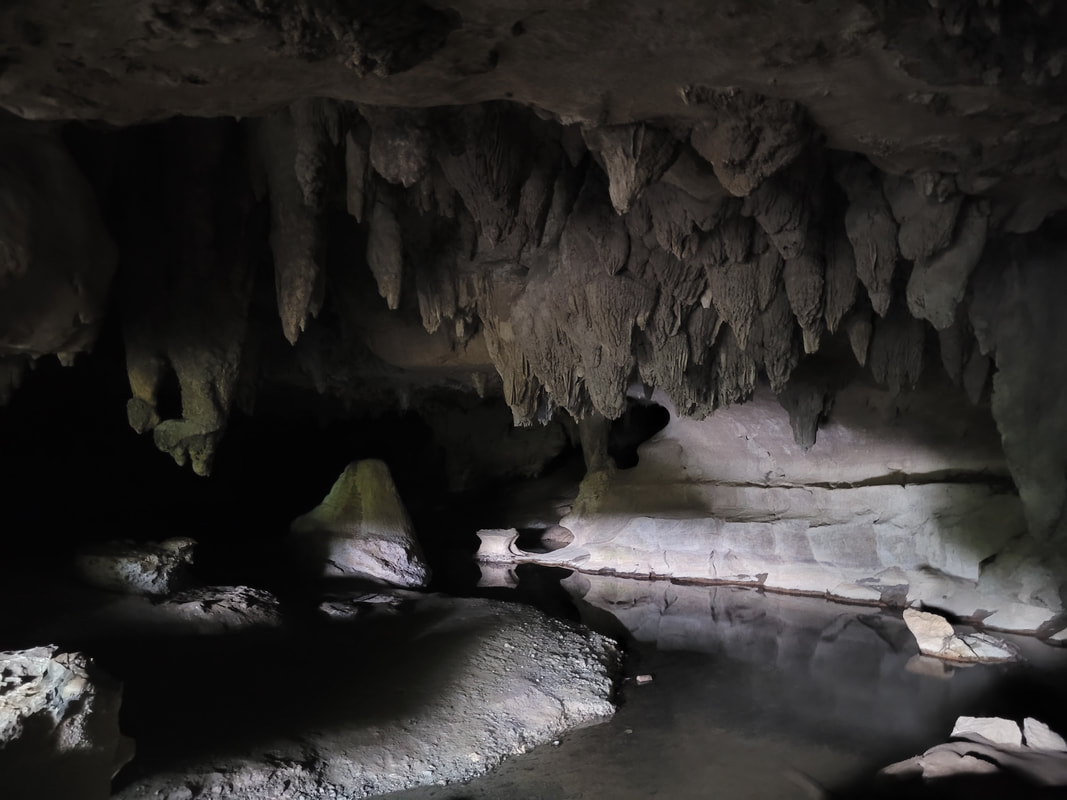
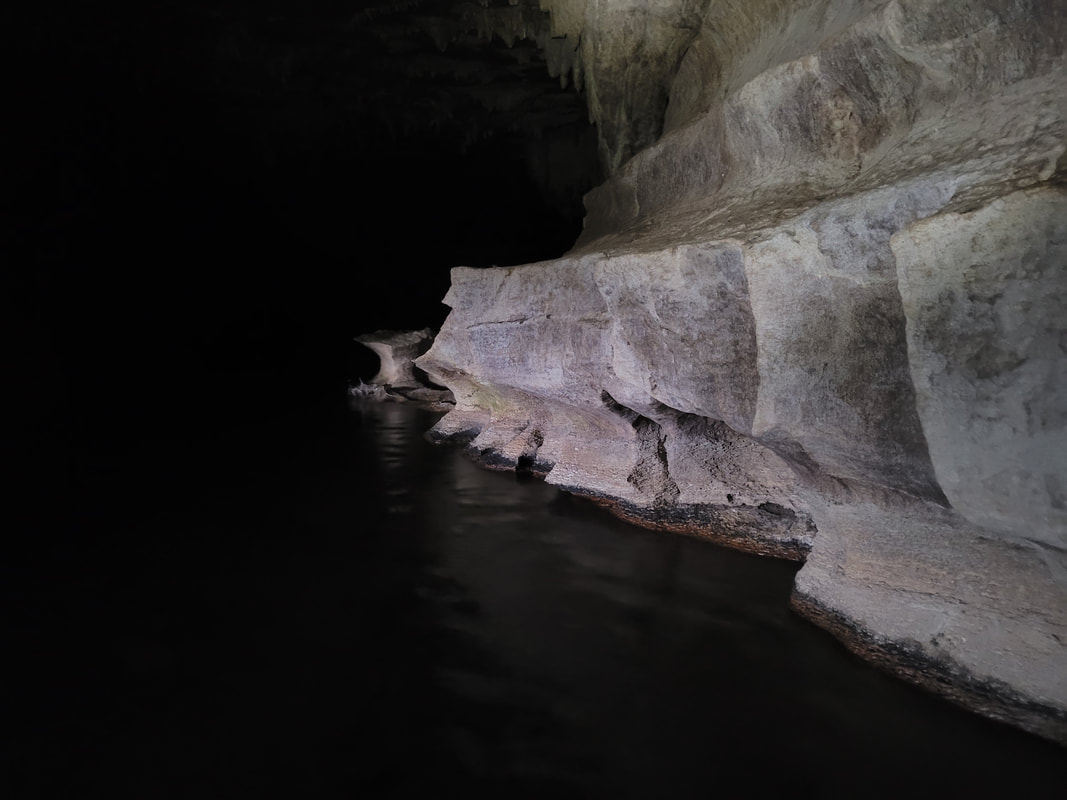
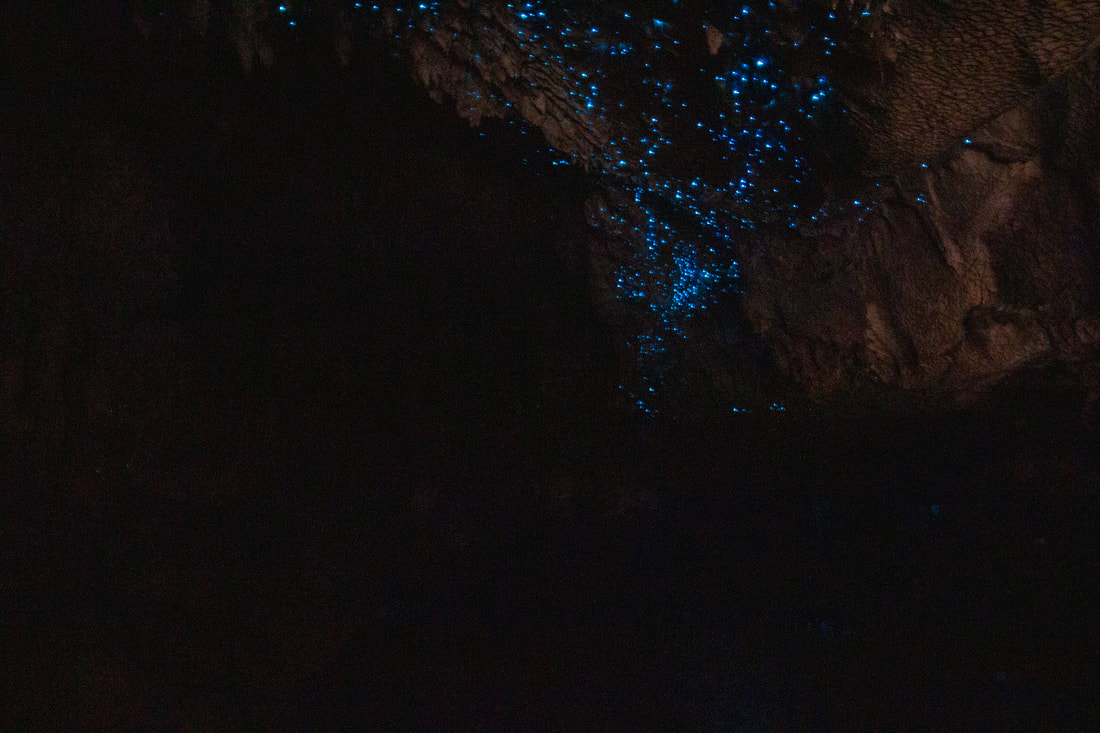
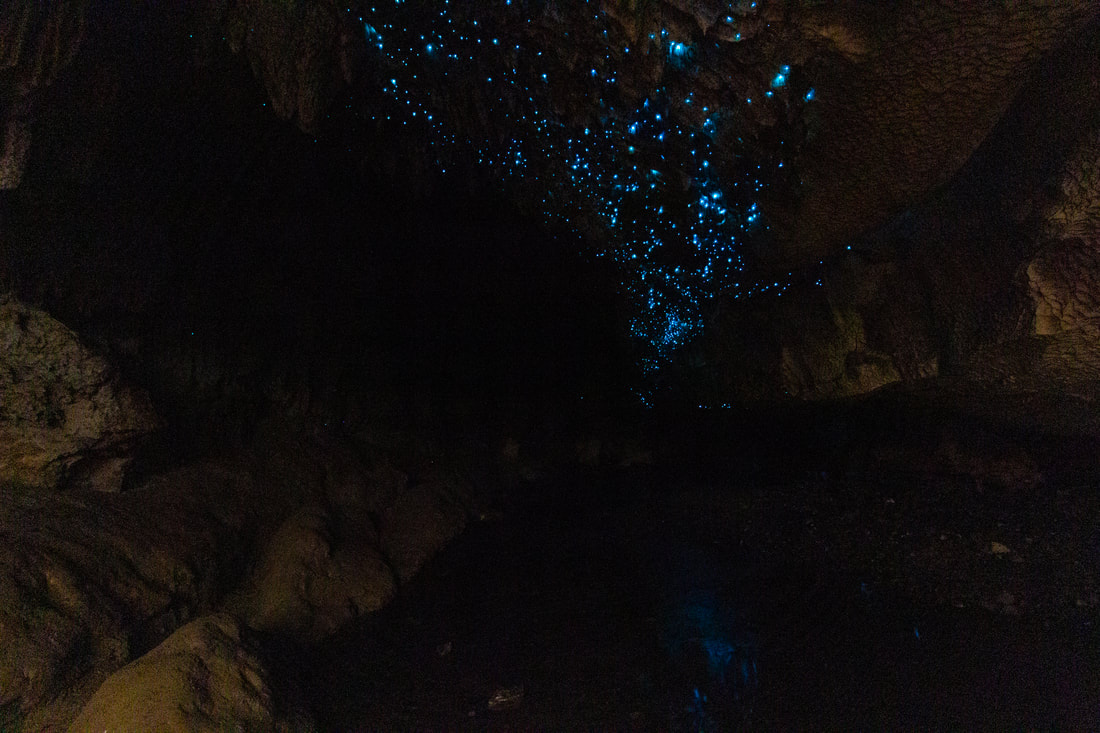
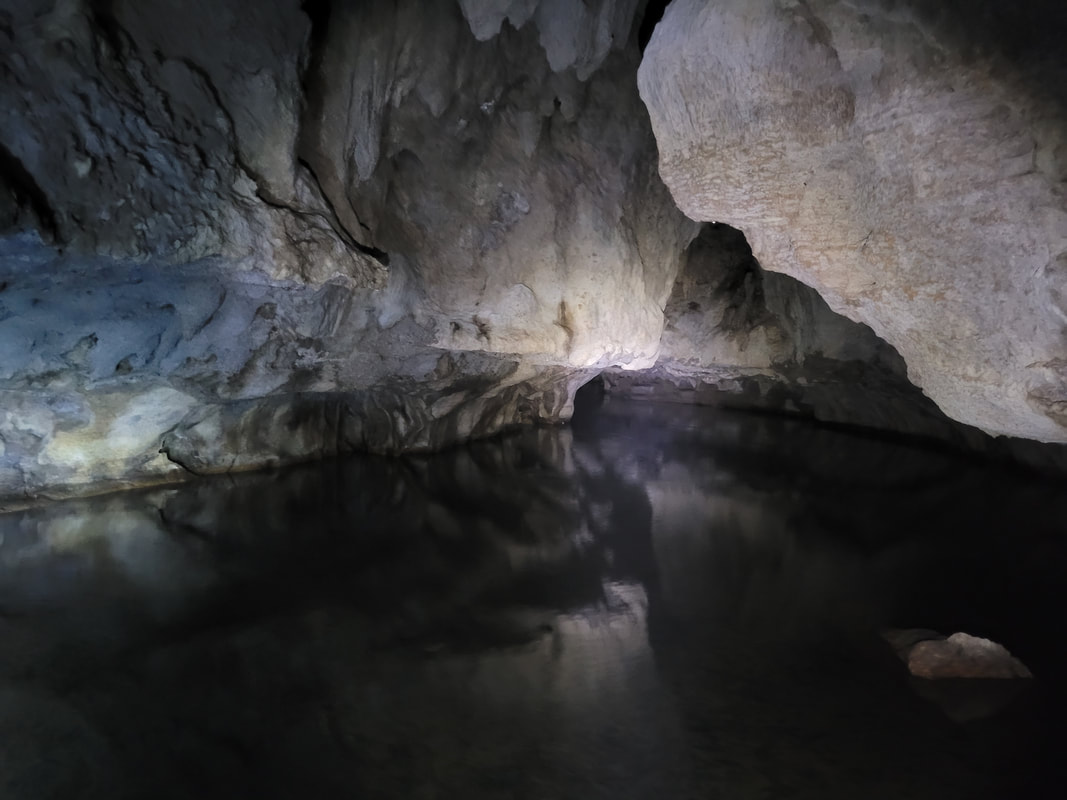
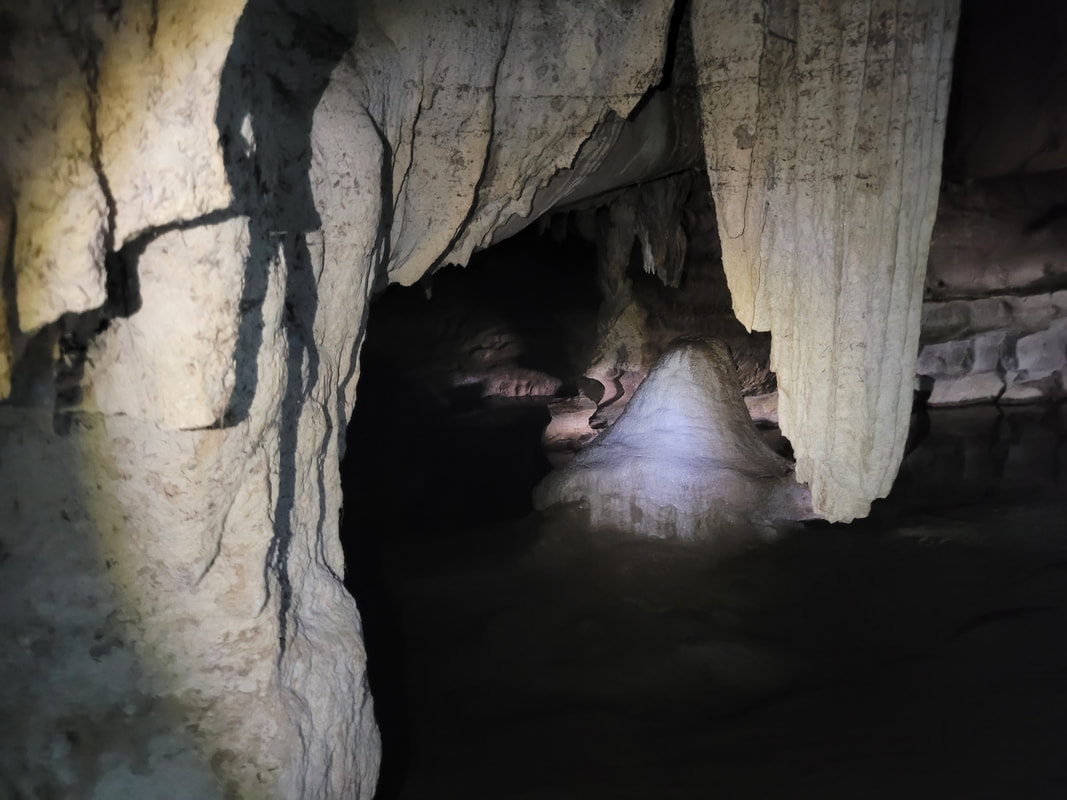
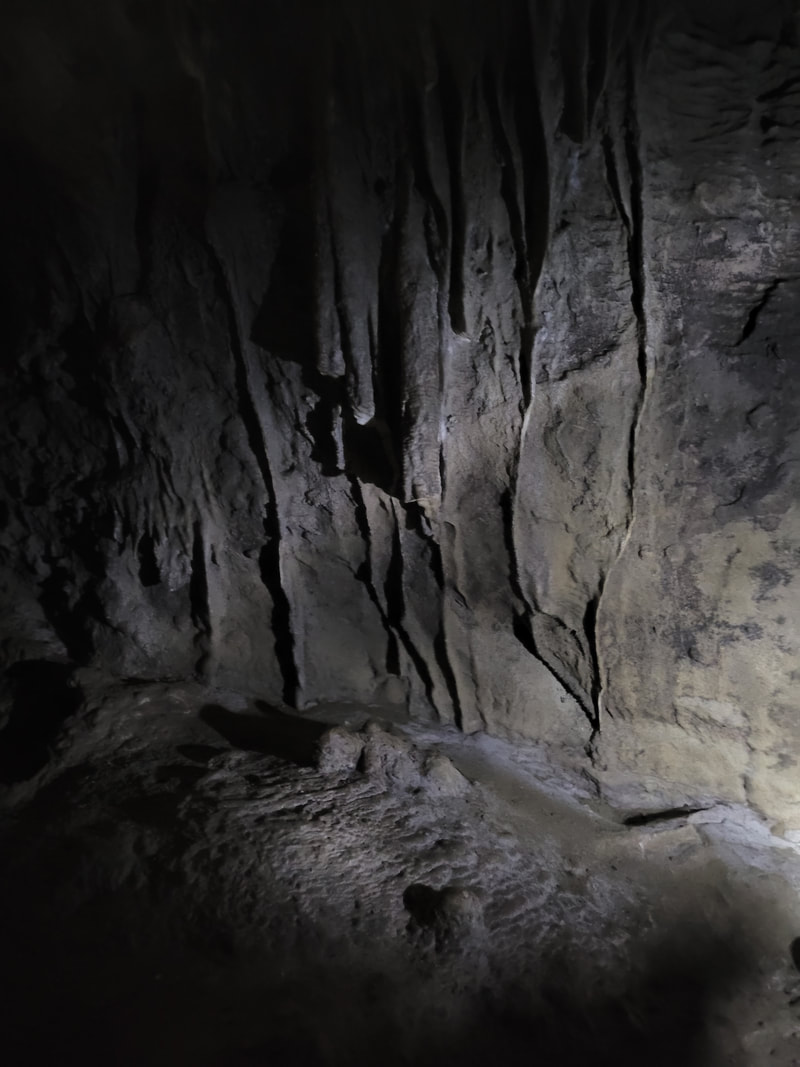
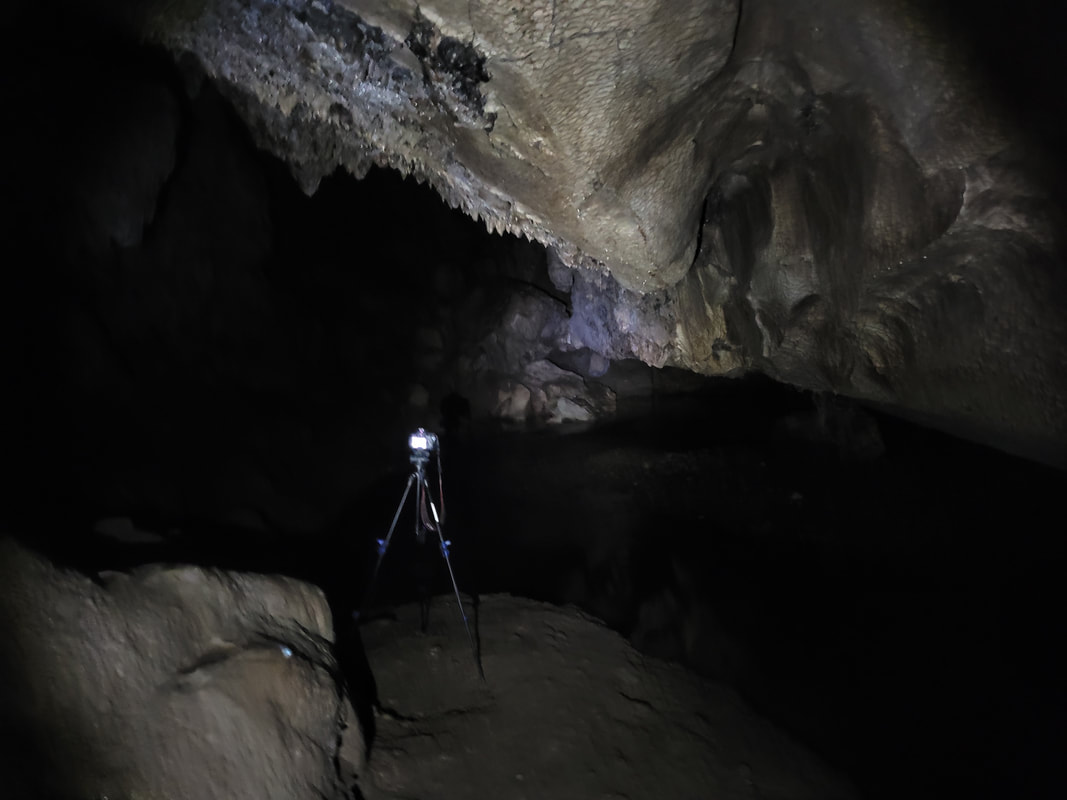
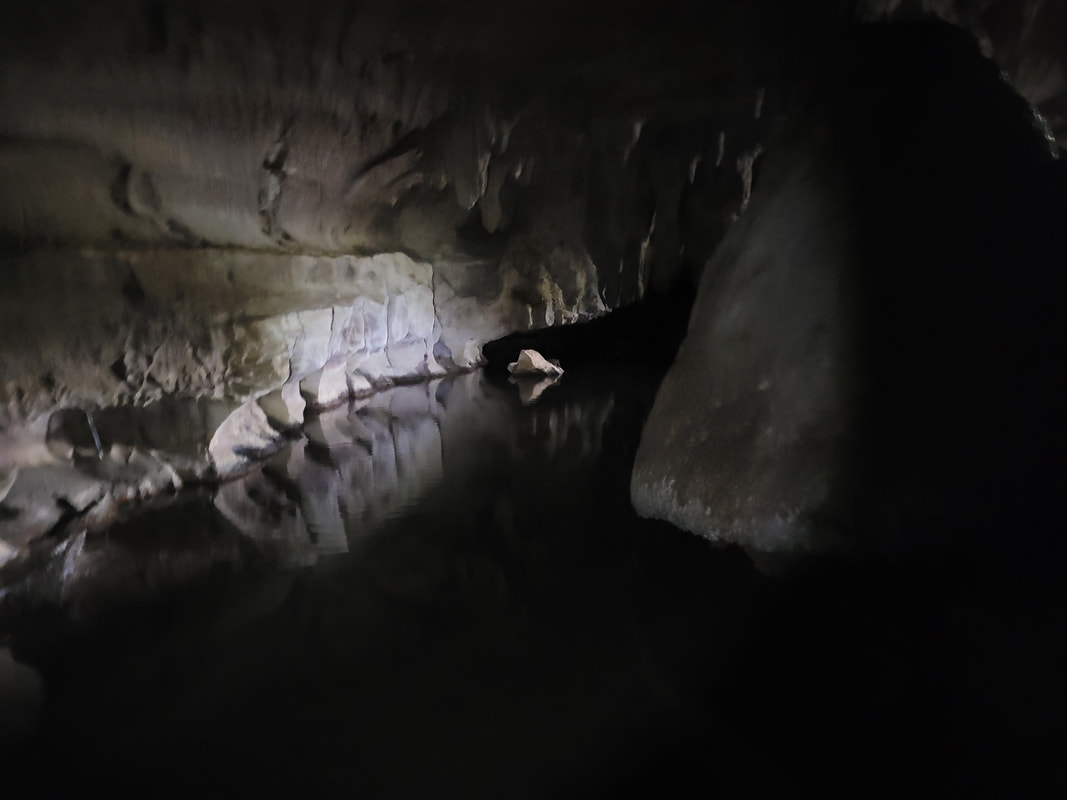
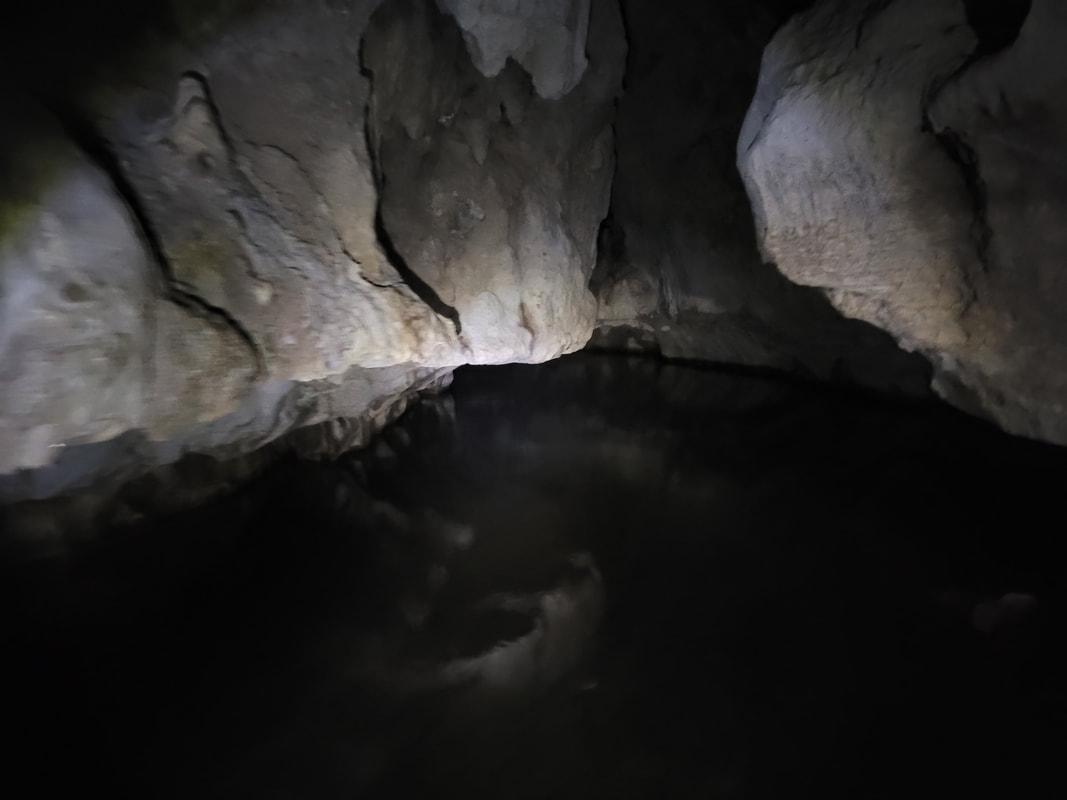
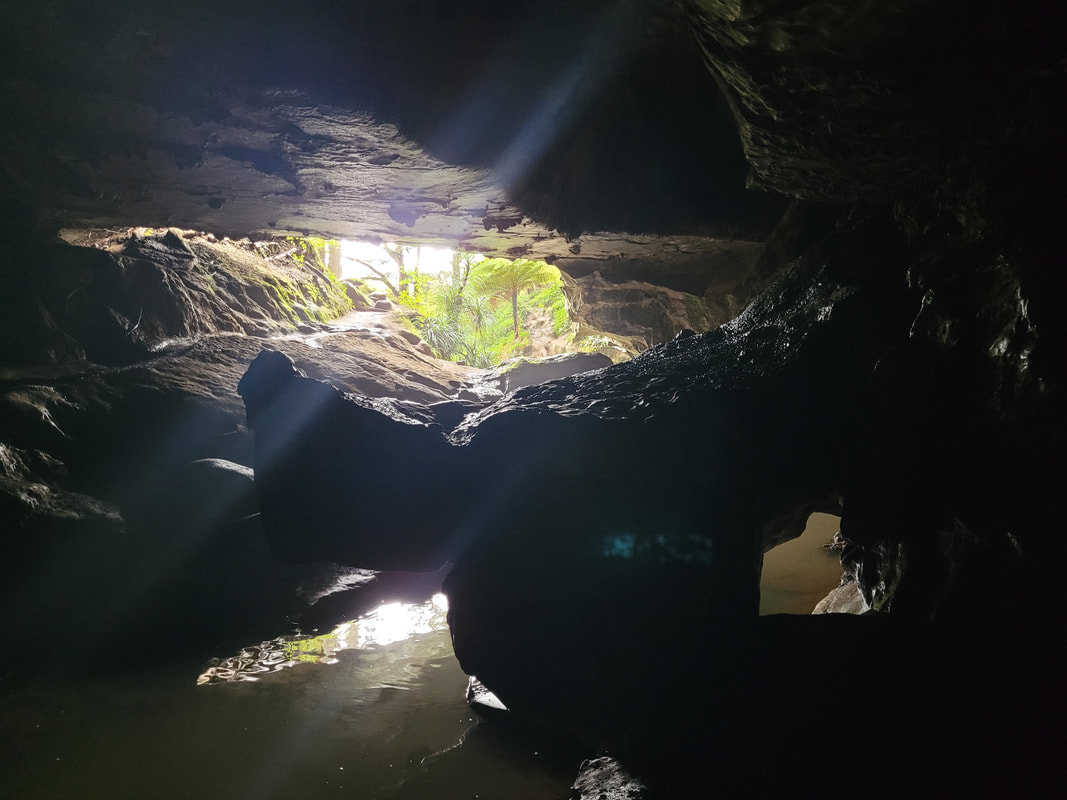
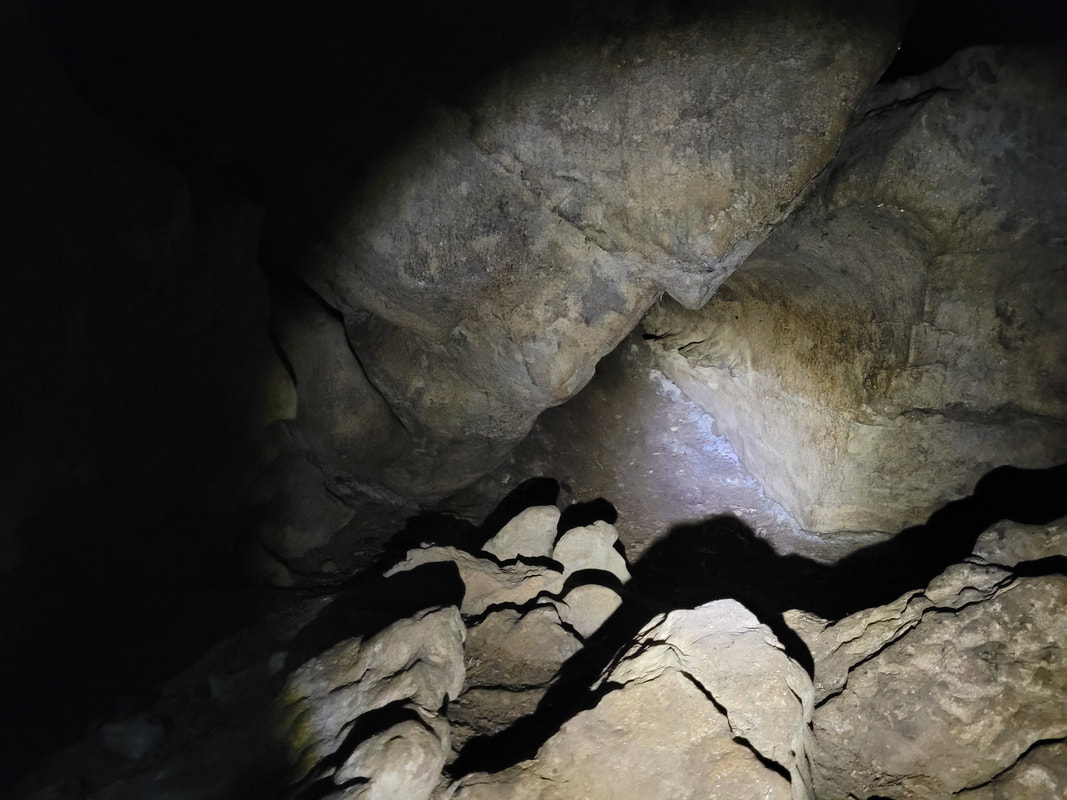
A 30 second exposure at the end of the main chamber
Northland's Largest Limestone Cave
IMPORTANT: Before I begin this blog, I want to express HOW IMPORTANT it is to NOT GO INTO the caves if there has been heavy rain or there is rain on the forecast as flash flooding can occur. We also kept an eye on the weather forecast to make sure there was no rain forecast and it hadn't rained in a while, so we decided it was fine to go in. The water wasn't flowing inside the cave and it was only up to our ankles (sometimes it can be waist high) and we were also equipped with 4 flashlights, 1 headlamp plus SPARE batteries. It's PITCH BLACK deep inside the cave, so it's important to be really prepared.
Exploring the Waipu Caves is one of the best experiences we have had in New Zealand, showcasing hundreds, or even thousands, of vibrant blue glowworms throughout the whole cave and displaying magnificent stalactites and stalagmites. It's the largest limestone cave in Northland.
The caves are FREE to enter - yes, you read that right....FREE! There are so many caves in New Zealand where you have to pay to go in and because it's a timed tour, you aren't allowed to take a tripod and take photos, but here, you can spend as long as you like.
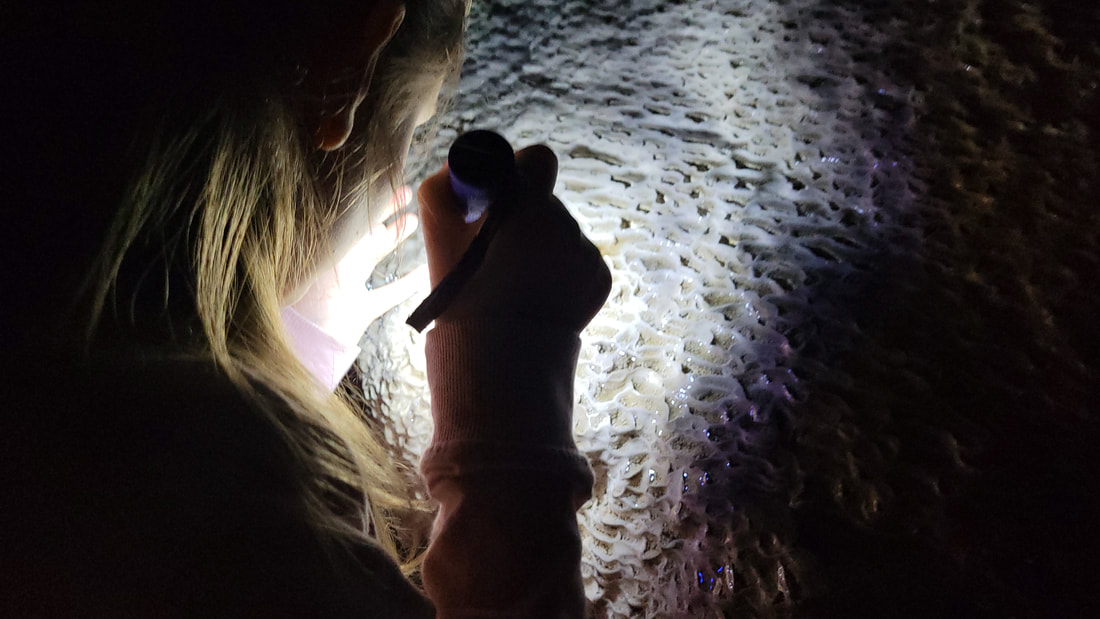
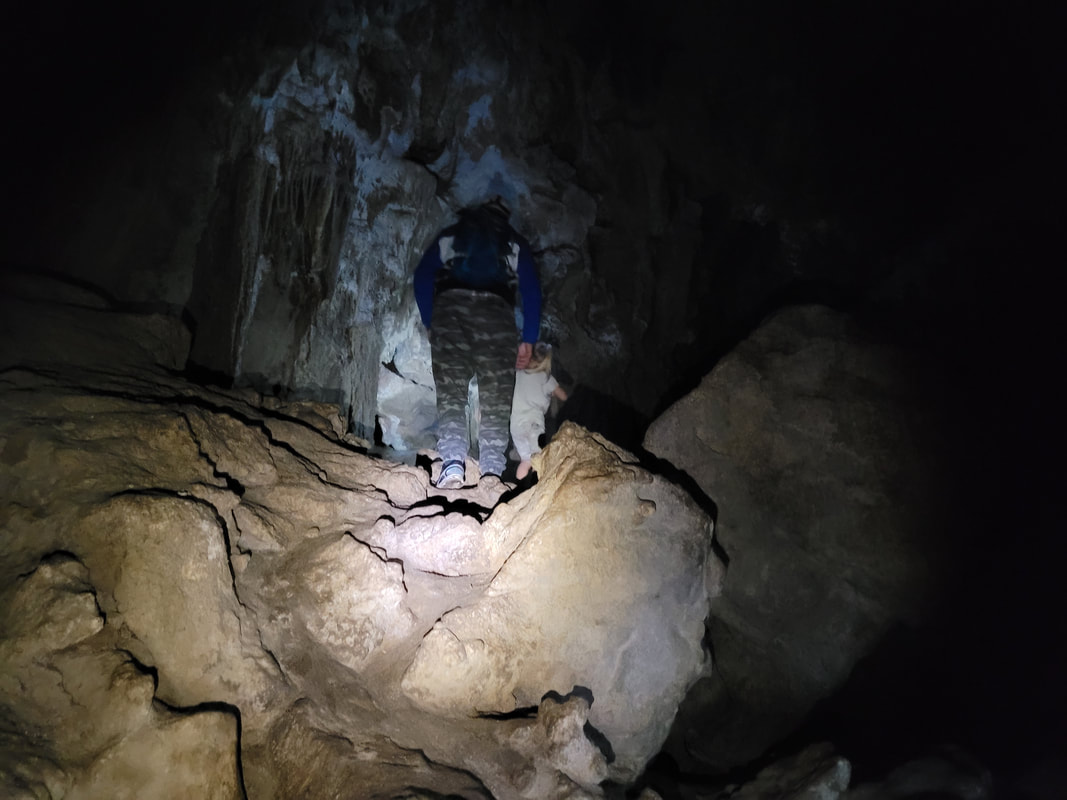
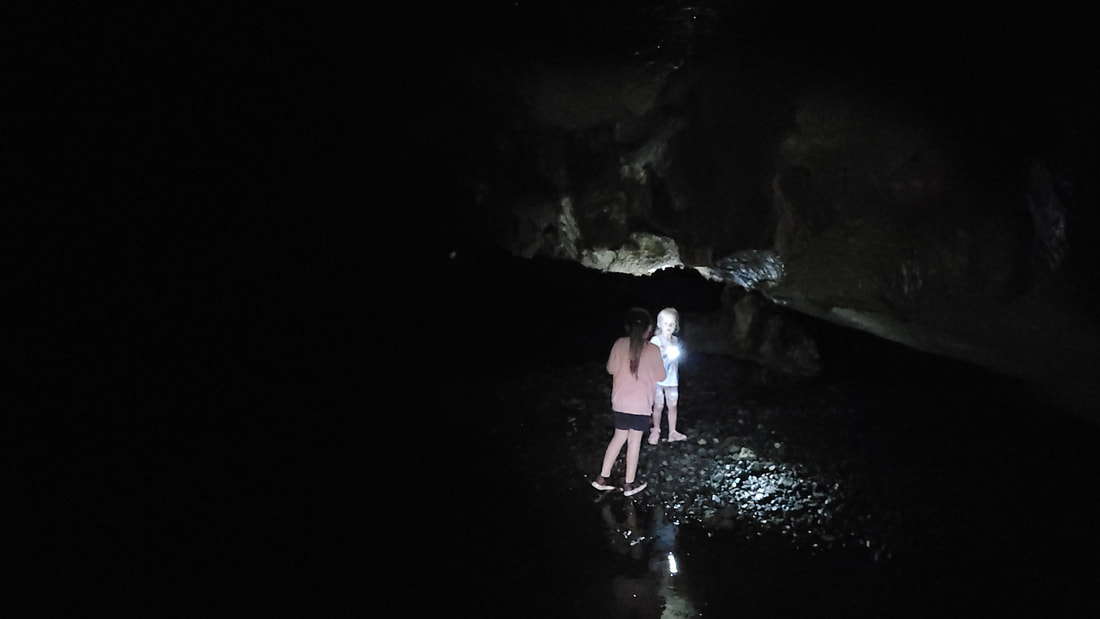
The first time we visited, we only took two torches - rookie mistake! We had read that everyone should have a torch to themselves, but we really thought that two would be enough. Lath and I were holding the torches, so the kids found that really hard as the cave is (obviously) dark and slippery in some places, so it's important you can see when you're going! So on our way to the caves the second time, we made sure to pick up some torches from the supermarket. The kids loved having their own torches and it was a lot less stressful for them.
This is one experience you need to do ASAP! Don't get put off by thinking you need fancy gear to go in - we went in shorts, sneakers (ones that we knew were going to get soaked and caked in mud), $5 torches from the supermarket and the sense of adventure. Our girls were 4 and 8 and were absolutely fine! We held their hands in certain places where it was slippery or they needed a hand up, but they were fine and had an absolute blast exploring.
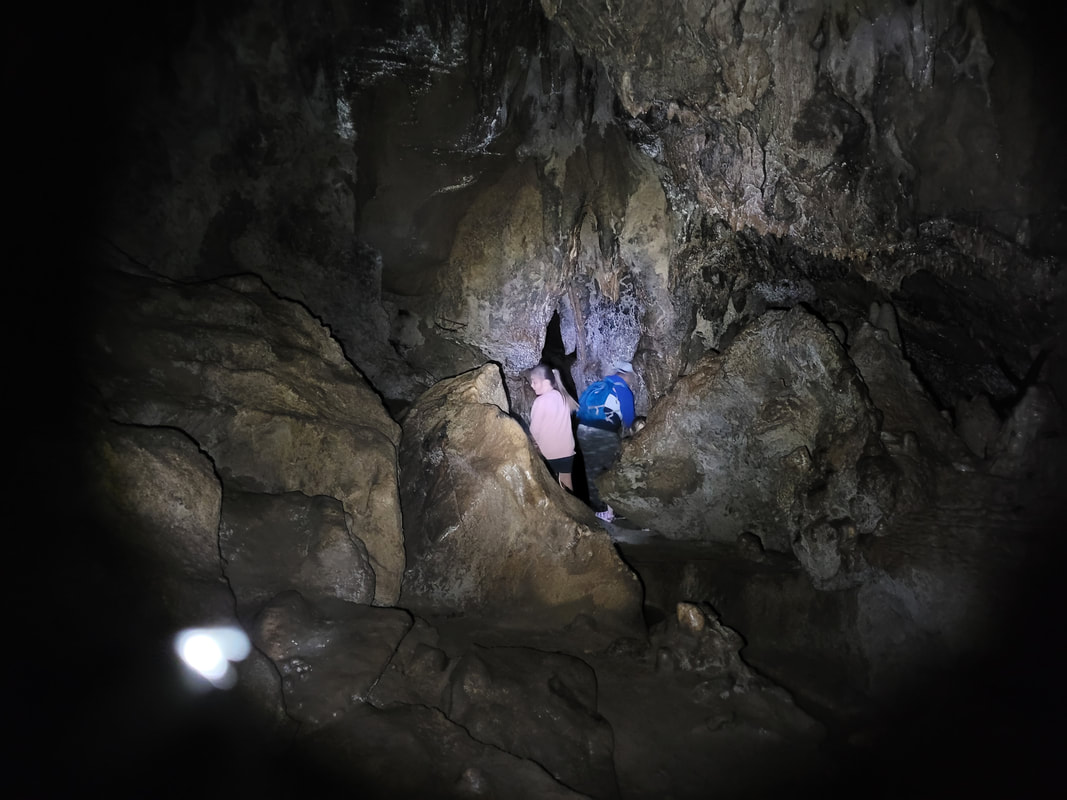
Bella doesn't like the dark, but she was fine down here, even with the lights off to look at the glow worms. We had read so much about the caves taking you through waist deep water and how you have to get into tight spaces, so we have that on our minds, but we didn't experience anything like this at all as we stayed in the main chamber which had SO MUCH to explore and there hadn't been much rain, so the water level was low.
Don't be put off by how dark the caves look in the photo, it's brighter than it looks when you have your torch on! And it wasn't scary at all, no bad vibes here, people!
Exploring the Waipu Caves is one of the best experiences we have had in New Zealand, showcasing hundreds, or even thousands, of vibrant blue glowworms throughout the whole cave and displaying magnificent stalactites and stalagmites. It's the largest limestone cave in Northland.
The caves are FREE to enter - yes, you read that right....FREE! There are so many caves in New Zealand where you have to pay to go in and because it's a timed tour, you aren't allowed to take a tripod and take photos, but here, you can spend as long as you like.
The first time we visited, we only took two torches - rookie mistake! We had read that everyone should have a torch to themselves, but we really thought that two would be enough. Lath and I were holding the torches, so the kids found that really hard as the cave is (obviously) dark and slippery in some places, so it's important you can see when you're going! So on our way to the caves the second time, we made sure to pick up some torches from the supermarket. The kids loved having their own torches and it was a lot less stressful for them.
This is one experience you need to do ASAP! Don't get put off by thinking you need fancy gear to go in - we went in shorts, sneakers (ones that we knew were going to get soaked and caked in mud), $5 torches from the supermarket and the sense of adventure. Our girls were 4 and 8 and were absolutely fine! We held their hands in certain places where it was slippery or they needed a hand up, but they were fine and had an absolute blast exploring.
Bella doesn't like the dark, but she was fine down here, even with the lights off to look at the glow worms. We had read so much about the caves taking you through waist deep water and how you have to get into tight spaces, so we have that on our minds, but we didn't experience anything like this at all as we stayed in the main chamber which had SO MUCH to explore and there hadn't been much rain, so the water level was low.
Don't be put off by how dark the caves look in the photo, it's brighter than it looks when you have your torch on! And it wasn't scary at all, no bad vibes here, people!
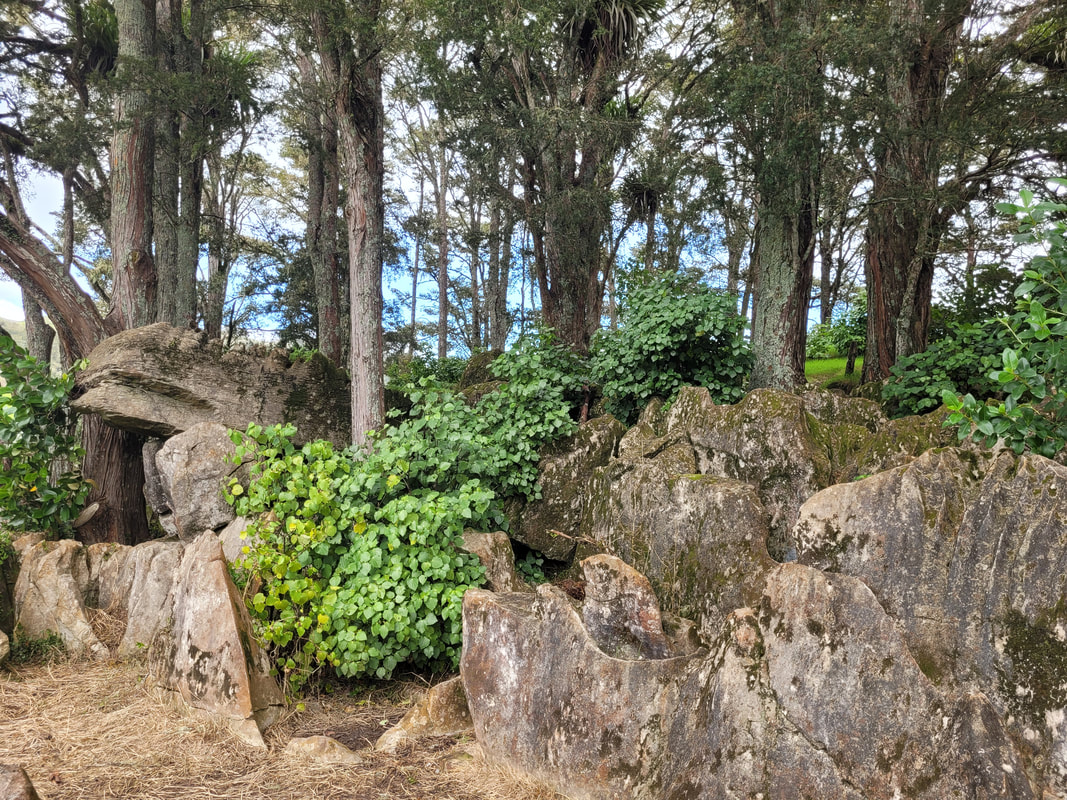
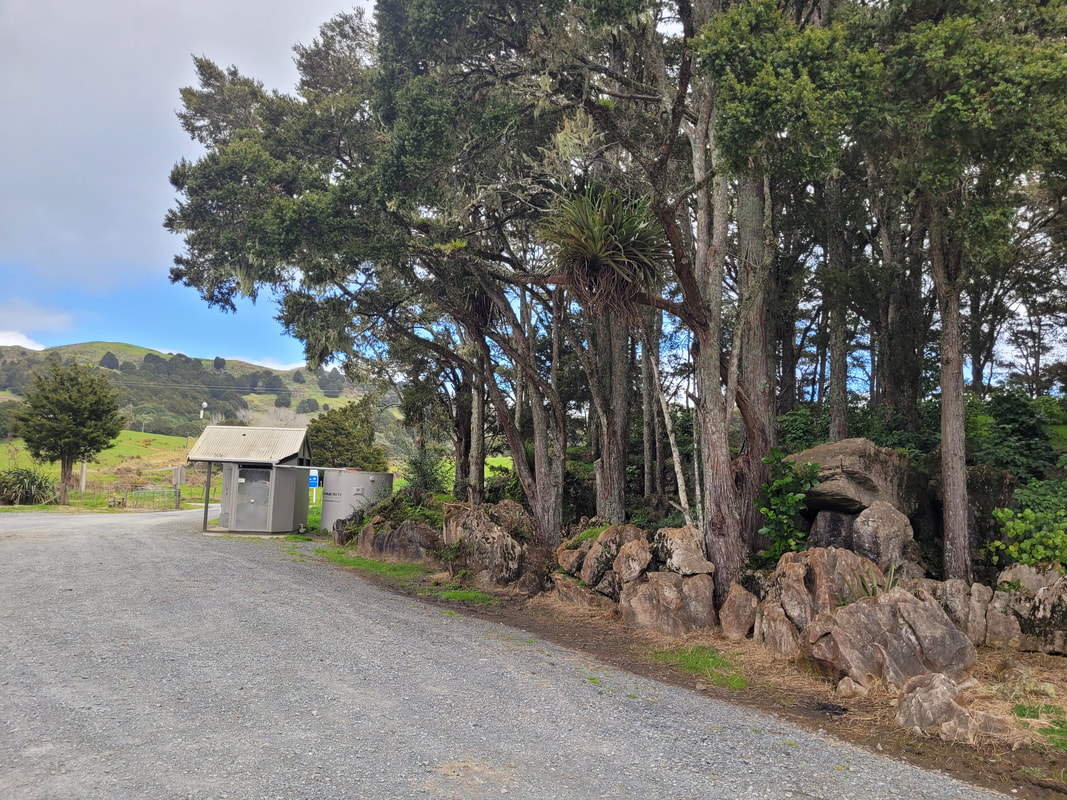
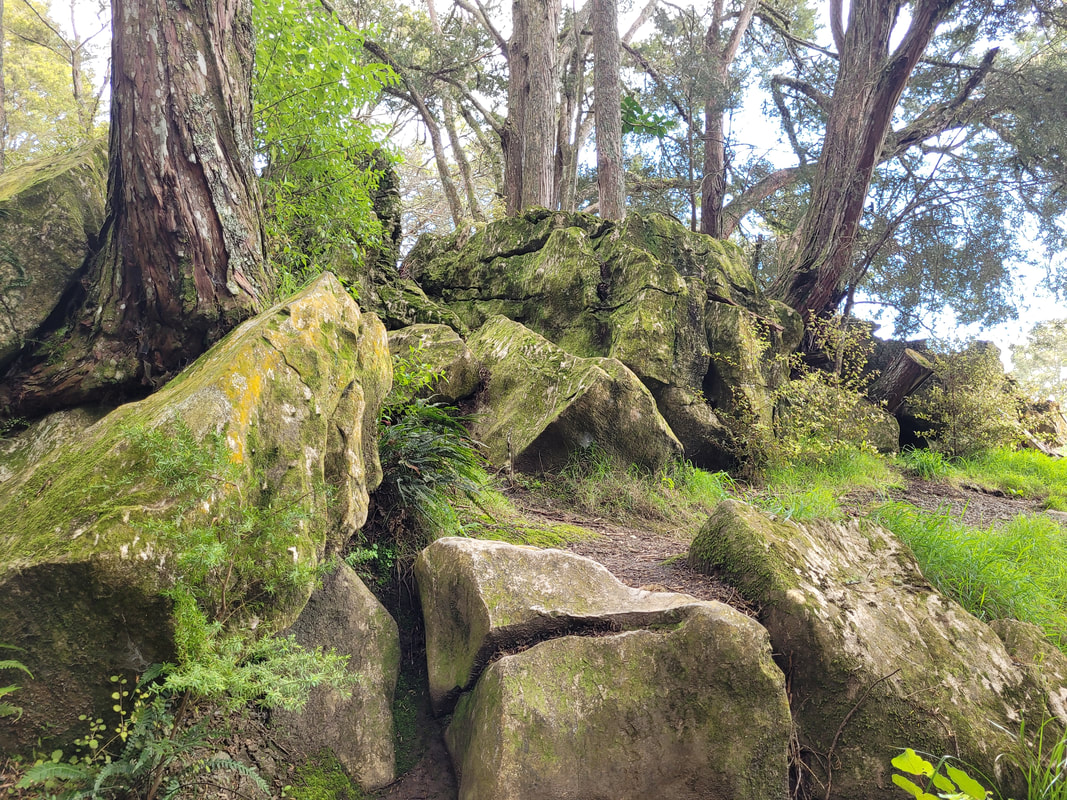
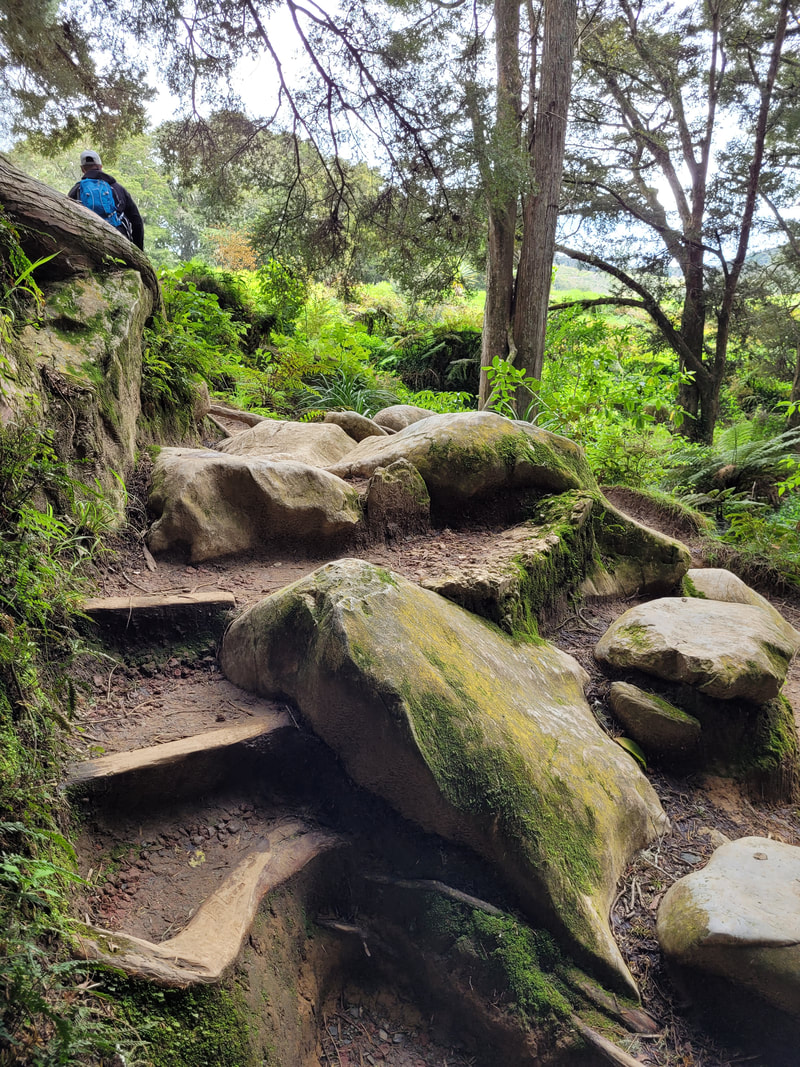
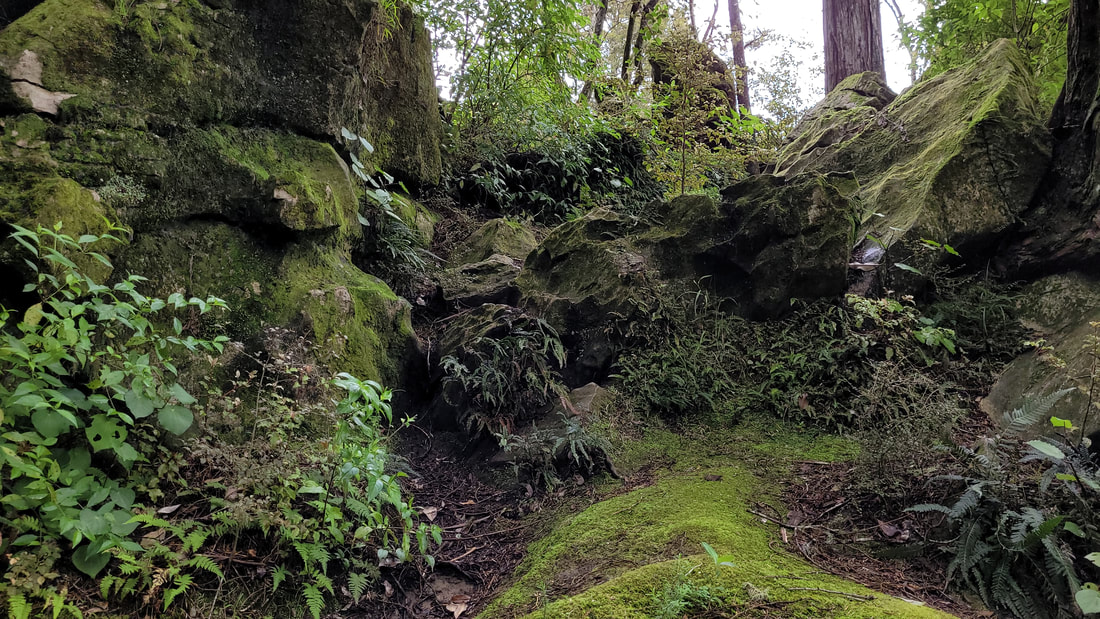
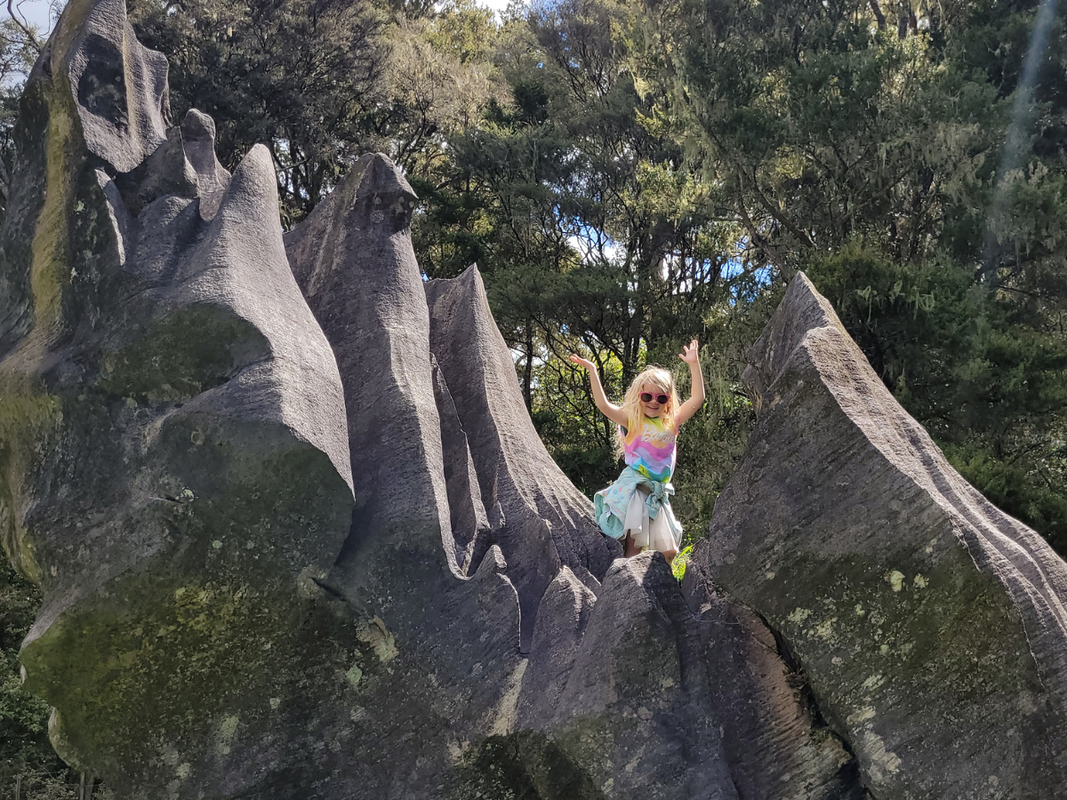
Limestone rocks beside the parking lot
There are limestone rocks scattered all over the area
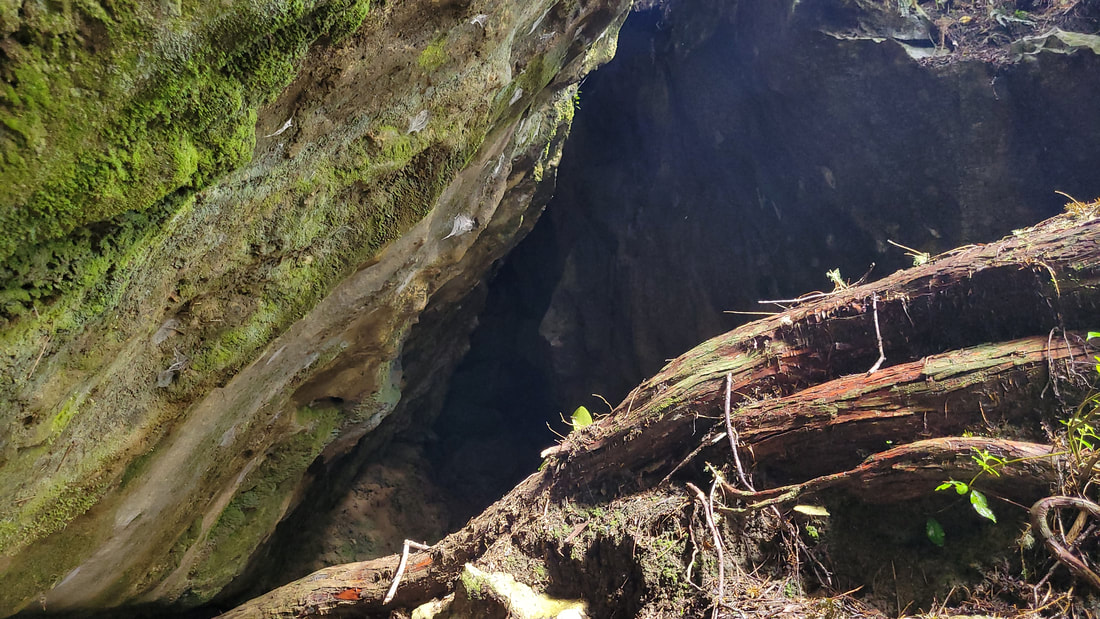
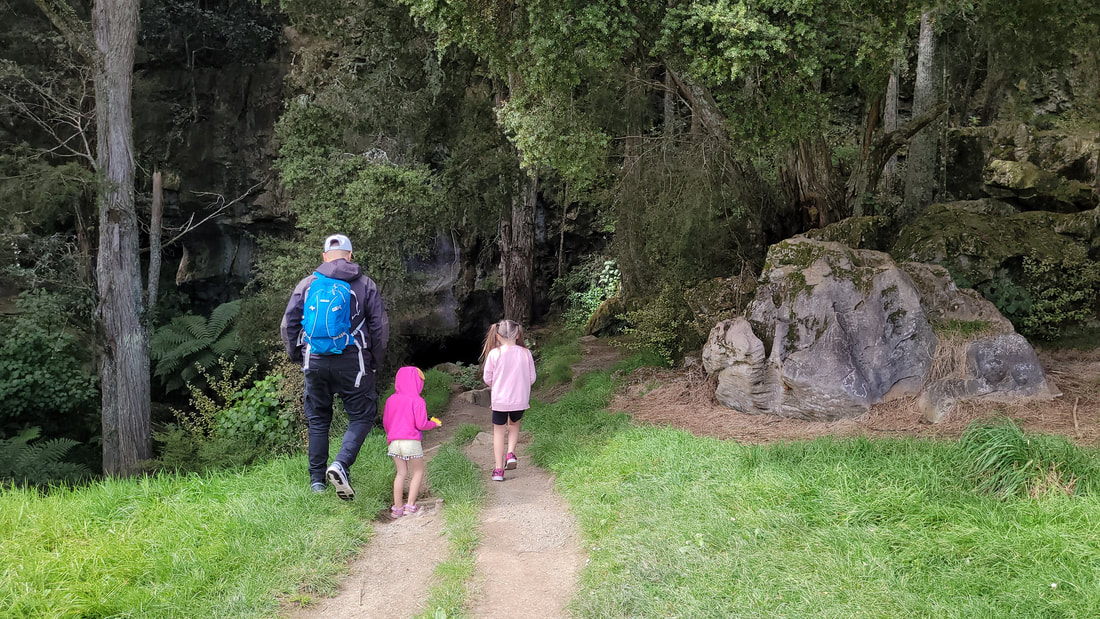
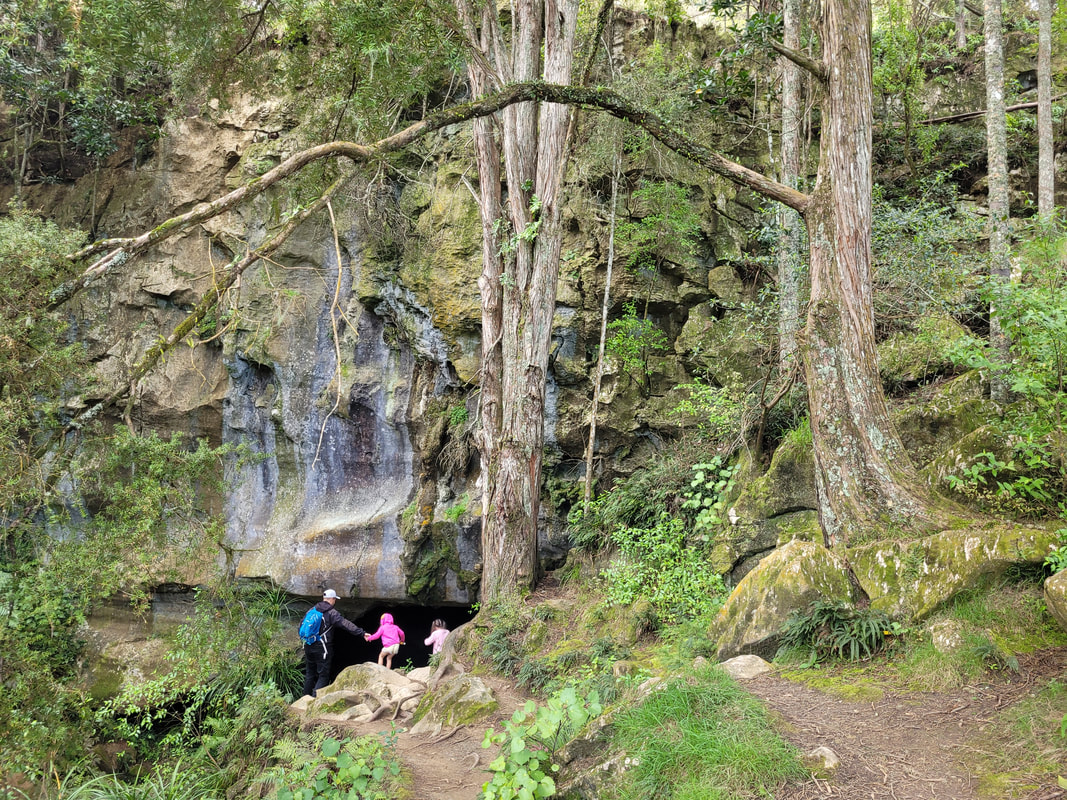
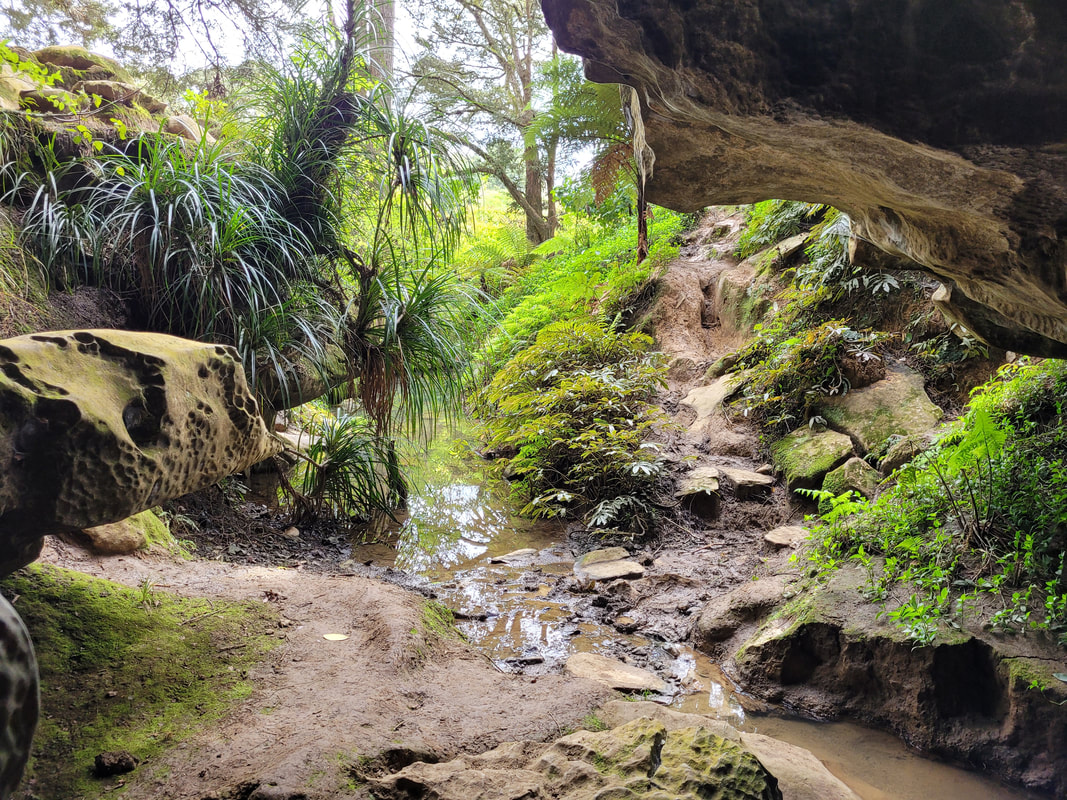
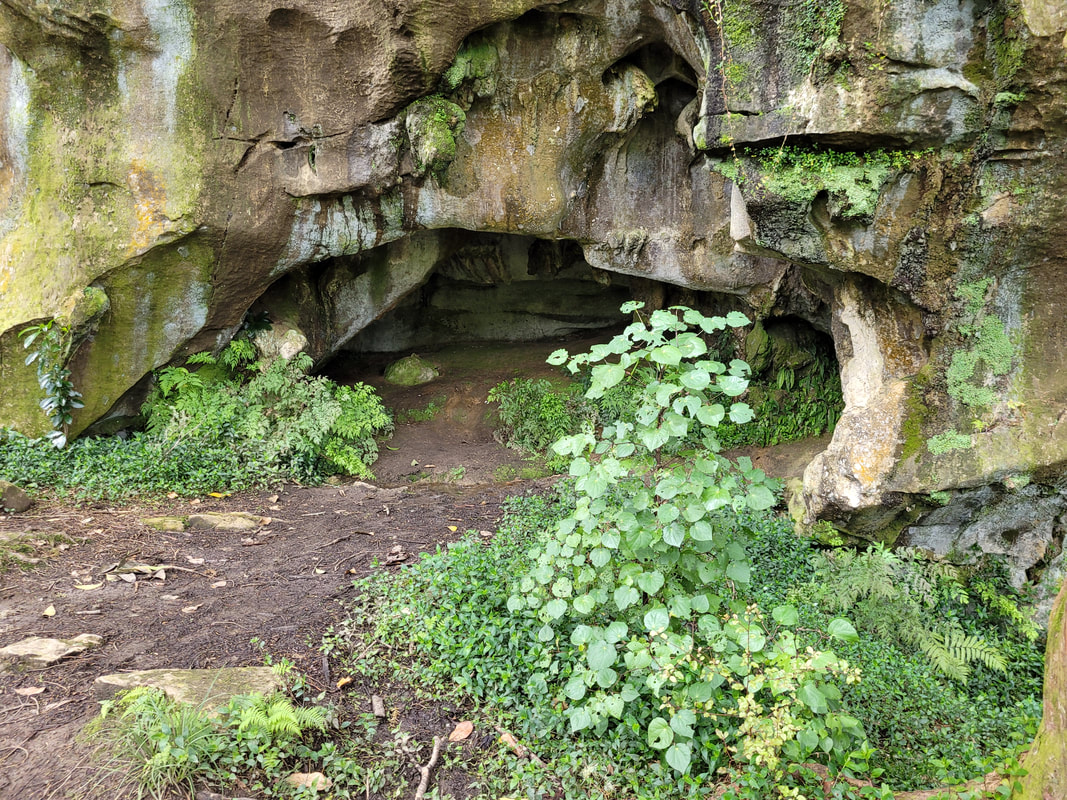
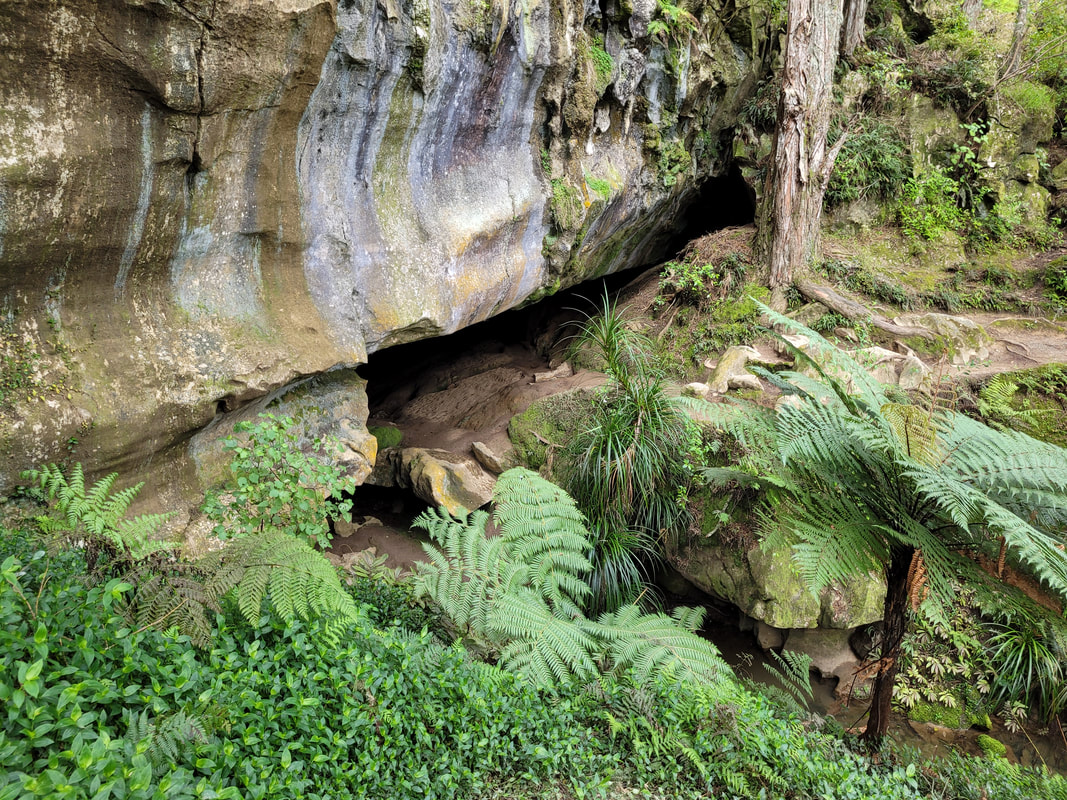
There was some beautiful, soft spring light hitting the entrance of the cave
How On Earth Are The Caves Formed?
The caves at Waipu mainly consist of karst limestone, which is a sedimentary rock, made up of calcium carbonate and calcite.
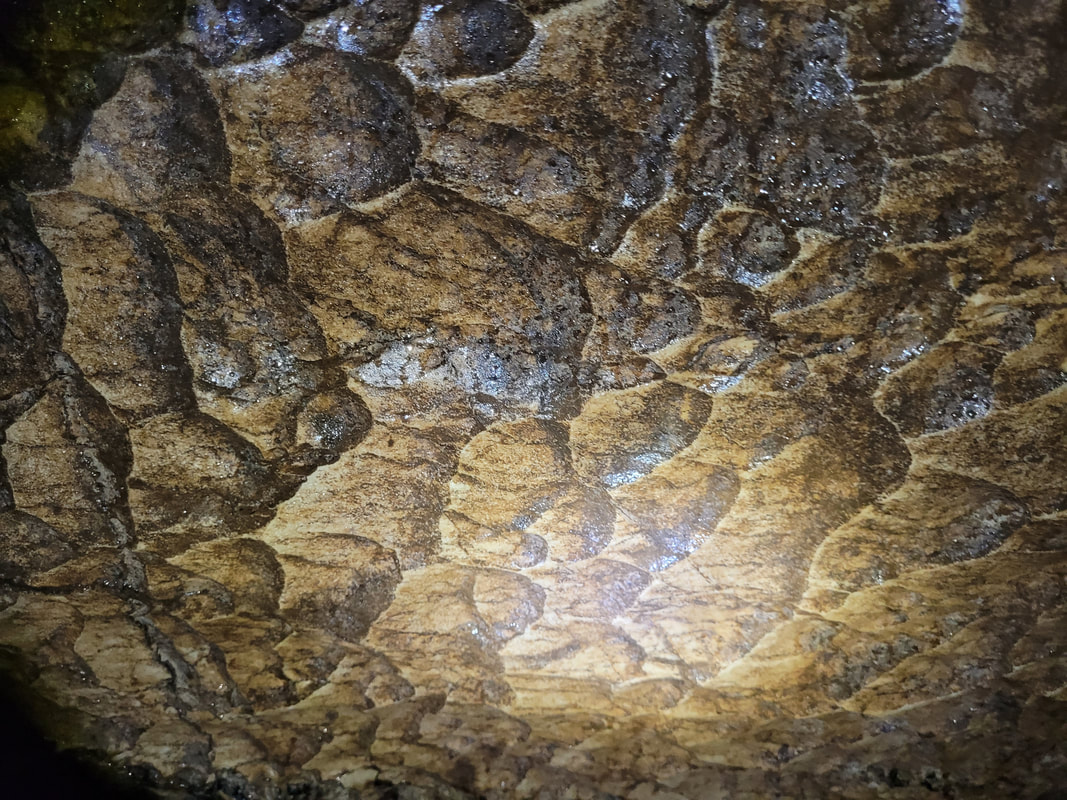
Limestone caves are the most common type of cave on earth and can come in different colours like white, light blue, dark brown, dark yellow and nude, but the caves in Waipu are a light olive green colour, typical of karst limestone.
Limestone caves are formed over a looooong time and some caves can take over 100,000 years to form before they are large enough for us to explore. The rainwater erodes the limestone, creating cracks and fractures in the stones, allowing more rainwater to pass through and eventually creating chambers after so much of it has been dissolved. The time it takes to do this process, depends on the amount of carbon dioxide in the air and soil it passes through, how much water passes through and the temperature. The calcium carbonate in limestone dissolves best in water when there are cooler temperatures and where there is a higher concentration of carbon dioxide.
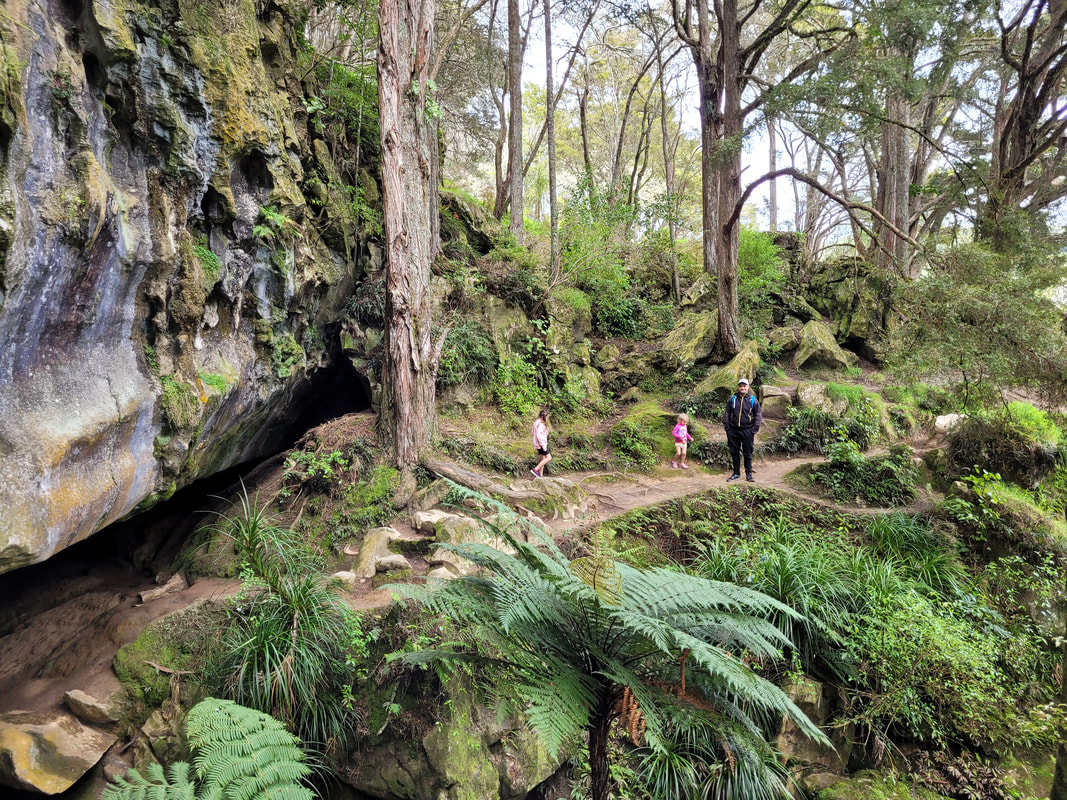
Take care around the entrance as it can be really slippery if there has been recent rainfall
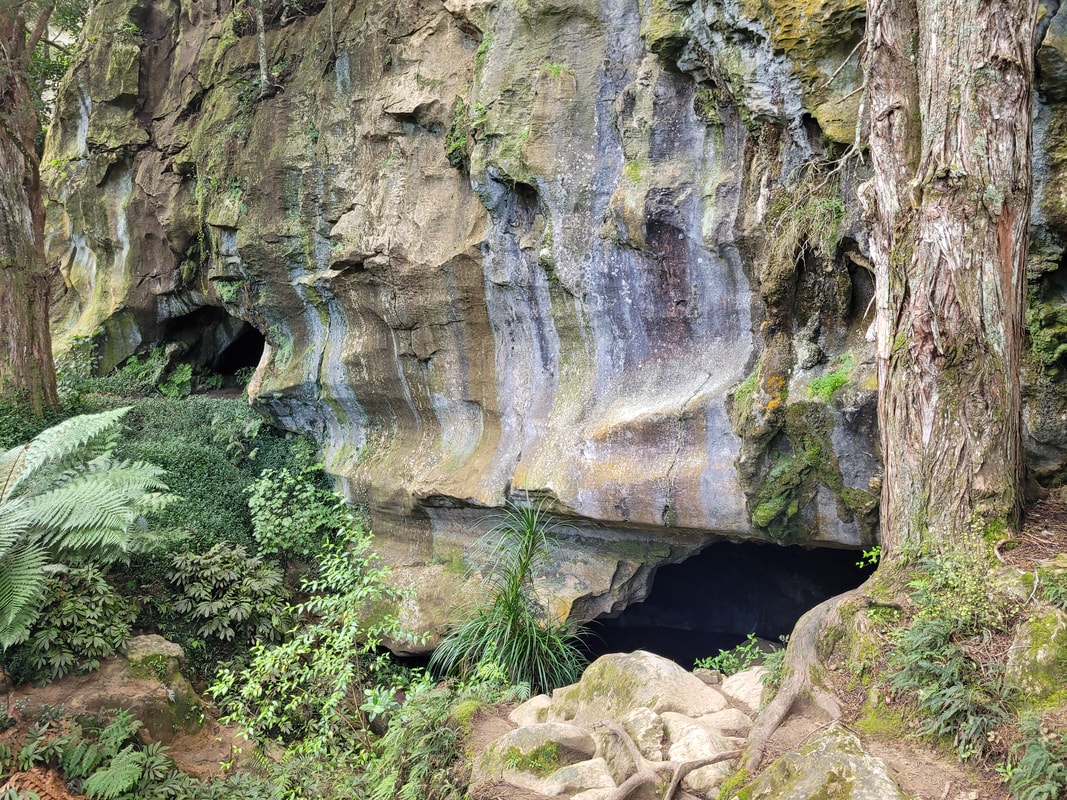
The entrance to the limestone caves in Waipu
|
FUN FACT: Limestone can only be dissolved in rainwater - no other type of water! The rainwater absorbs CO2 which causes it to be acidic and therefor dissolves the calcium carbonate in the limestone. |
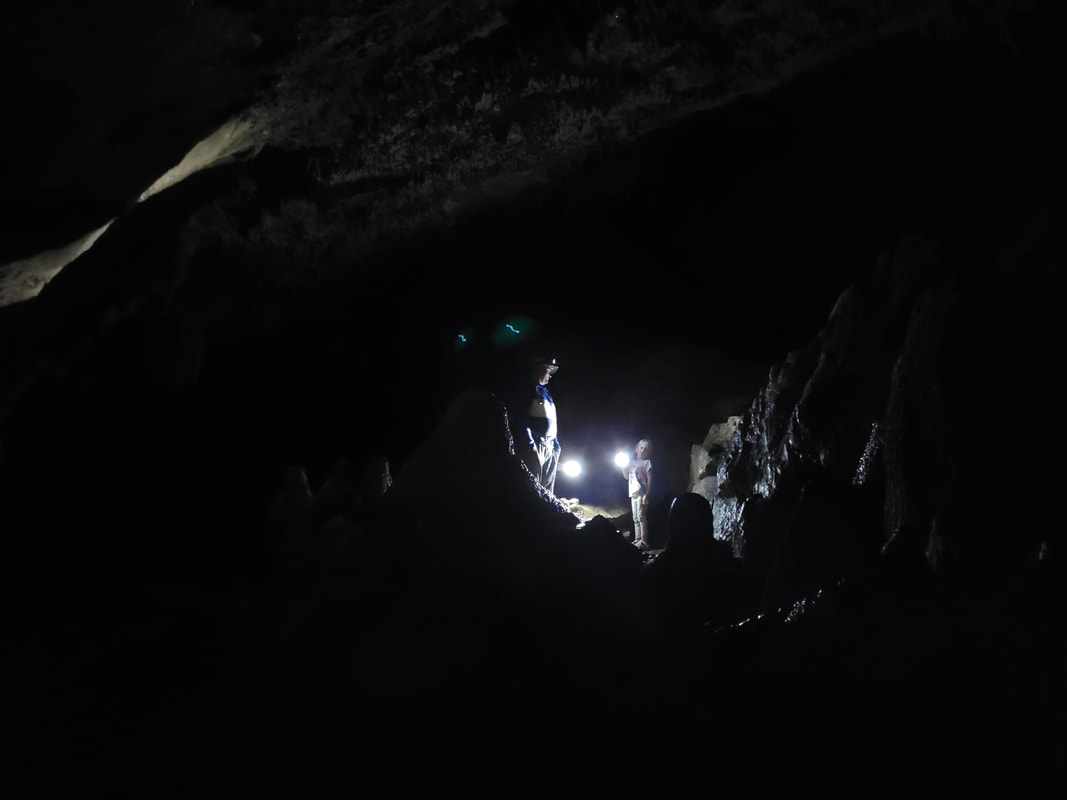
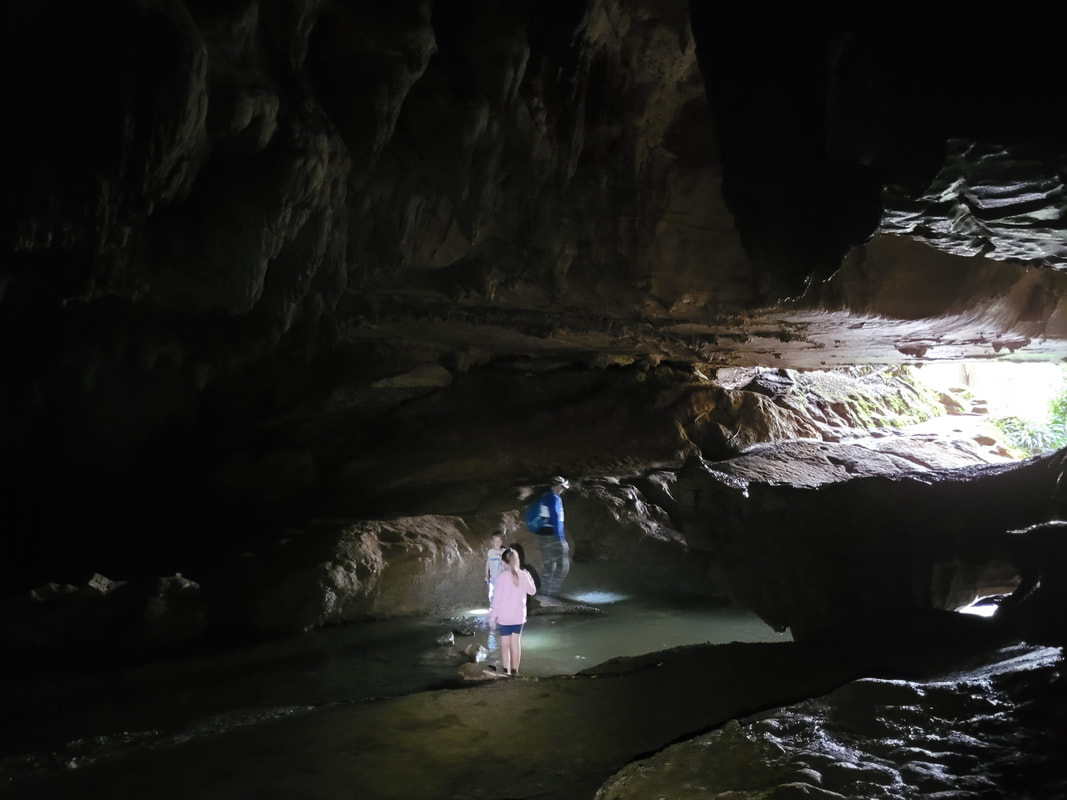
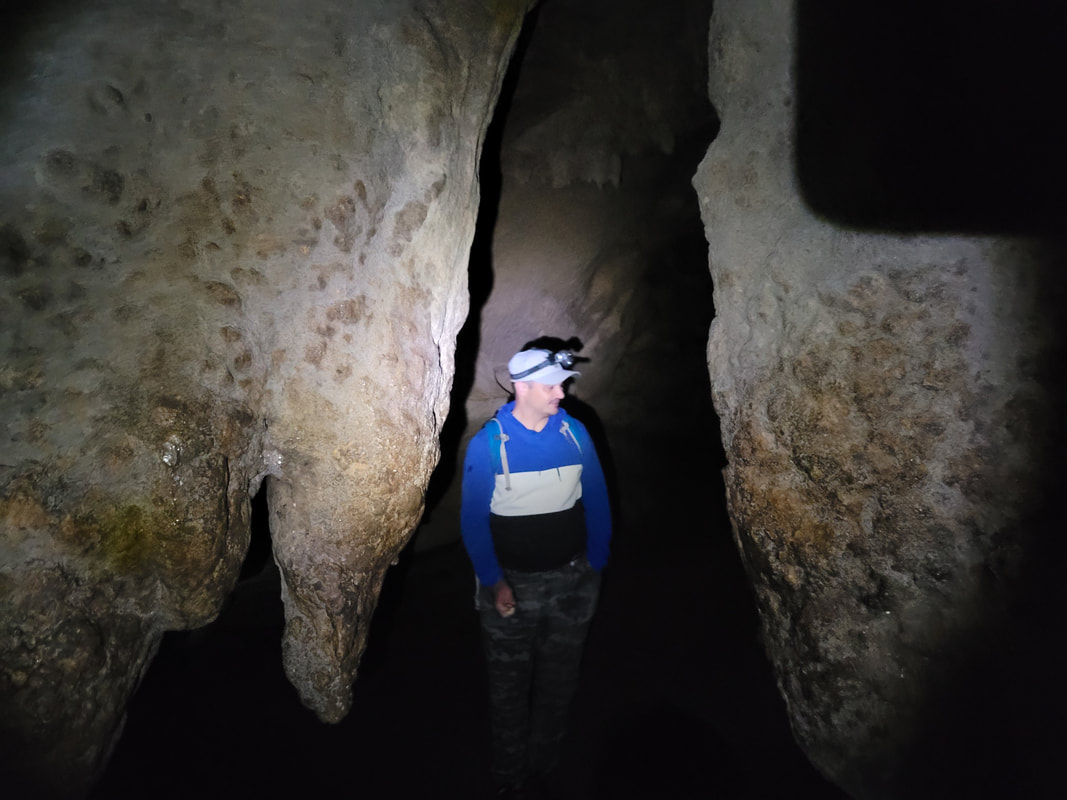
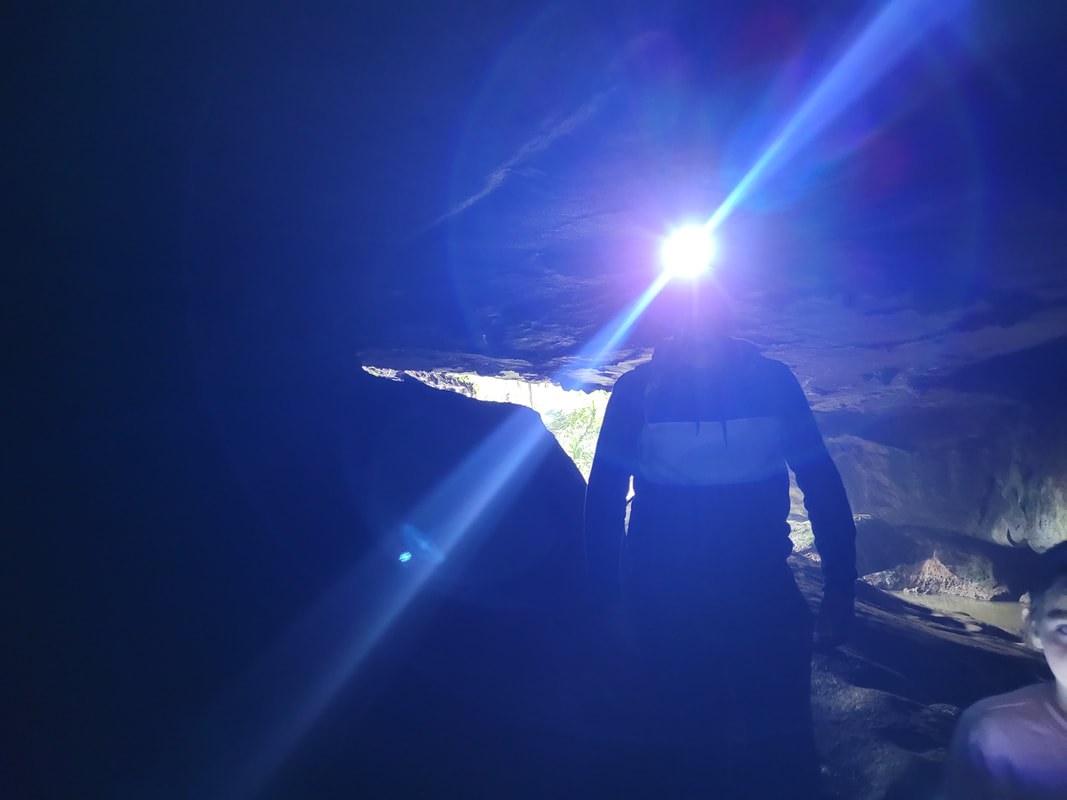
Lath, Arabella and Sienna are dwarfed by the size of the entrance to the cave
Exploring The Caves
It's hard to get lost in the cave - sure, there are twists and turns, but it's really one big chamber and if you go a different way around a group (swarm? murder? flock?) of stalagmites, you'll be back to where you started in no time.
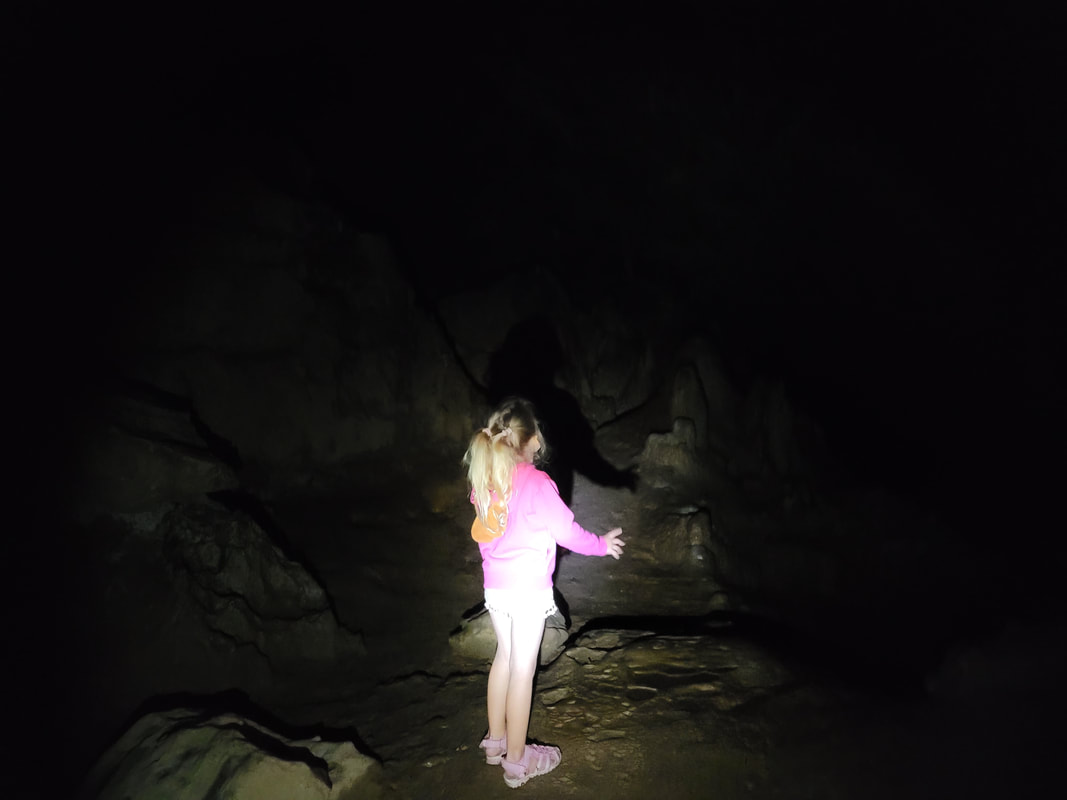
There are smaller caves off the bigger caves which are mainly steep yet flush with not too much to see in there. We didn't see many glow worms in these caves, but it was cool to explore none the less! These parts are perfect for making shadow animals.
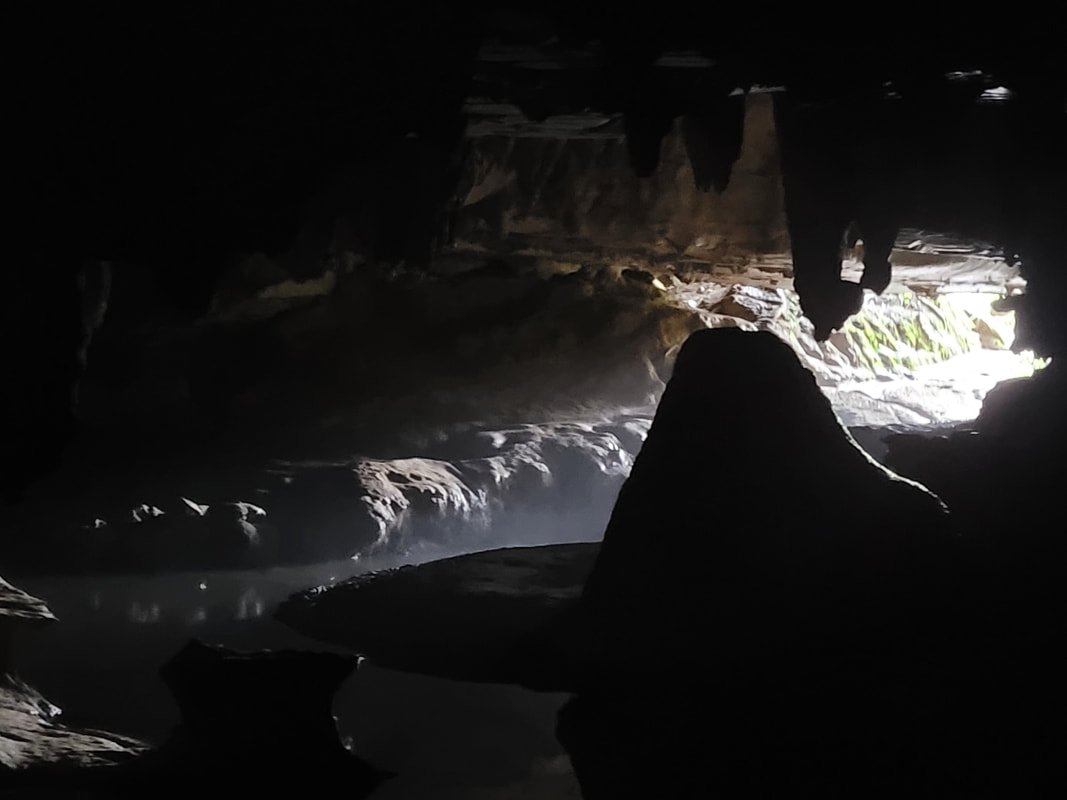
The roof is so tall! At times we saw faint patches of sunlight, high up near the roof. Every part of the cave offered something new to discover, something new to be in awe of and something to talk about.
Every now and then we would turn off our torches to see if we could spot the glowworms. They are darkest at the back of the caves but there are still plenty scattered around the whole area.
There are smaller caves off the bigger caves which are mainly steep yet flush with not too much to see in there. We didn't see many glow worms in these caves, but it was cool to explore none the less! These parts are perfect for making shadow animals.
The roof is so tall! At times we saw faint patches of sunlight, high up near the roof. Every part of the cave offered something new to discover, something new to be in awe of and something to talk about.
Every now and then we would turn off our torches to see if we could spot the glowworms. They are darkest at the back of the caves but there are still plenty scattered around the whole area.
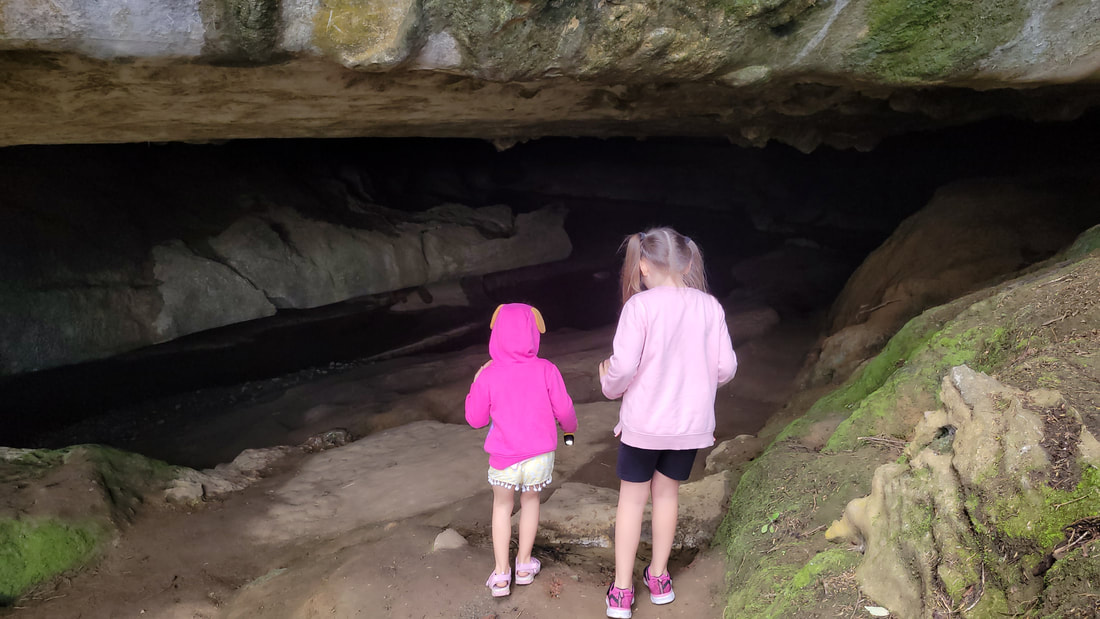
Arabella and Sienna at the entrance of the caves
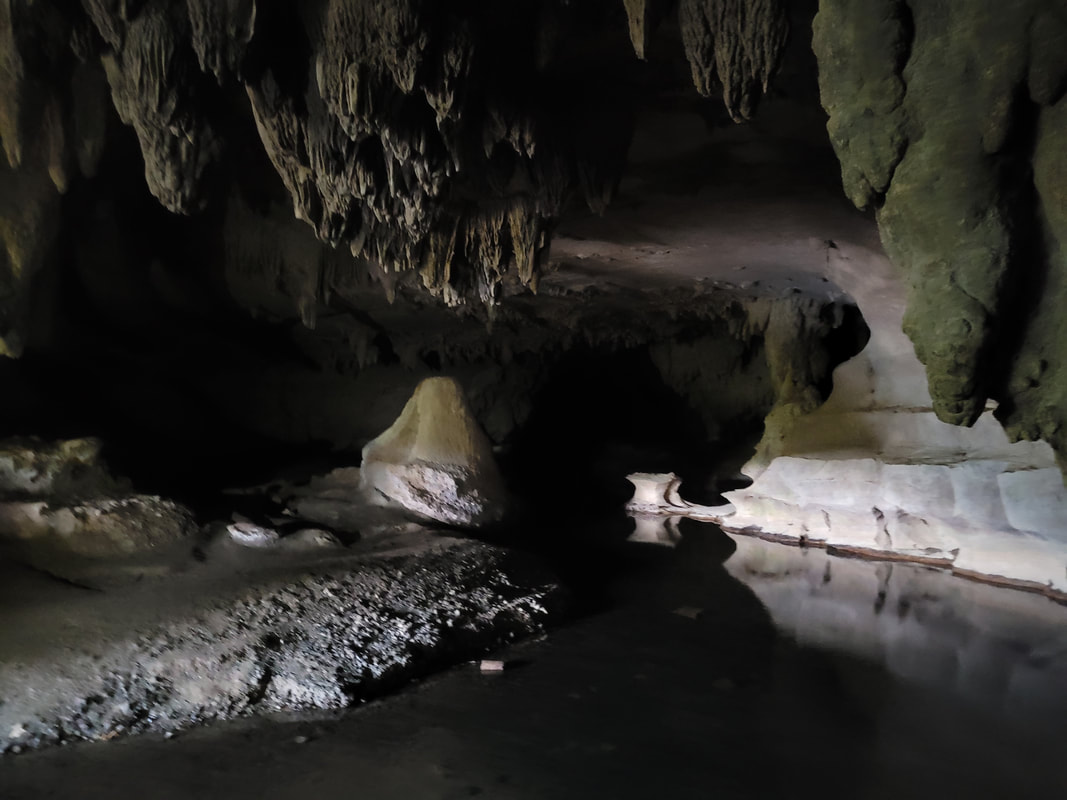
The cave is full of stalactites

The first part of the stream to cross
Glow Worms - Worms That Glow? Not Exactly
They are actually maggots, fly larvae of a small fly, which hang off the roof in caves and have a big, bright glowing bum – hence the name, glowworms. They are part of the Lampyridae family and are super useful in our ecosystem as they help control insect population. They can only glow when they are in their juvenile stage, which is around 9 – 12 months long.
Where can you find them?
Most glow worms can be found inside dark caves, where there is water. But we have come across them on night bush walks in Auckland where we have seen them in dry riverbeds (such an awesome surprise when you come across them unexpectedly!)
How do they glow?
There is a chemical reaction that goes on to cause the glow, is called bioluminescence. When an enzyme called luciferase and a pigment called luciferin and adenosine triphosphate react with oxygen in the cave, a blue/green light shines bright from the glowworm’s big bum, releasing the excess energy as light.
Why do they glow?
There are a couple of reasons they glow
1- The female glows bright to attract a male
2 – They glow bright to attract their food. The hungrier are, the brighter they glow, especially in winter.
There are 30% more glow worms in summer than there are in winter.
The adults have no mouths!
The adults have no need to eat so therefore they don’t need a mouth. Makes sense, I guess! Once the larvae turn into a fly, they mate then the male adults live for another 5 days and once the females have laid their eggs, they die 2 days later (Charlotte’s Web vibes).
What do they eat?
The glowworms create long beaded threads to catch their food in, like a spider does. They like to feast on insects, slugs and occasionally plants.
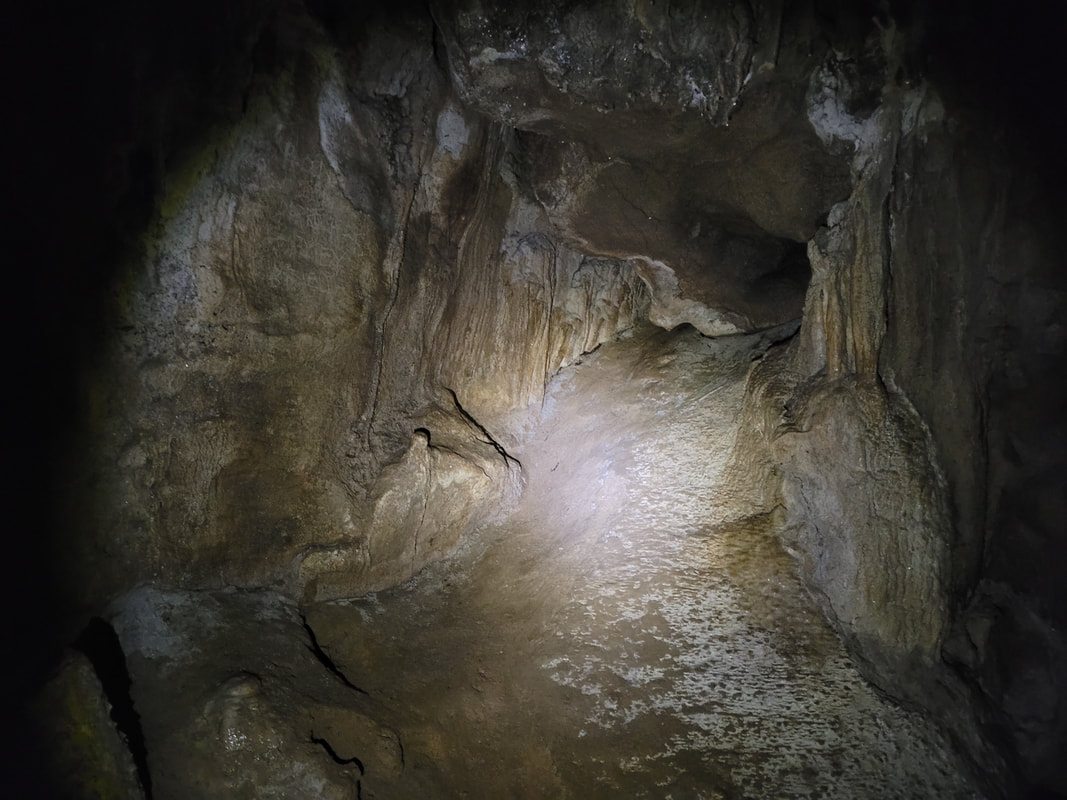
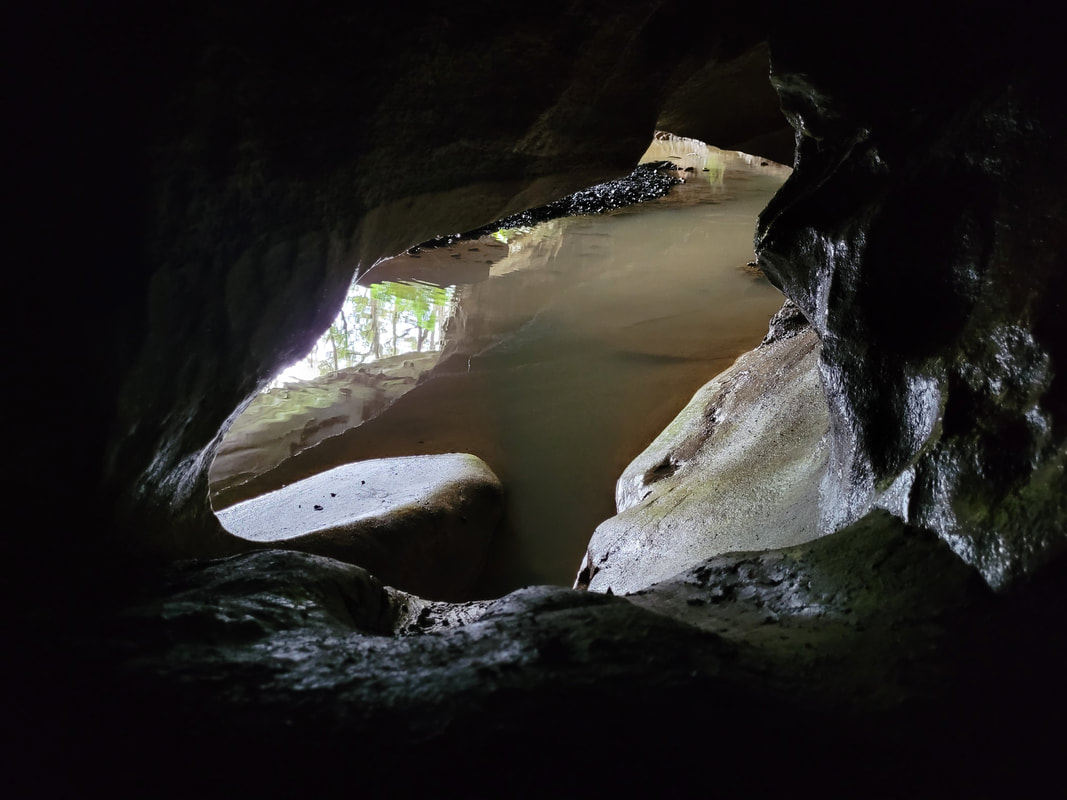
The second part of the cave is easy to get to, with just a small stream to cross
|
|
In Te Reo Maori, the word for glowworms is Titiwai which means 'lights that reflect on water' |
There was a beautiful fog like presence in the cave
Every aspect of the cave had unique formations
Make sure you take a torch for each person - and spare batteries!
Photographing The Glowing Bums
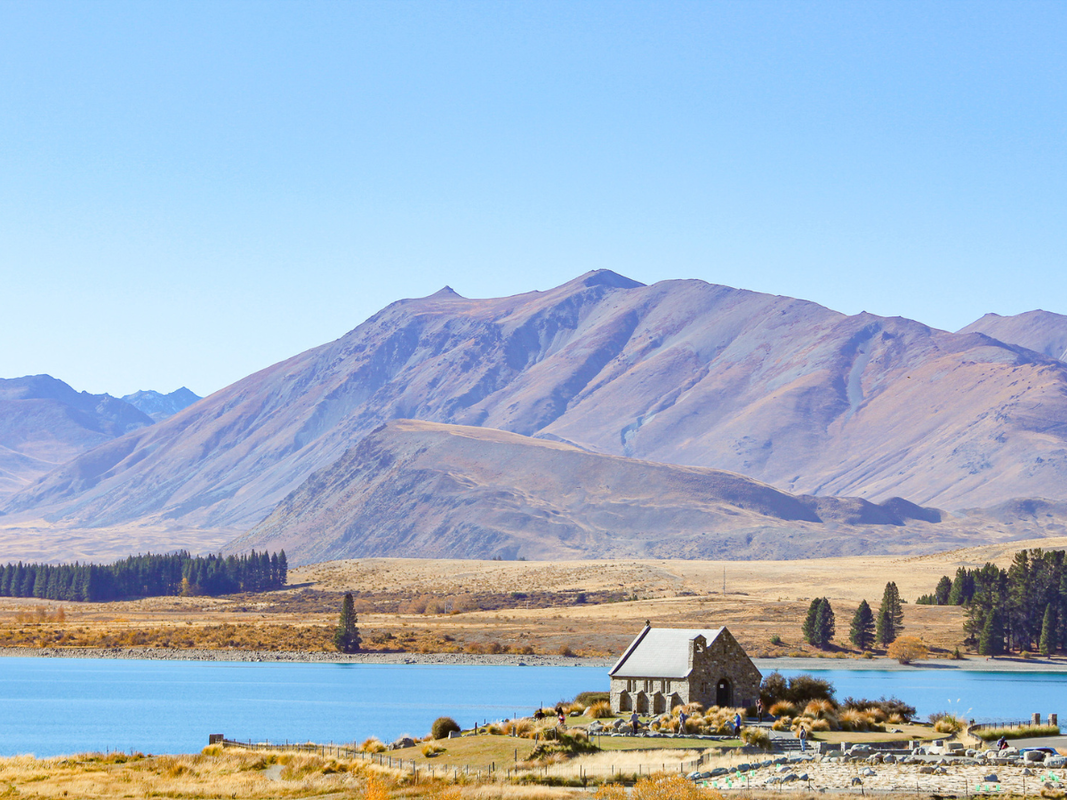
The caves are really easy to navigate, it's just one giant cave, with twists and turns and paths over rocks, streams, stalagmites and stalactites. You won't see many glow worms in the first part of the cave, but when you cross the stream and head around to the left, you'll see a few scattered around the cave roof, looking like stars! (Kind of like the ones we saw in Tekapo). We found the glow worms brighter here than in the Abbey Caves.
If you're keen to go further into the cave, you can head to the final section where you'll find a galaxy of glowworms! Especially right at the end as you're facing the back of the cave. It's a really magical place, especially when you turn your torch off and all you can see is a blue, glowing roof.
The first time we went to the caves, I had taken my DSLR but I just could not get it to work and there is NO cell reception down there, so I couldn't even google how to take photos in the dark! I was gutted but we were staying only half an hour away, so I knew I could do my research and go back again. So before our second trip, I ended up taking screen shots of the settings I needed to use and because they were so different between each recommendation, I had to play around a bit. I found out that the reason my camera wouldn't shoot the first time, was because the lense had to be on manual due to no light.
To get the shots of the glowworms, I aimed my torch at the exact area I wanted to photograph, then I half shut the shutter, so the camera auto focused, then I changed it to manual focus once I had it in exactly the right spot.
I used a canon 700D on M mode and the settings I used were:
ISO 6400 - 12800
F stop 4.0 (this is the lowest my camera goes! If yours goes lower, then make it as low as it can go)
Exposure 30 seconds
White balance auto
For the close-up shots of the glowworms, I used a 55-250mm long lense and a wide angle lense for the rest of the photos. Using a wide angle lense will allow more light in, but if you don't have one then it's not a biggie.
I was playing around with the shots and realised that if I pointed my torch at the opposite end of the cave, there was a small amount of light in the cave and the photos came up way better and the glowworms shone super bright! You can't have any direct light near where you're shooting, or the photos won't work out. Lath took the girls to the opposite end of the cave where they threw rocks into the stream so I could get the photos I needed, without them sitting in the dark for 20 minutes. Occasionally one of the girls would shine their torch over to where I was, so I would have to restart the photo again! A bit frustrating when each photo takes 30 seconds, but we got there in the end. The photos you see below have been slightly enhanced to capture the brightness.
At first, I tried using a 2 second timer but that had an orange glow that made the rocks come out red when the photo was done. So instead, I made sure I pressed the shutter as easily as I could, without creating any movement on the camera or tripod. Time to buy an external shutter cable!
We were pretty lucky that we had the entire cave to ourselves for about an hour before others came along, as once pesky people with their torches are there, you won't be able to get any good shots till they leave!
Some of the worms were right above our heads, you could reach out and touch them. But don't. Don't be that one eejit who ruins it for everyone. And if you do, just know that they aren't worms, they are maggots and you just touched a maggot.

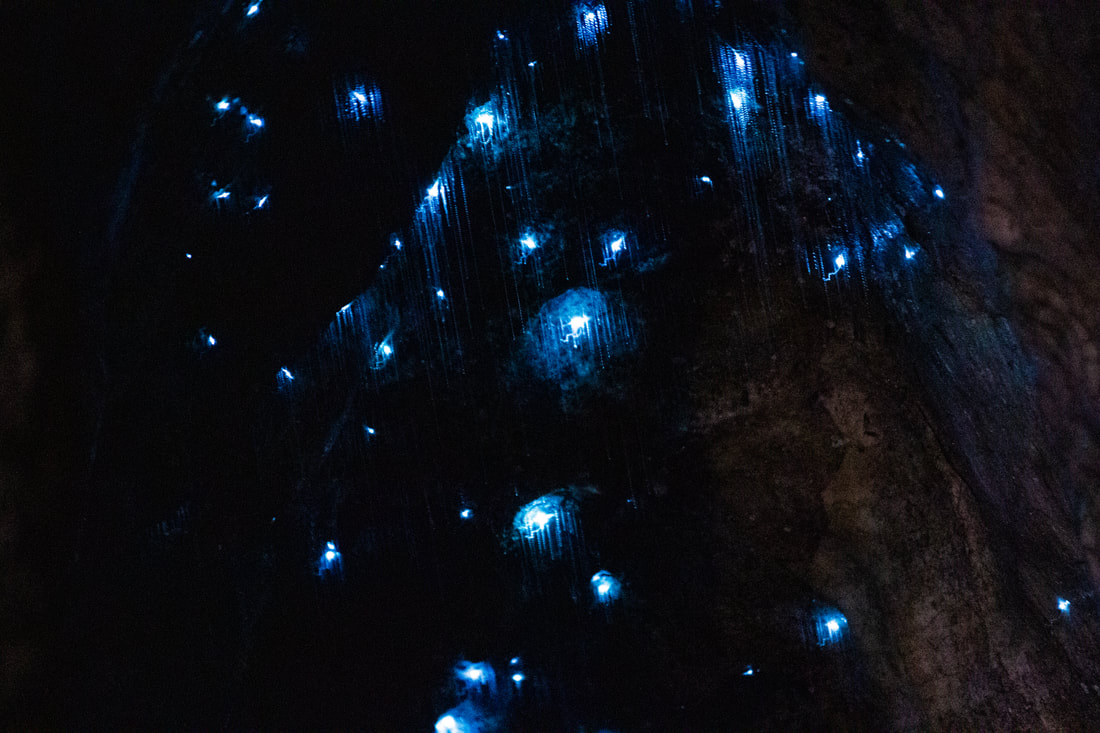
Check out that bioluminescence
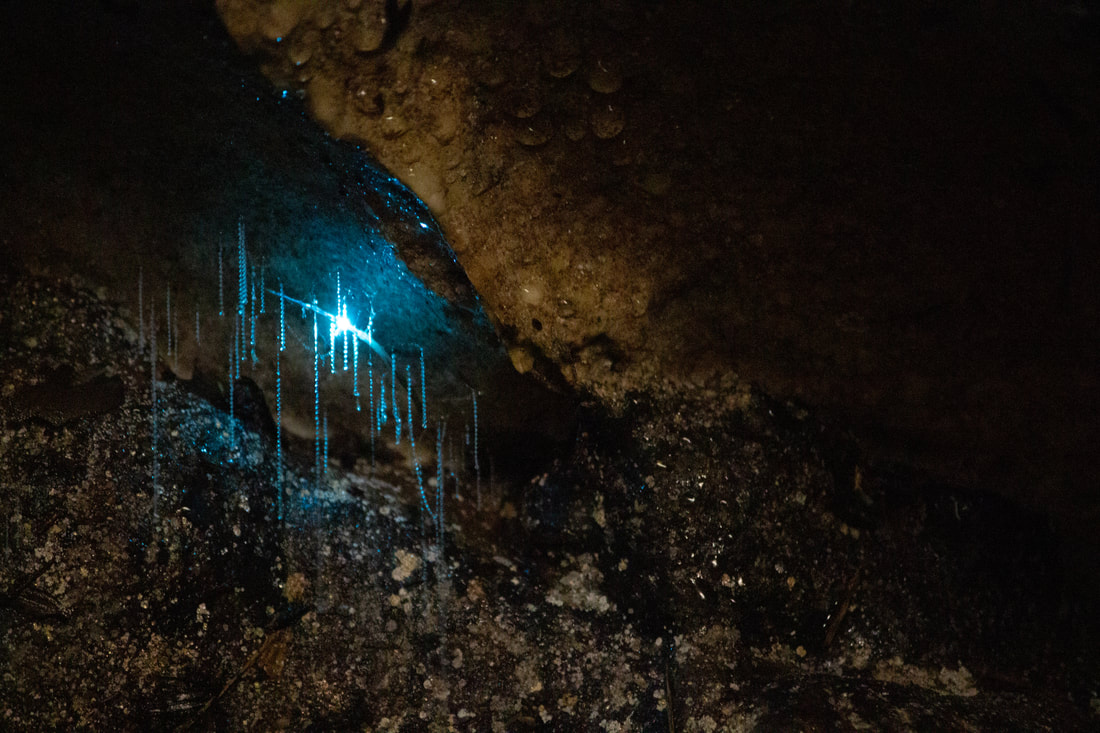
This photo was shot using my 55-250mm long lense
The galaxy of glowworms created a reflection on the water which added to the magic
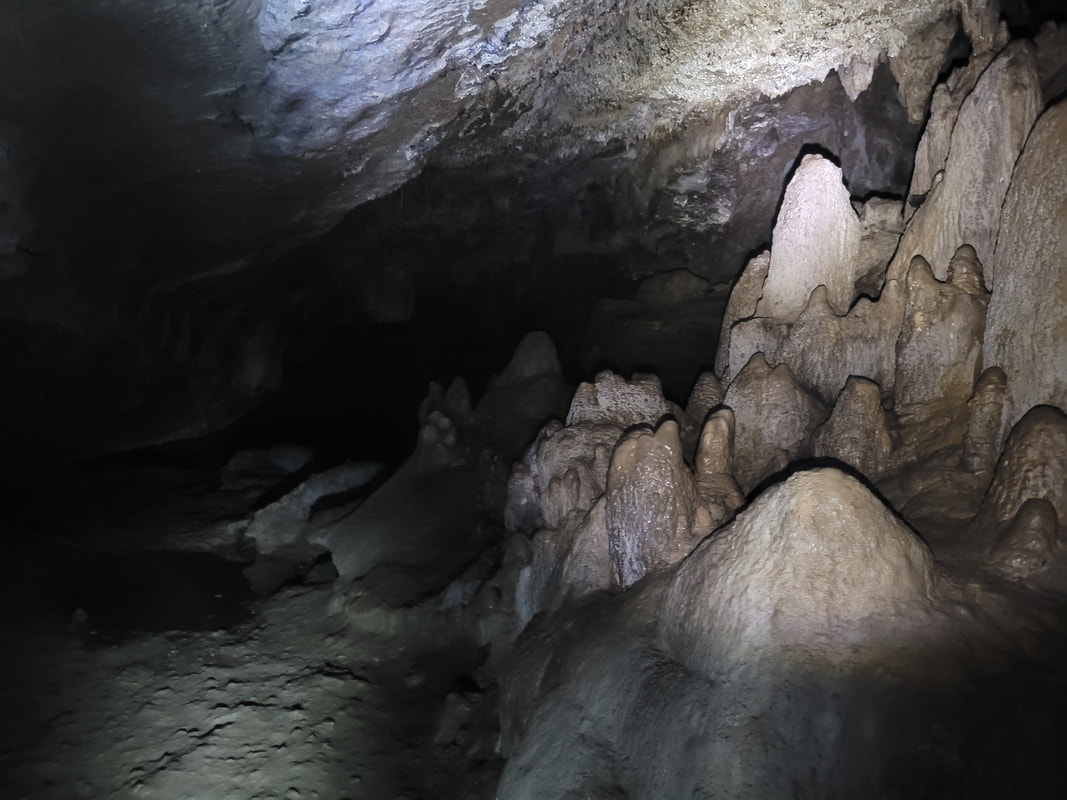
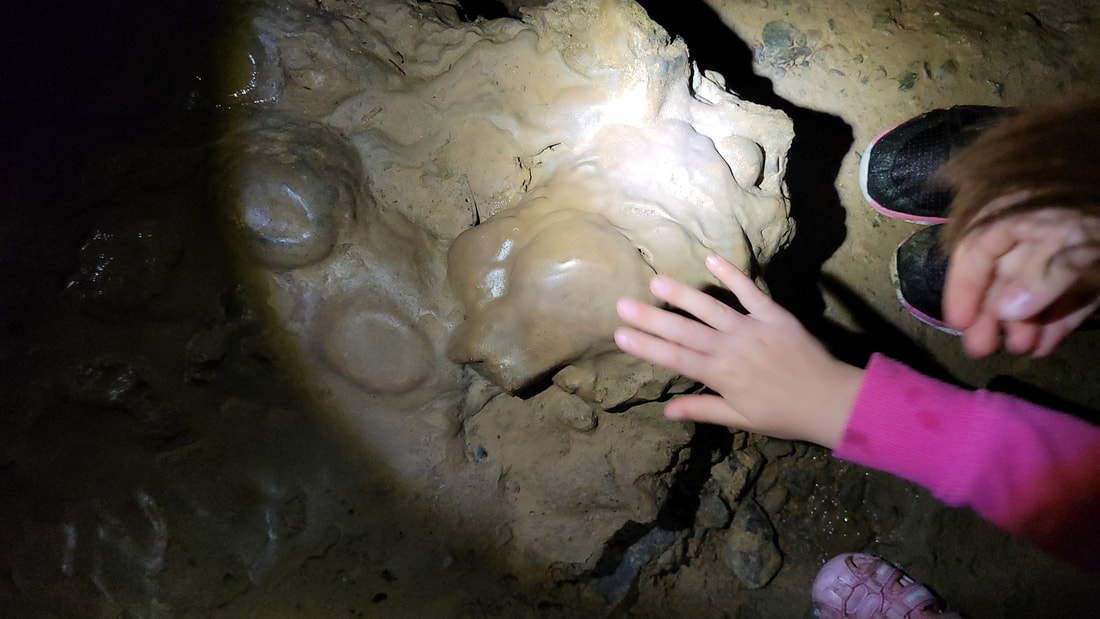
This Guy!
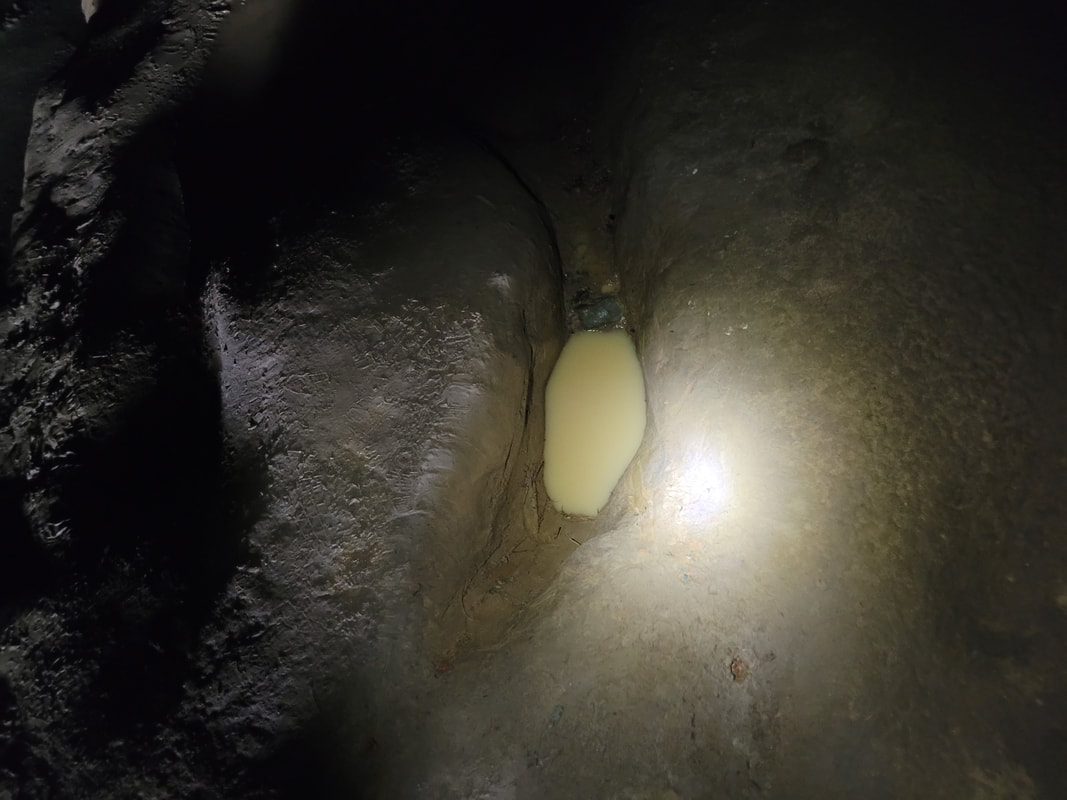
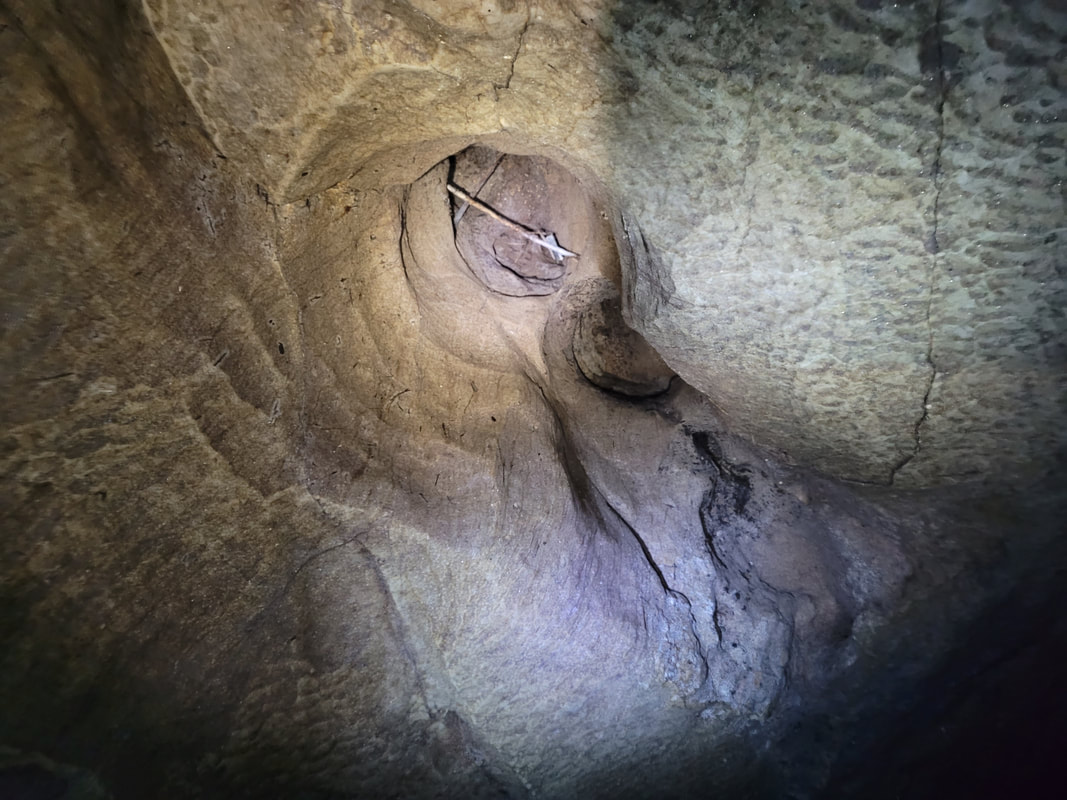
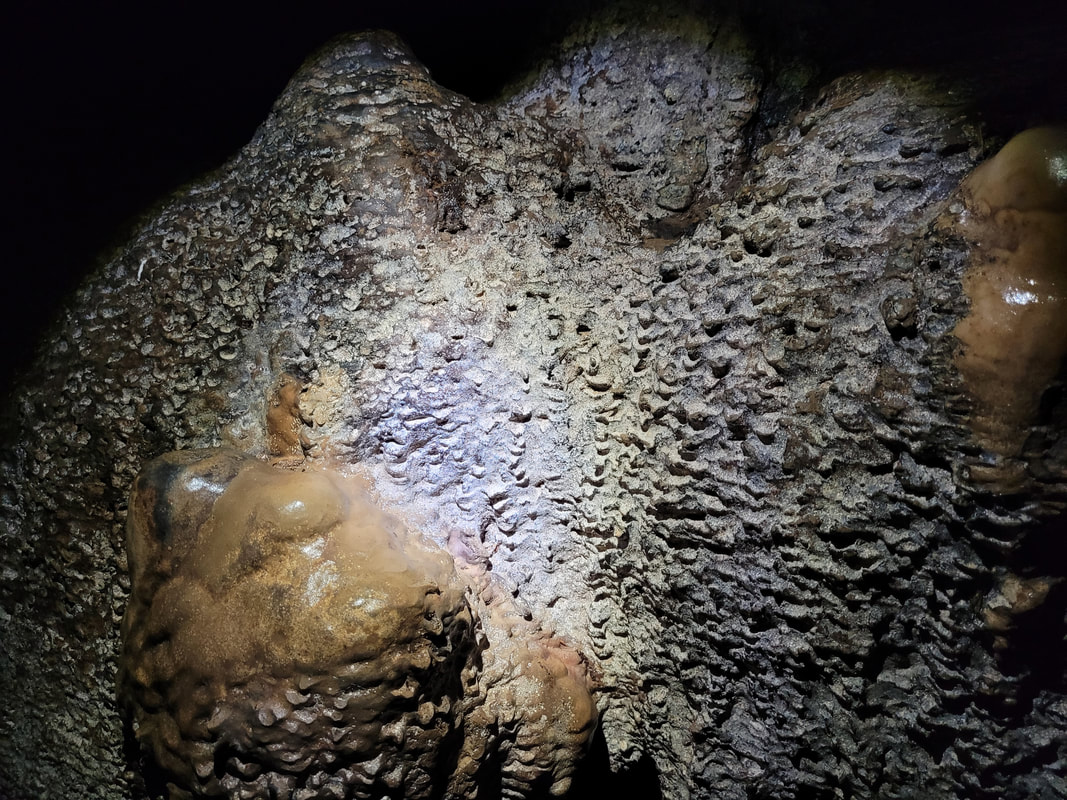
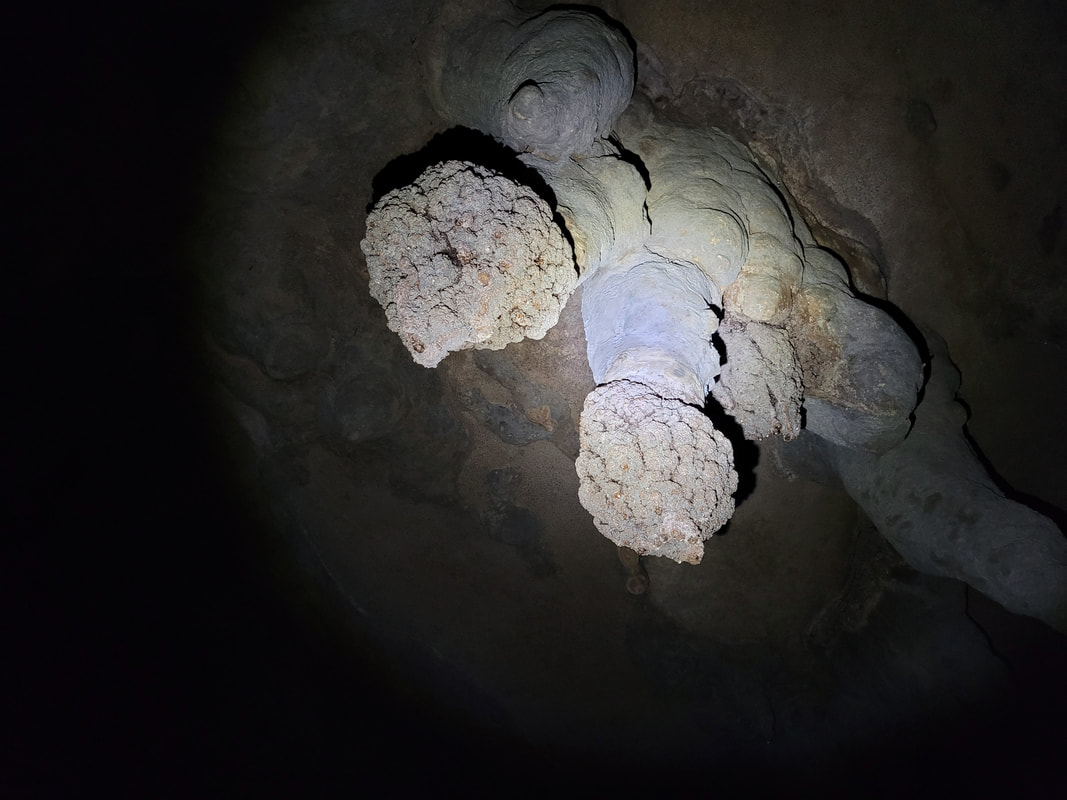
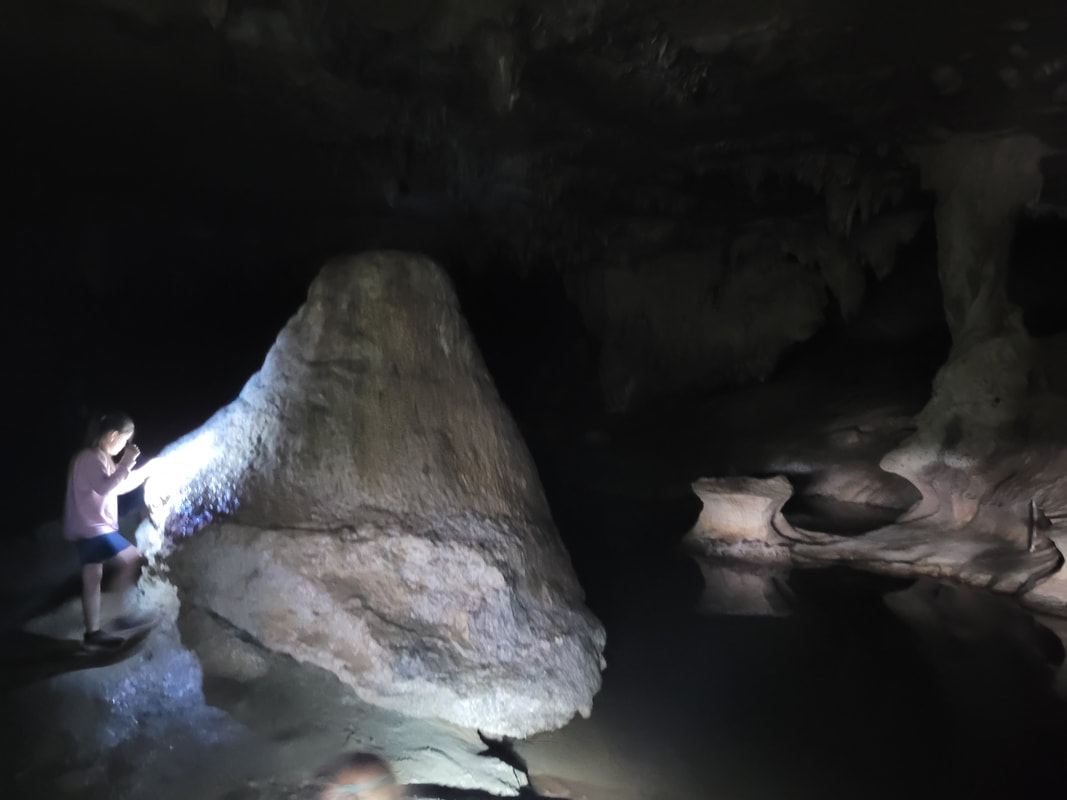
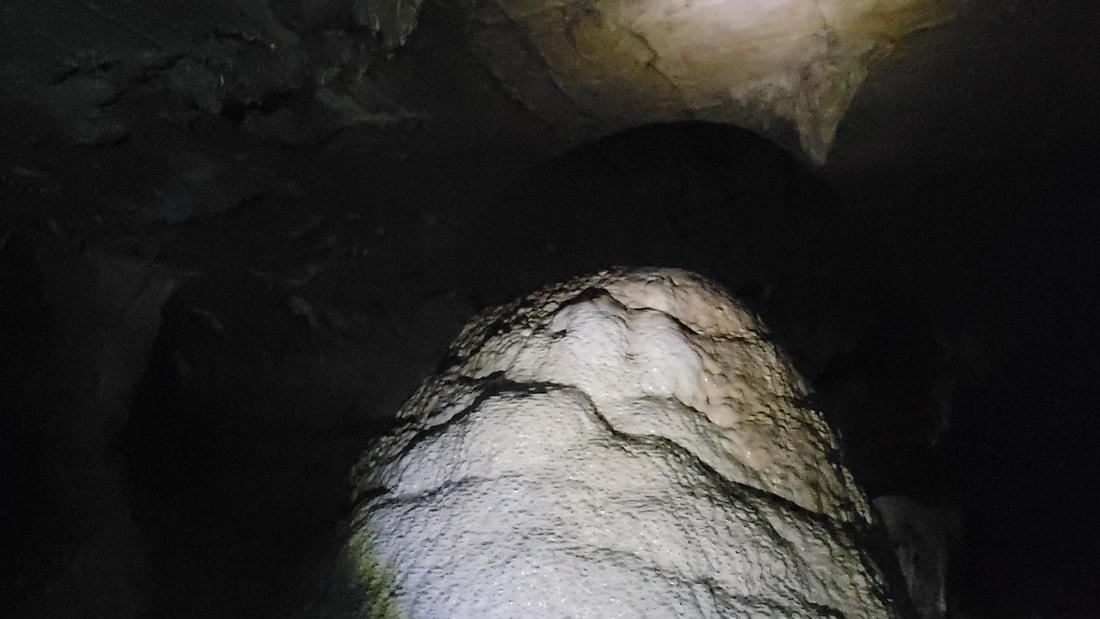
The other star of the show was this incredible stalagmite, which was just across the stream, not far from the entrance which we spent a lot of time studying.
It was around 2 metres in diameter and around 2 - 3 metres tall. There was a constant drip of water hitting the top of the stalagmite, which is why it's becoming so large and one day it will meet the top of the cave.
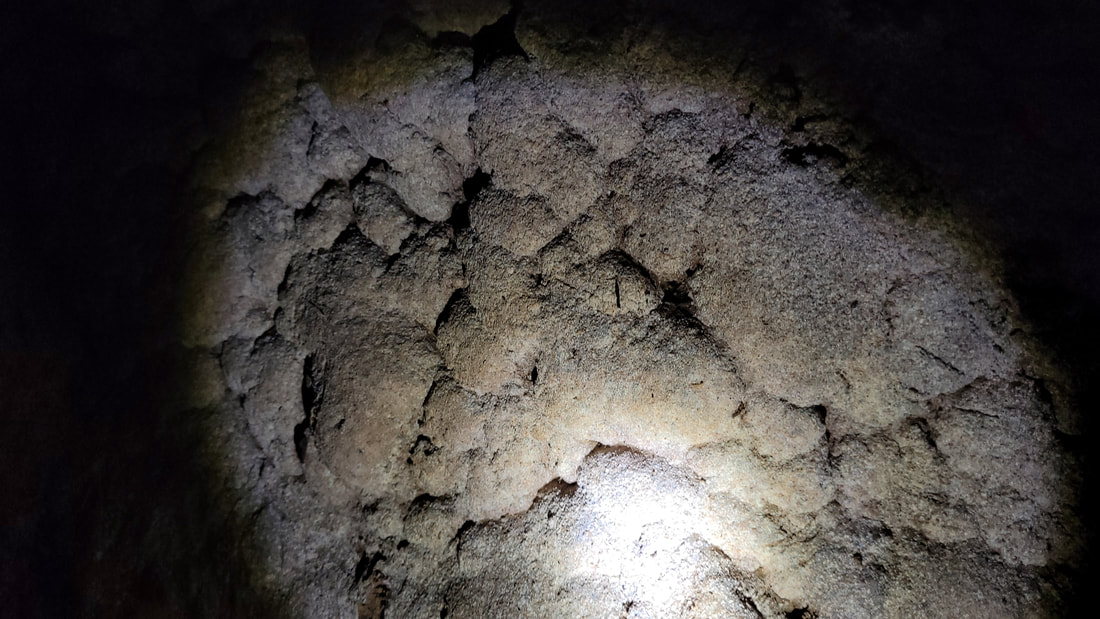
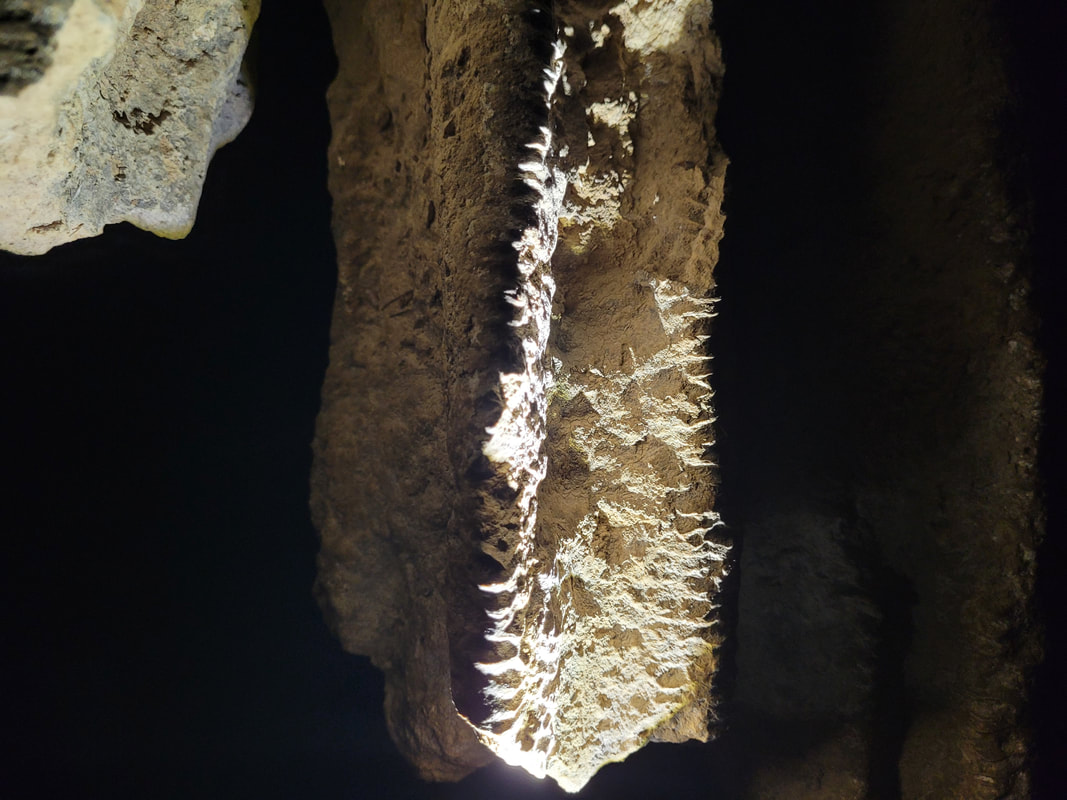
The stalagmite had two completely different sides to it. One side was lumpy, yet smooth and the other side had hundreds of terraces that were crystalized, sometimes trapping small stones and dead bugs. We were absolutely fascinated by the crystal side and we spent a lot of time studying it. Everyone else seem to pass by it, with the intention of finding the glowworms. We like to look at everything when we're exploring, for this exact reason - so we don't miss something we find really fascinating!
It was around 2 metres in diameter and around 2 - 3 metres tall. There was a constant drip of water hitting the top of the stalagmite, which is why it's becoming so large and one day it will meet the top of the cave.
The stalagmite had two completely different sides to it. One side was lumpy, yet smooth and the other side had hundreds of terraces that were crystalized, sometimes trapping small stones and dead bugs. We were absolutely fascinated by the crystal side and we spent a lot of time studying it. Everyone else seem to pass by it, with the intention of finding the glowworms. We like to look at everything when we're exploring, for this exact reason - so we don't miss something we find really fascinating!
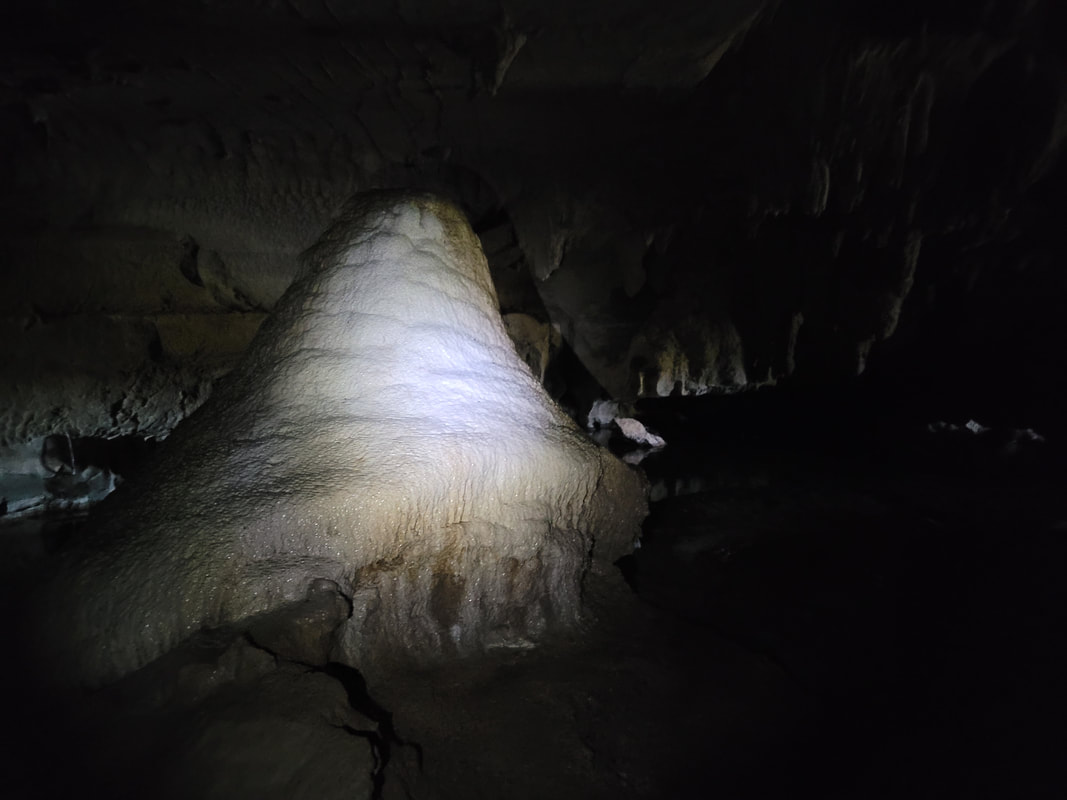
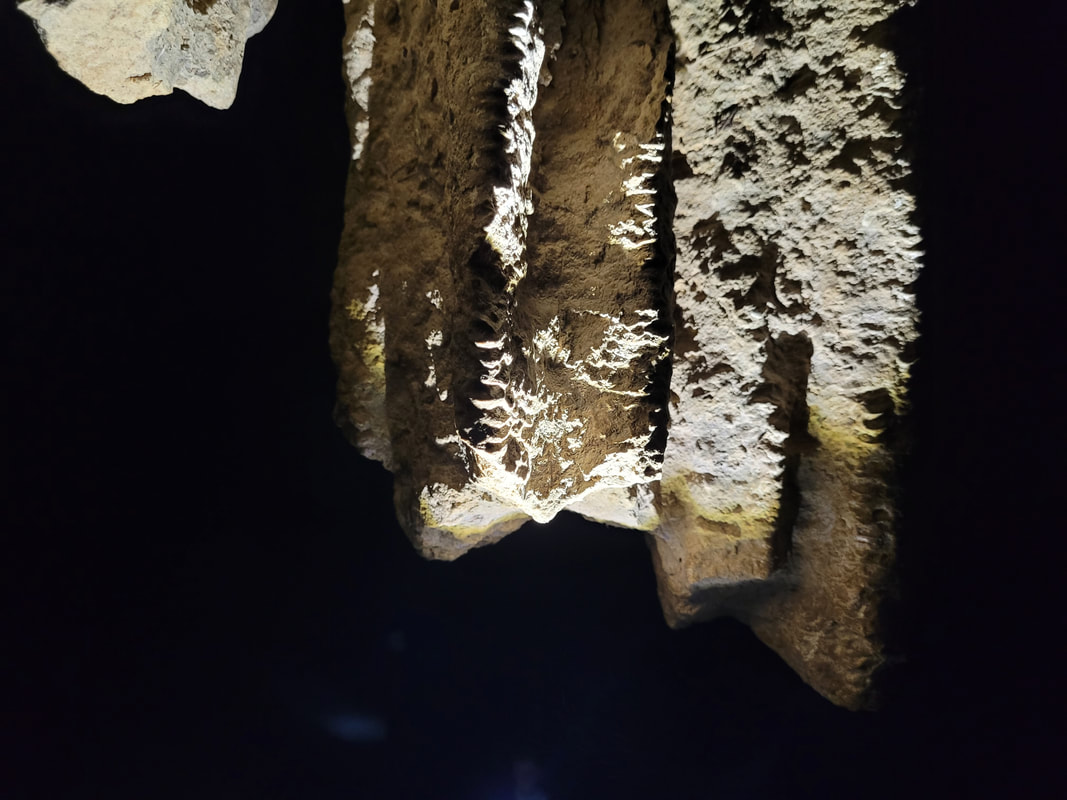
One of the main attractions in the cave - a huge, crystalized limestone stalagmite
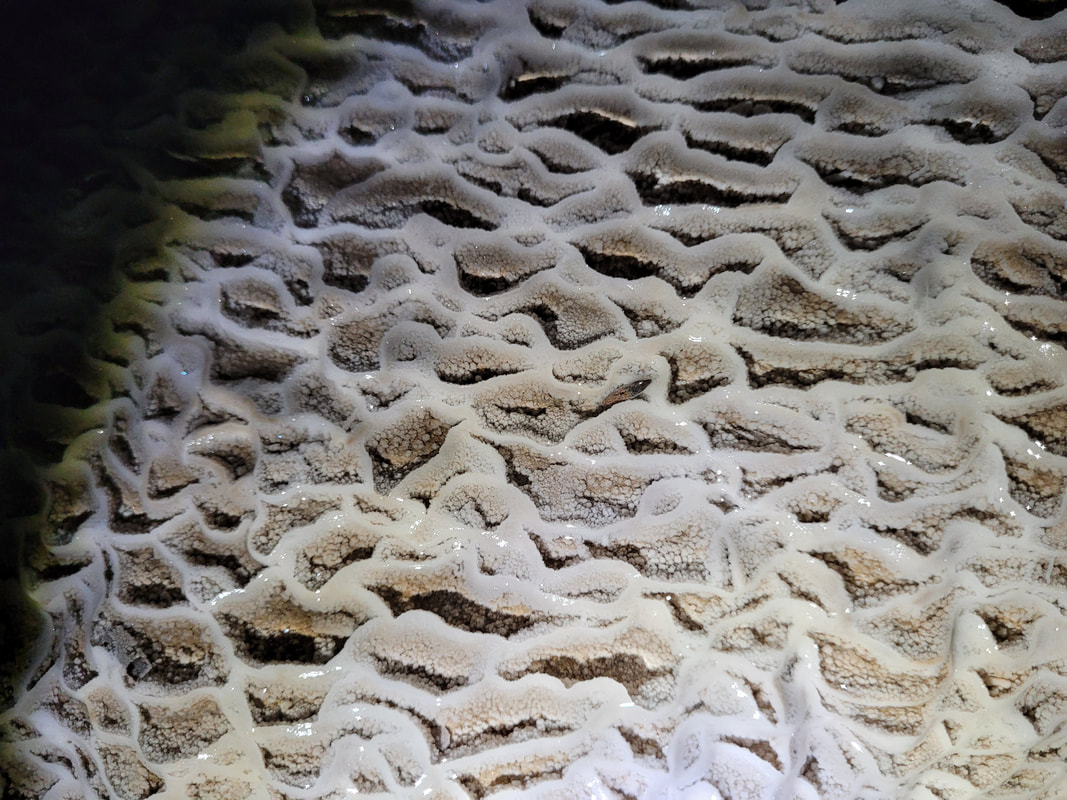
The hundreds of calcium carbonate terraces on the stalagmite were fascinating
Bella LOVES crystals, so she spent ages studying this stalagmite
Stalagmites And Stalactites
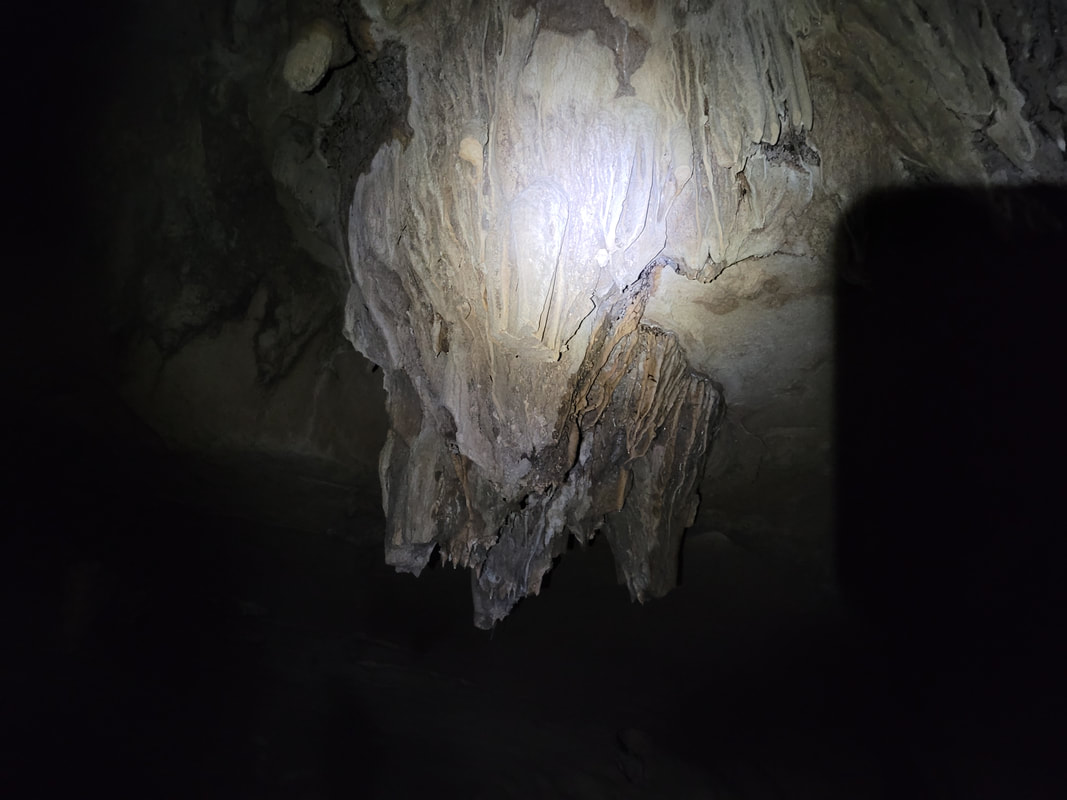
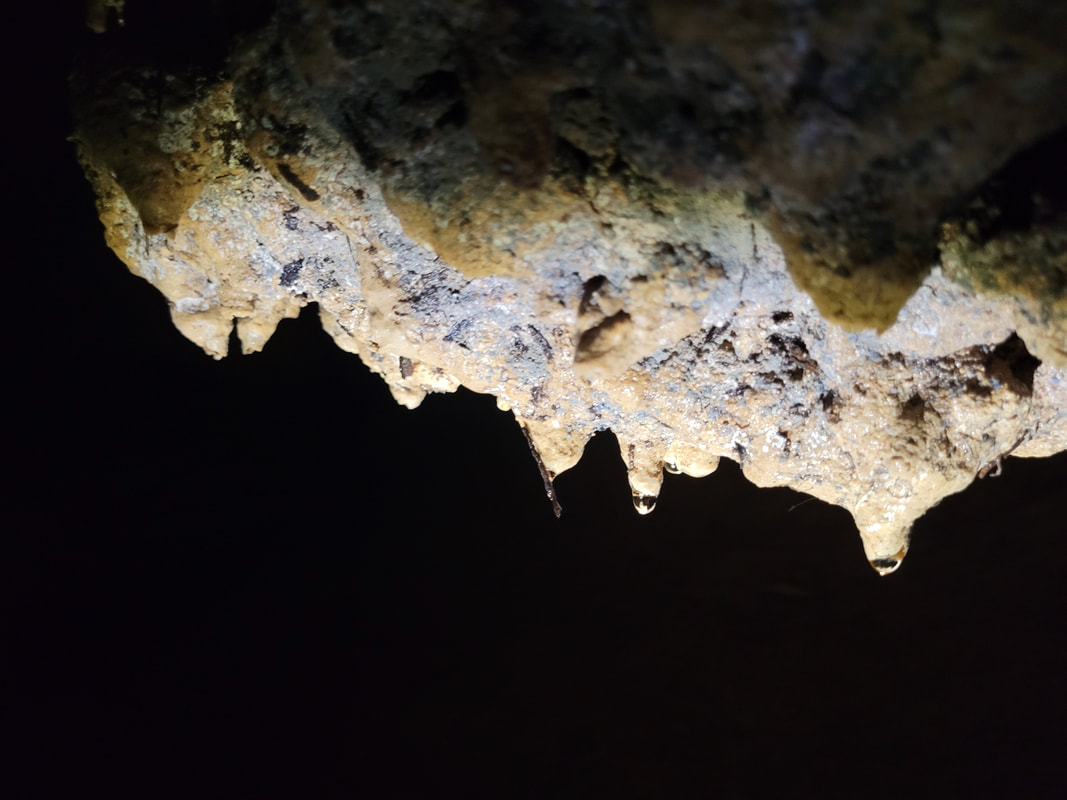
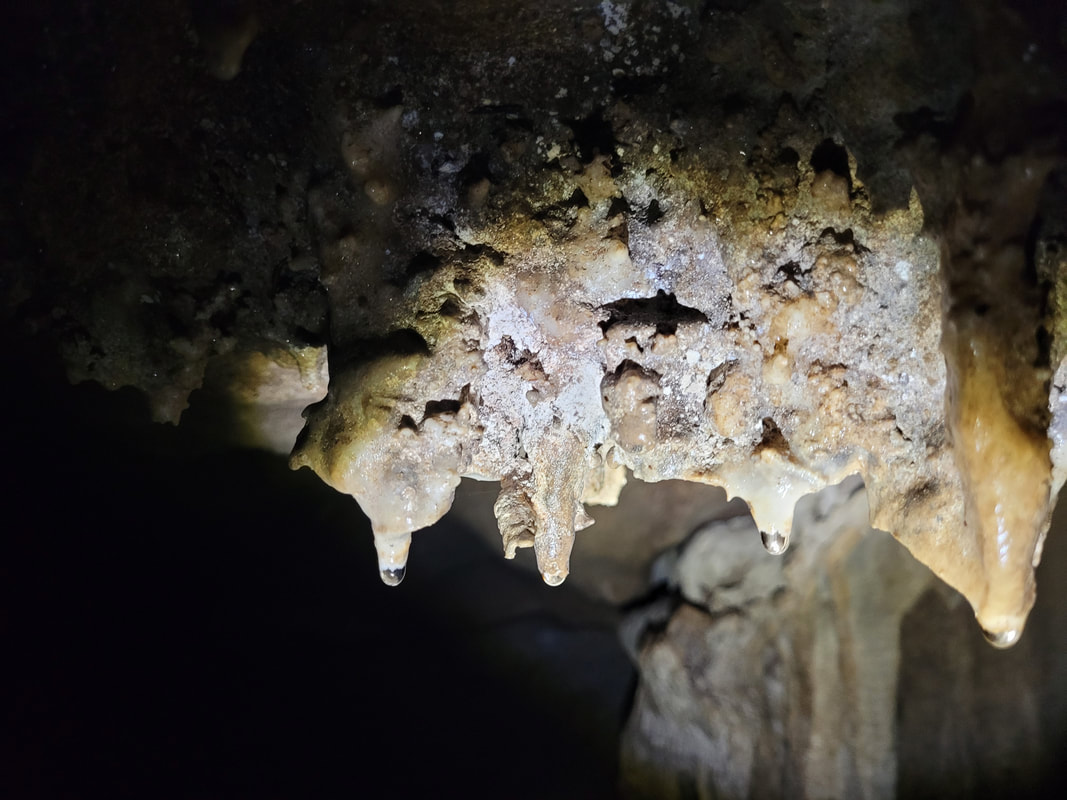
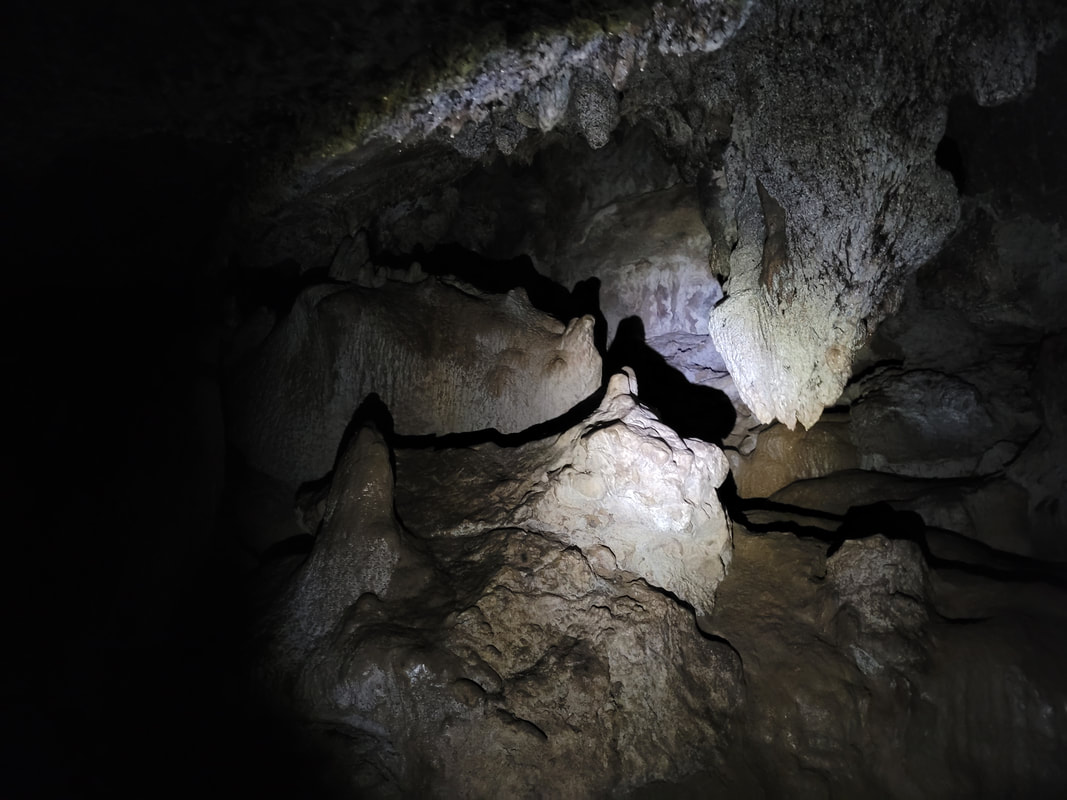
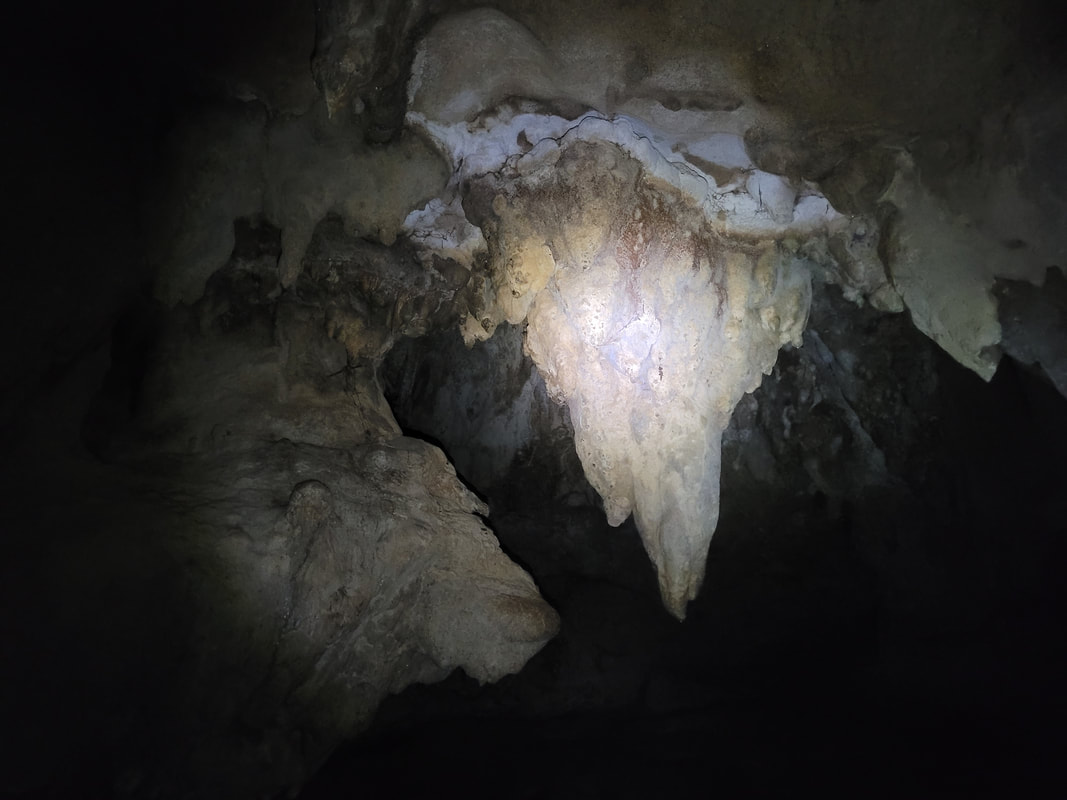
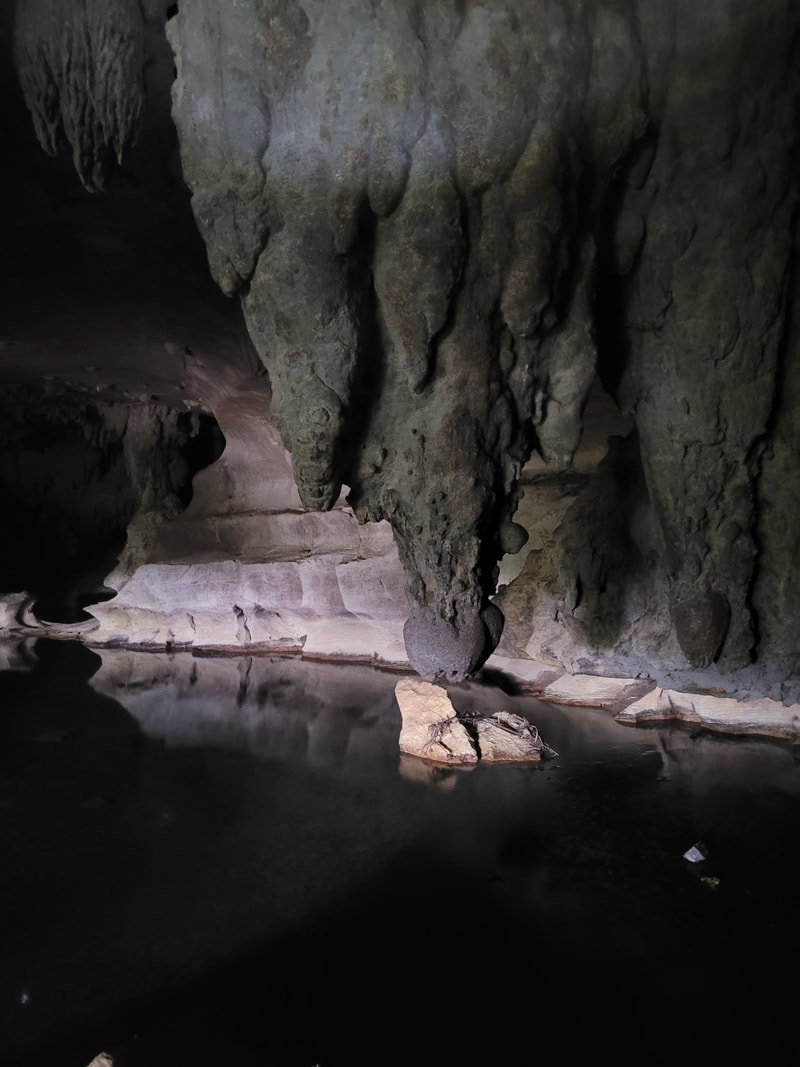
There were a lot of weird, pointy things (also known as stalagmites and stalactites), hanging off the roof and growing up from the floor of the cave.
They were all sorts of shapes and sizes, with so many textures and colours. Some were new and some were ancient and they were fascinating to look at and touch - it's not every day you get to go spelunking (Bella's favourite new word!).
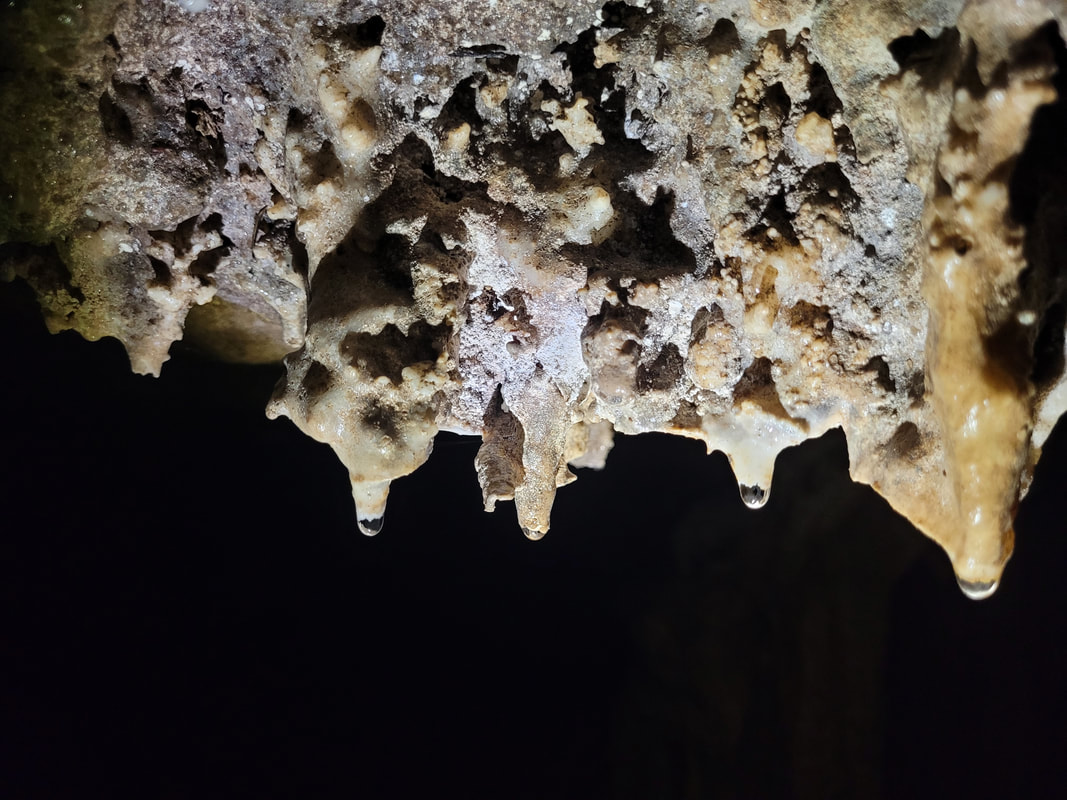
My favourite were the small ones, hanging close to the roof. Some were round and some were jagged and they all had water dripping off them, which made it easy to see how they were being formed over time. I had a lot of fun photographing the smaller ones as there were quite a few in the lower part of the cave roof, so they were easy to photograph, although the process wasn't quite so simple - hold your torch in one hand, pointing to these beauties, hold your phone in the other hand and take a photo using the volume button (thanks for this, Samsung!), all while being in some weird position on the rocks below, trying not to slip. It would have been much easier to ask someone to hold the torch for me, hmmm.
Stalactites and stalagmites are such fascinating names when you first hear them, but what on earth do they mean and why are they so fascinating? When we entered the Waipu Cave for the first time, we saw stalactites and stalagmites everywhere! They are so interesting to look at and one would probably ask, how did they form?
When the rainwater passes through the cave, it wets the limestone roof which causes heeeaps of drips from the cave roof, below (hello, gravity). These water droplets carry dissolved minerals in the rainwater, which react with the carbon dioxide in the air and limestone and when they drip below, tiny minerals build up to create the stalagmites (and stalactites), drip by slow drip. The icicle-like formations are mainly made of calcite and can grow as little as 2.5cms every 100 years! When the stalagmite grows so tall and the stalactite grows so low, they meet and become a pillar, called a stalagnate.
The simplest way to distinguish between the two, is that stalactites are holding on TIGHT to the roof and stalagmites MIGHT grow up to the roof one day. Stalagmites are often wider and thicker than stalactites.
It's an amazing thing to see and something we never truly appreciated until we saw them with our own eyes.
They were all sorts of shapes and sizes, with so many textures and colours. Some were new and some were ancient and they were fascinating to look at and touch - it's not every day you get to go spelunking (Bella's favourite new word!).
My favourite were the small ones, hanging close to the roof. Some were round and some were jagged and they all had water dripping off them, which made it easy to see how they were being formed over time. I had a lot of fun photographing the smaller ones as there were quite a few in the lower part of the cave roof, so they were easy to photograph, although the process wasn't quite so simple - hold your torch in one hand, pointing to these beauties, hold your phone in the other hand and take a photo using the volume button (thanks for this, Samsung!), all while being in some weird position on the rocks below, trying not to slip. It would have been much easier to ask someone to hold the torch for me, hmmm.
Stalactites and stalagmites are such fascinating names when you first hear them, but what on earth do they mean and why are they so fascinating? When we entered the Waipu Cave for the first time, we saw stalactites and stalagmites everywhere! They are so interesting to look at and one would probably ask, how did they form?
When the rainwater passes through the cave, it wets the limestone roof which causes heeeaps of drips from the cave roof, below (hello, gravity). These water droplets carry dissolved minerals in the rainwater, which react with the carbon dioxide in the air and limestone and when they drip below, tiny minerals build up to create the stalagmites (and stalactites), drip by slow drip. The icicle-like formations are mainly made of calcite and can grow as little as 2.5cms every 100 years! When the stalagmite grows so tall and the stalactite grows so low, they meet and become a pillar, called a stalagnate.
The simplest way to distinguish between the two, is that stalactites are holding on TIGHT to the roof and stalagmites MIGHT grow up to the roof one day. Stalagmites are often wider and thicker than stalactites.
It's an amazing thing to see and something we never truly appreciated until we saw them with our own eyes.
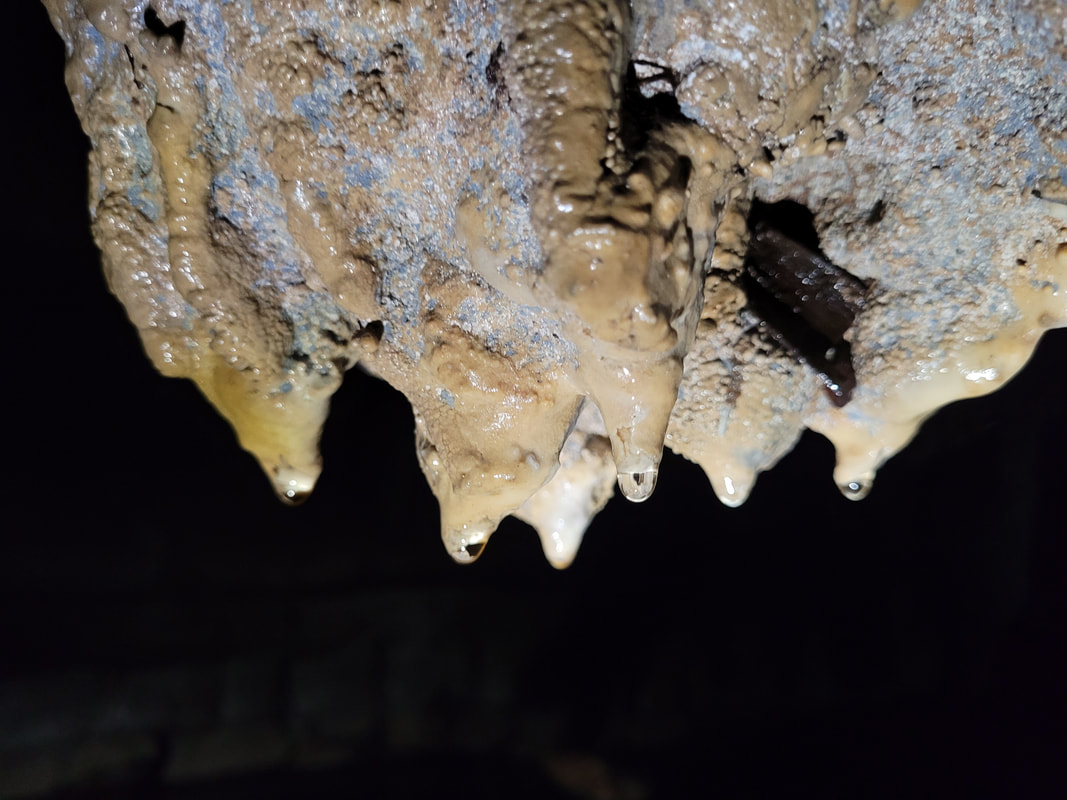
Intricate patterns on one of the stalactites
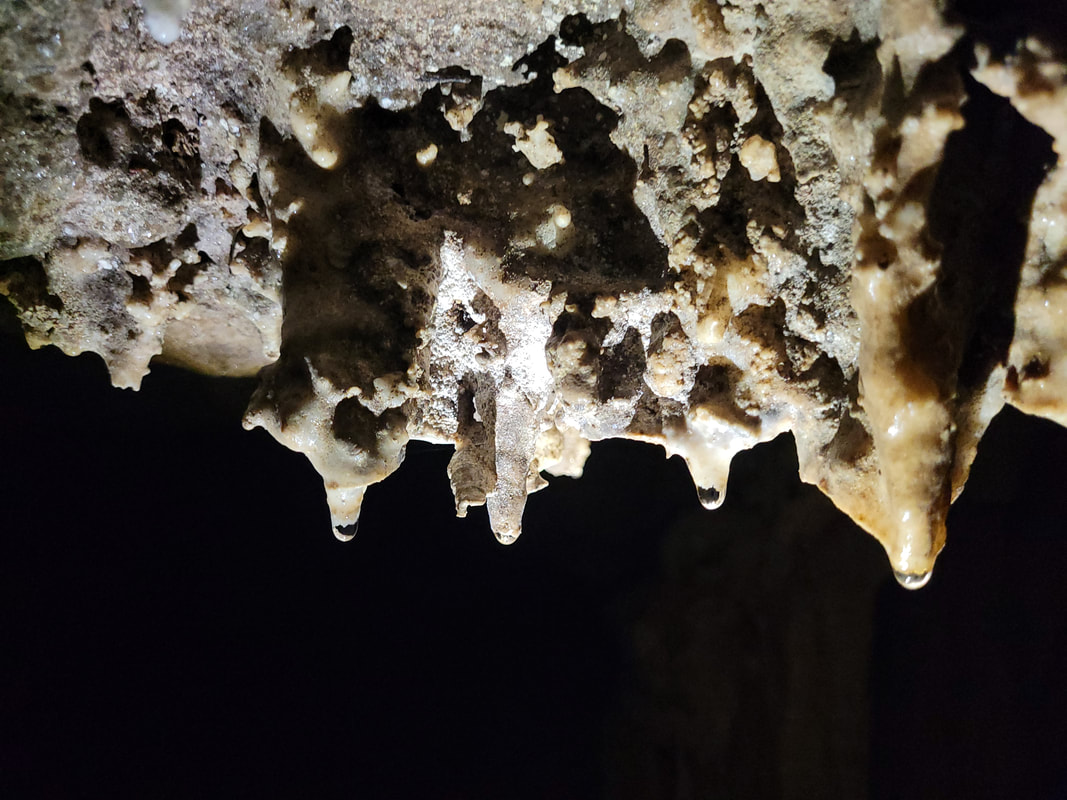
The stalactites came in all sorts of shapes and had many different features
|
|
The words stalagmites and stalactites come from the Greek word 'stalassein', which means 'to drip' |

Cave boobies
The back of the cave where the galaxy of glowworms is, you'll find a whole pile of stalagmites
Get Ya Feet Wet!
The kids weren't afraid to get into the water, it was Bella and Sienna who encouraged us to get in sometimes! The stream is super clear (unless there have been a lot of people walking in it, then it would be murky after being stirred up) and there doesn't seem to be much life in there - no fish or eels from what we could see. Infact, there was barely any life in the caves at all, aside from the glowworms and some beautiful finches who have a nest just as you come into the entrance of the cave, on the left. Of course, there is so much life in there that we can't see with the naked eye.
The water was surprisingly warm, which helped us walk through it to explore some areas where most don't go (this is the best kind of exploring!) and it meant that we didn't mind getting our feet wet and have soaking wet shoes the whole time, squelching through the muddy parts.
Around 20 meters into the cave, to the right of where you would cross over the stream, there is a wide tunnel where the stream widens and gets a little deeper - it was still shallow, coming up a few inches past my ankles. We explored here for a bit, but we didn't go in too deep although the kids wanted to, but the cave roof comes down quite far towards the end, pretty much to water level and there may be a way of getting through to more caves, but we didn't want to try.
We saw one random green plant growing in the stream, this was only plant life we saw down there!
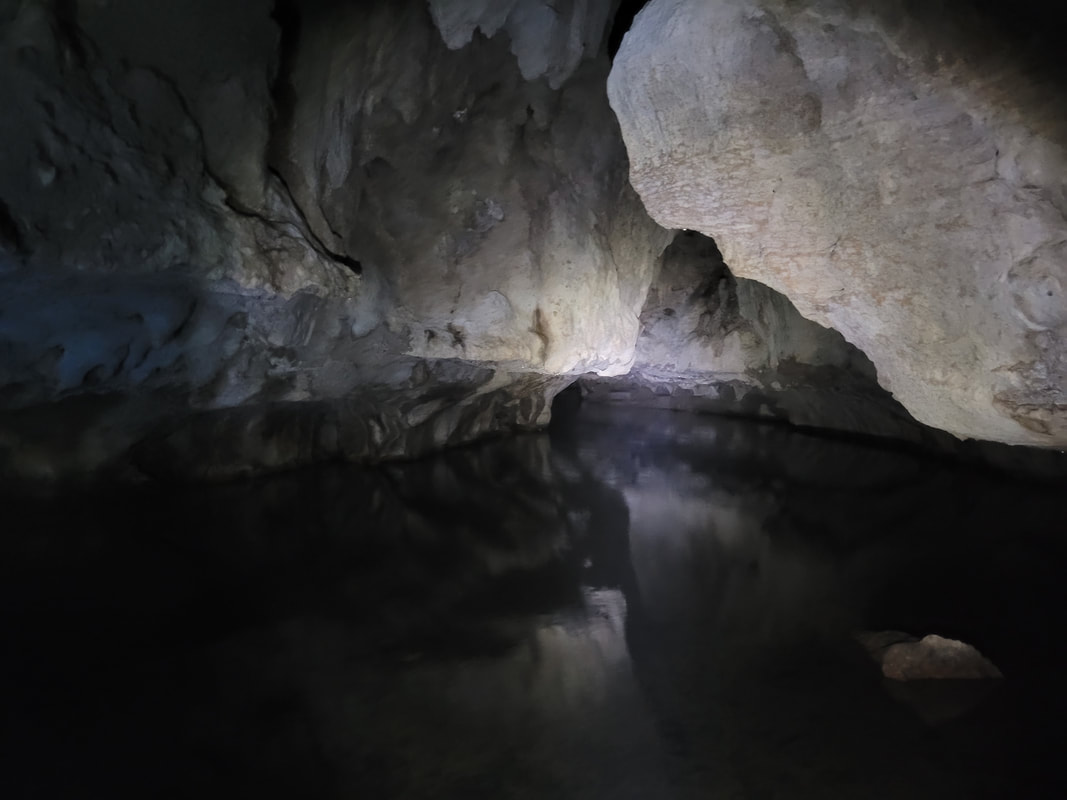
The water here was a few inches above the ankles and it was super clear
Sienna long legs was fascinated by the caves
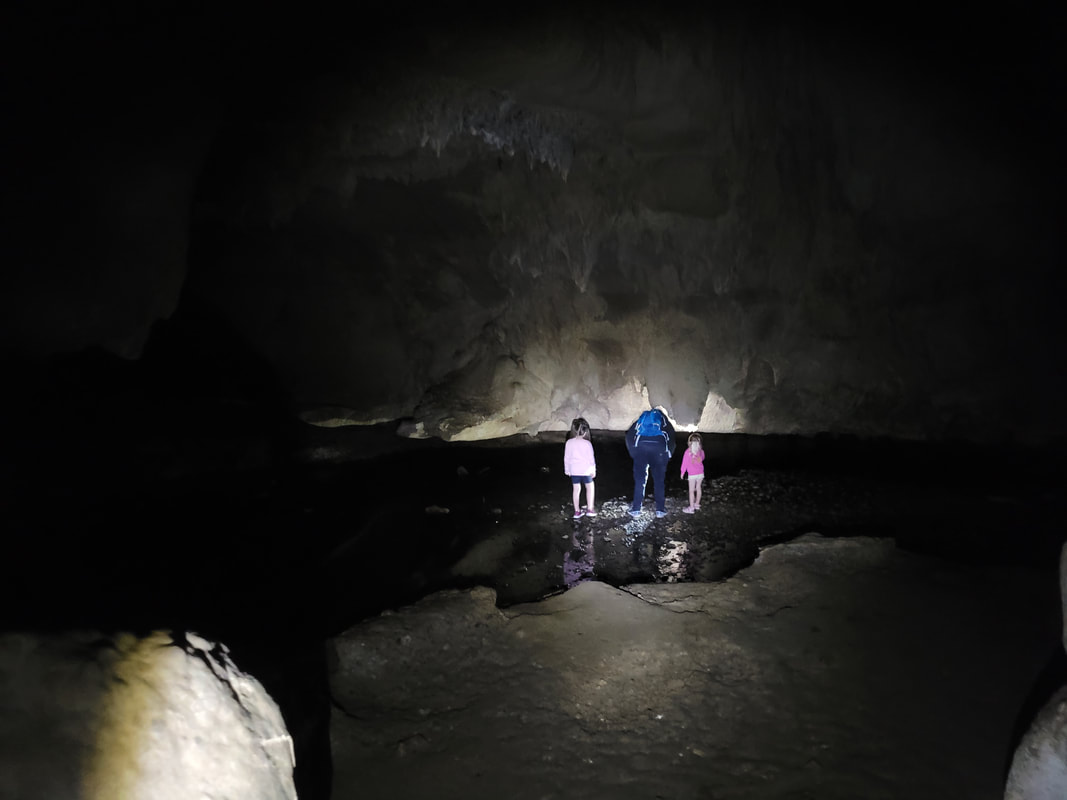
Lath, Arabella and Sienna checking out the edge of the cave in the stream
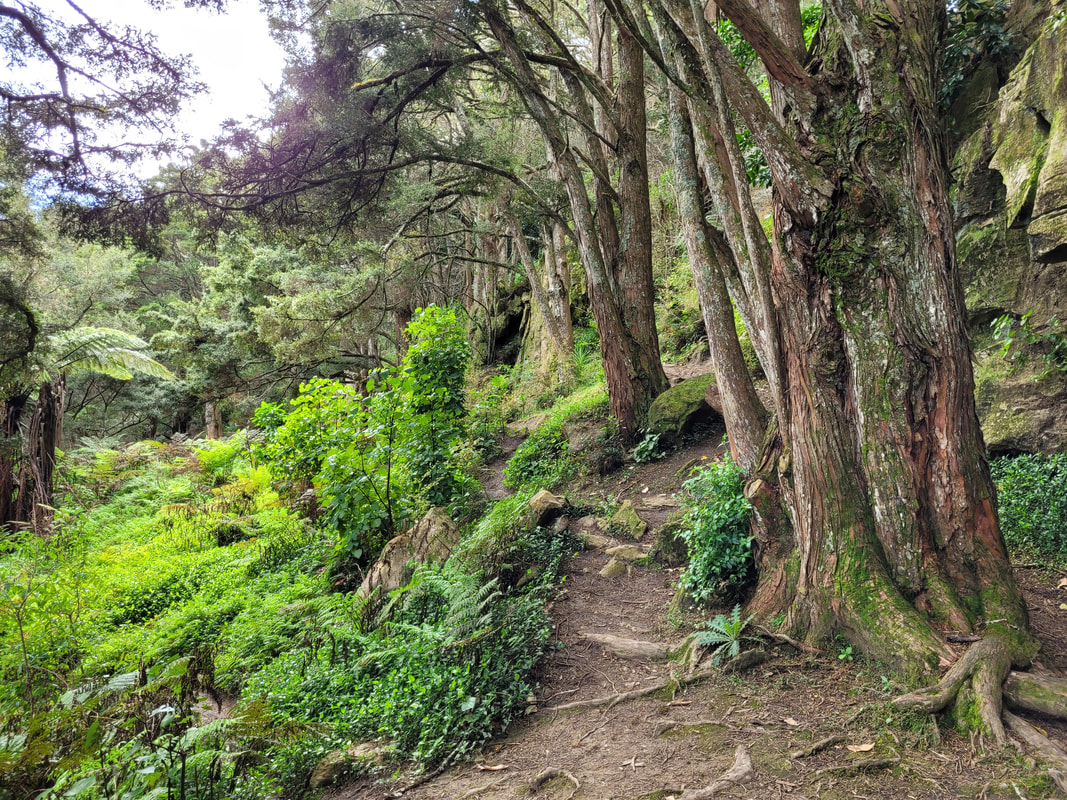
Oh The Lushness
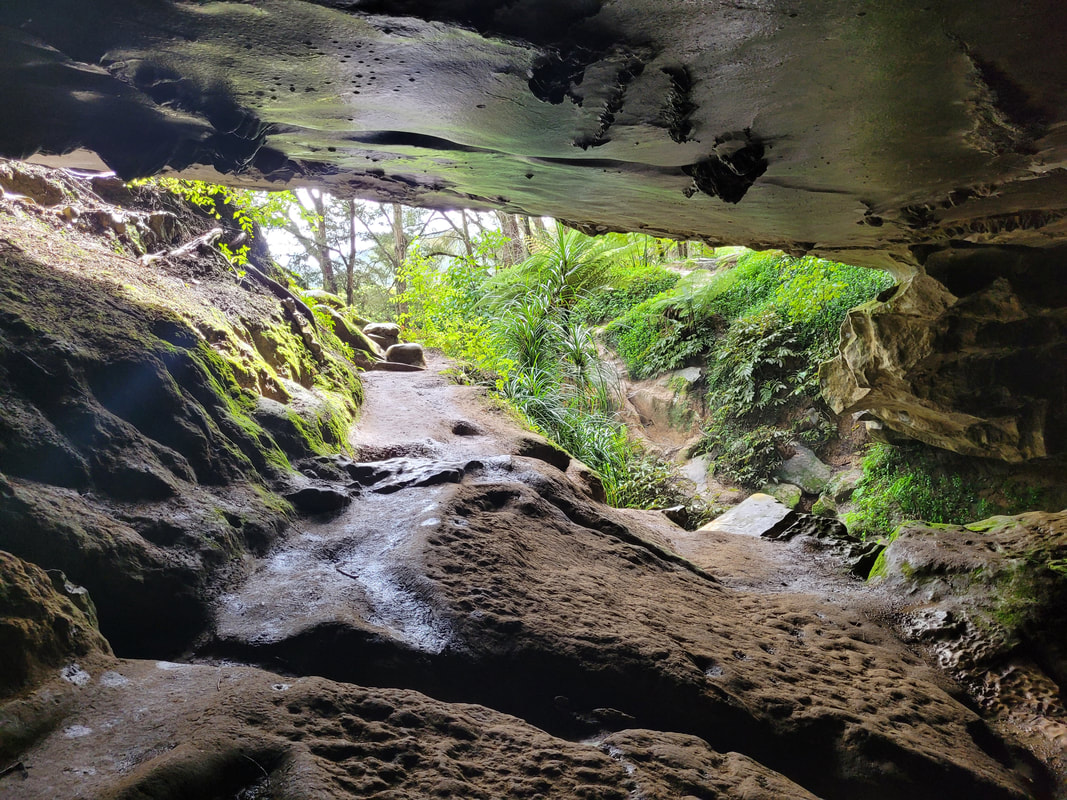
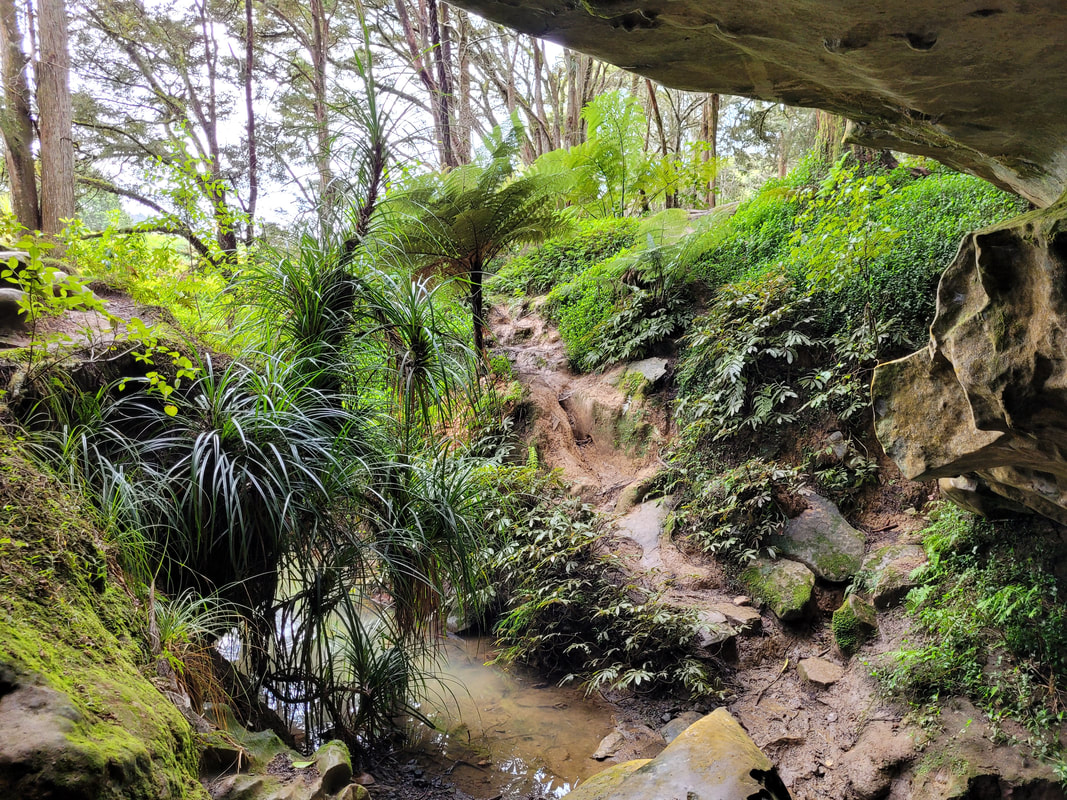
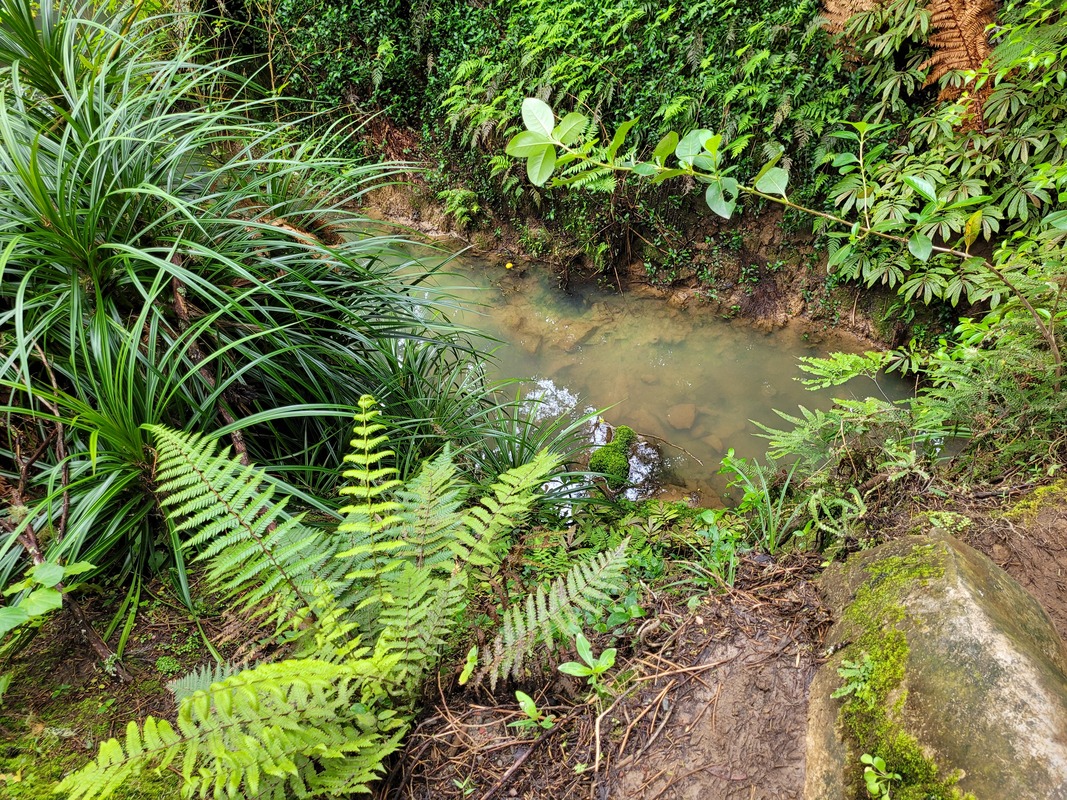
Walking into the cave and coming out, is just as magical as being in the cave. The native bush surrounding it is so lush and vibrant and there is a stream below, which feeds into the cave, which is a beautiful milky lime colour.
You will find quick flying finches in and around the entrance to the cave and beautiful limestone rocks, covered in vibrant green moss. Some of the rocks are porous, others have waves and curves and some have moss growing in the cracks.
It's always nice heading out of an amazing place, to see just as amazing scenery when you finish. It's like finding chips at the bottom of the McDonald's bag, when you think you've finished them all.
We took our time before going in and coming out, exploring this area, even crossing the milky lime stream to see what was on the other side. It was suuuper muddy and slippery and we didn't find anything too exciting on that side, but it was worth checking it out just in case!
If you're up to going on a hike after you've explored the caves, there is a walking track that begins near the carpark. Just look for the orange marker to the left of the cave (when facing the cave from the carpark). The track takes you through the Waipu Caves Scenic Reserve, showing off more limestones and native bush before taking you to a viewpoint which shows off panoramic views across the Whangarei Harbour, the Hen and Chicken Islands and Bream Head (where we did the Smugglers Bay Loop Track).

The cave entrance offers great photo ops!
Right down at the entrance/exit of the cave
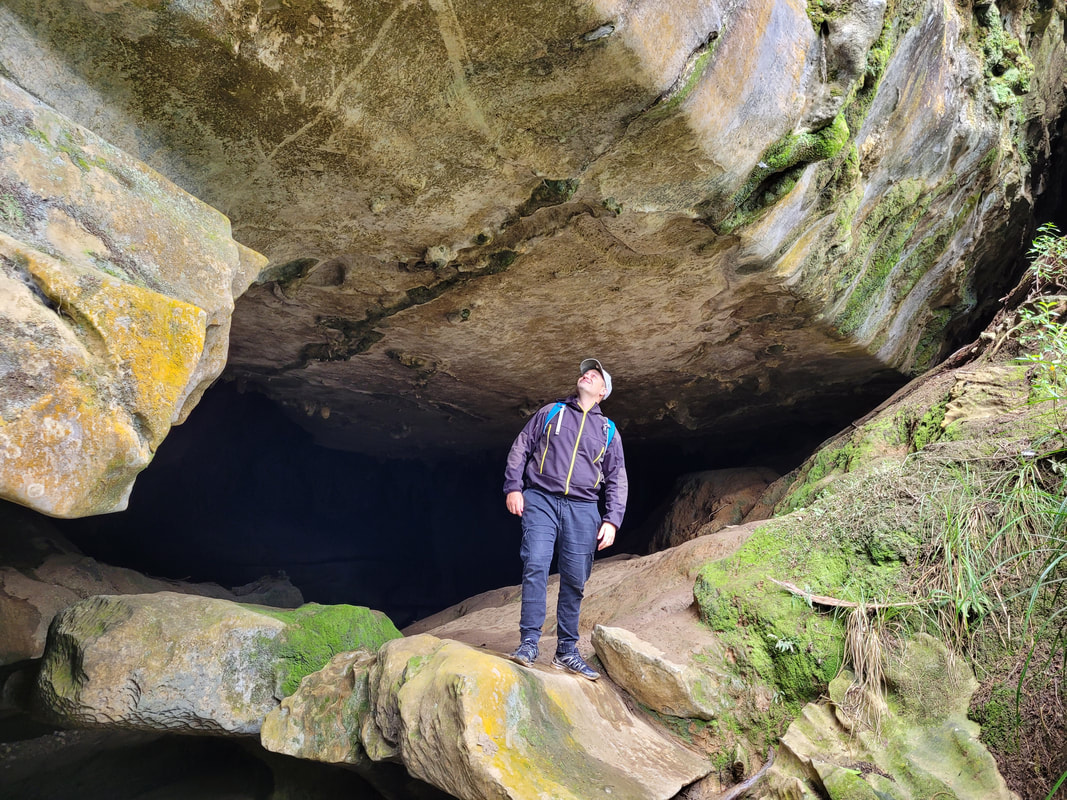
Lath standing at the entrance to the cave
Know Before You Go
- The caves can be slippery, especially around the entrance and at the back of the cave
- You will have to go through a stream to cross over to the rest of the caves - the recent rainfall will determine how high the stream is
- If there's heavy rainfall, it's best to avoid caving as they can flood really quickly
- Take spare batteries for your torch - the end of the cave is pitch black so it will be dangerous trying to get back to the entrance
- Wear shoes that are fine to get wet and super muddy
- There's a cold shower near the toilets where you can wash off afterwards
- The walk from the carpark to the caves is only around 100m
- If you're planning on getting some shots of the glowworms with your camera, make sure you bring an adjustable tripod
- Stick to the track to the caves - the land is full of sink holes and you will end up getting one very wet and muddy foot!
- The path near the entrance to the caves is narrow and a few metres above a stream, keep little kids close
- Wear shorts if you don't want to get your pants wet. We went in long pants on one of our visits and it was fine because the water was actually quite warm and it wasn't cold in the cave, so we didn't mind too much
- You can go at night to see the glowworms shine brighter
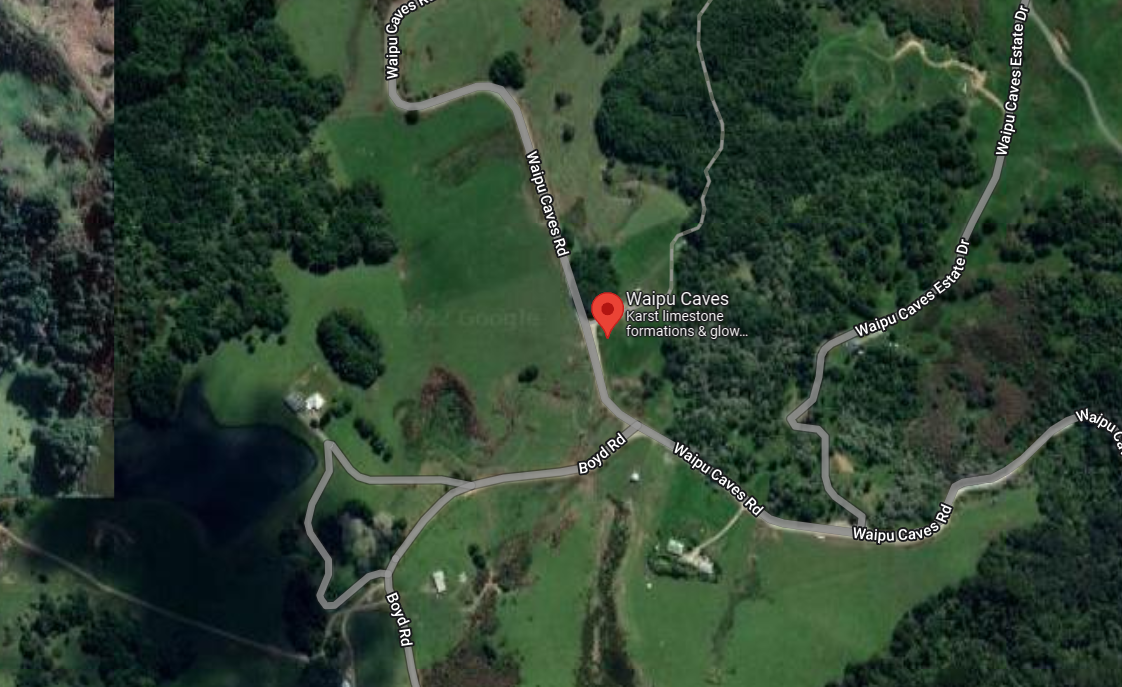
Mappy McMap Face
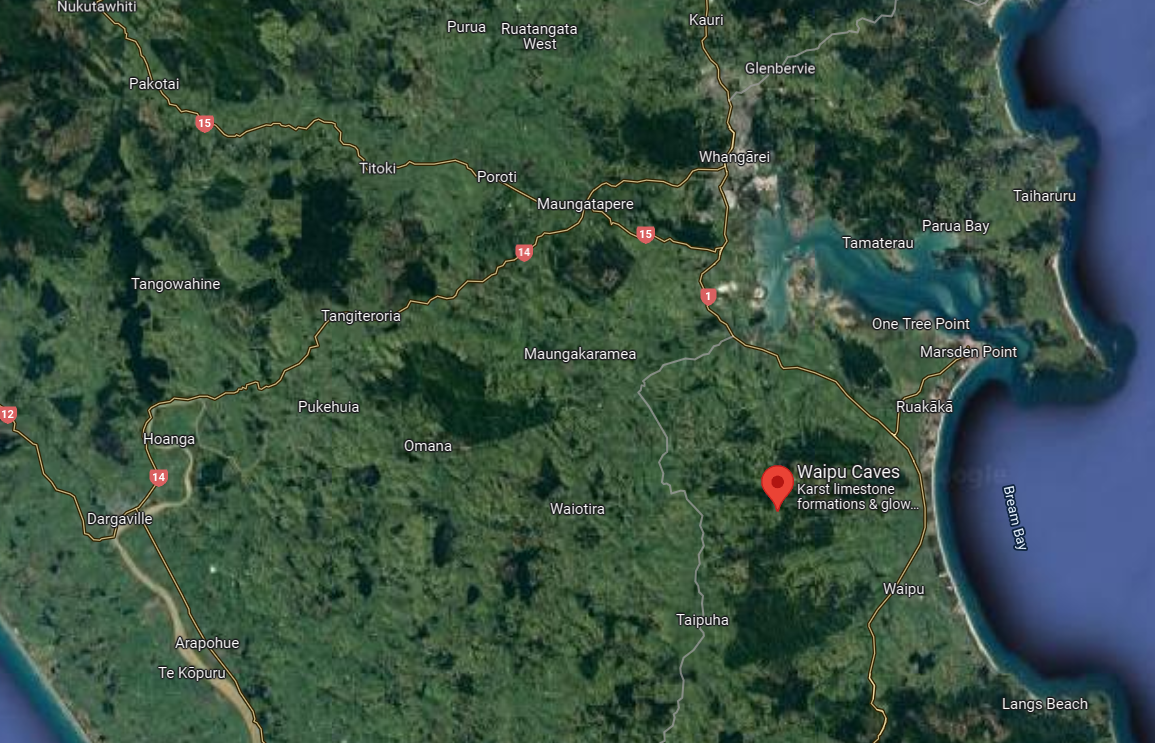
Getting There
The Waipu Caves are situated in Northland, a 30-minute drive south of Whangarei, 2 hours north of Auckland and a short 20-minute drive west of Waipu town centre.
The caves are just a short 20-minute drive from the Waipu town off State Highway 1.
If you're coming from North, you'll head along State Highway 1 can go down Springfield Road or Mangapai Road, otherwise you'll most likely be taken down Shoemaker Road or Mountfield Road which are also on State Highway 1.
The drive to the caves is really beautiful, through native bush and passing by huge limestones, some even have huge trees growing out of the top of them! It's an unsealed road for a few kms and there are some narrow, one-way parts so drive really slow in these parts as you can't see what's coming around the corner.
There is plenty of parking and more than enough space for campers.
Conclusion
The Waipu Caves are waiting for you to discover them! You will be rewarded with huge stalagmites, stalactites and a whole learning experience for kids (and adults!). The glowworms are incredible and if you have the gear to photograph them, your memories will forever be remembered.
This is one experience that will be talked about for a long time in our family and we cannot wait to explore more caves around the world.
There are more caves to explore in Whangarei - the Abbey Caves - but they are small and tight in some places and not easy to get to like the Waipu Caves.
This is one experience that will be talked about for a long time in our family and we cannot wait to explore more caves around the world.
There are more caves to explore in Whangarei - the Abbey Caves - but they are small and tight in some places and not easy to get to like the Waipu Caves.
Gallery of Waipu Caves
Check out the rest of the awesomeness that didn't make it to the main blog but deserves to be shown.


More to do in Northland
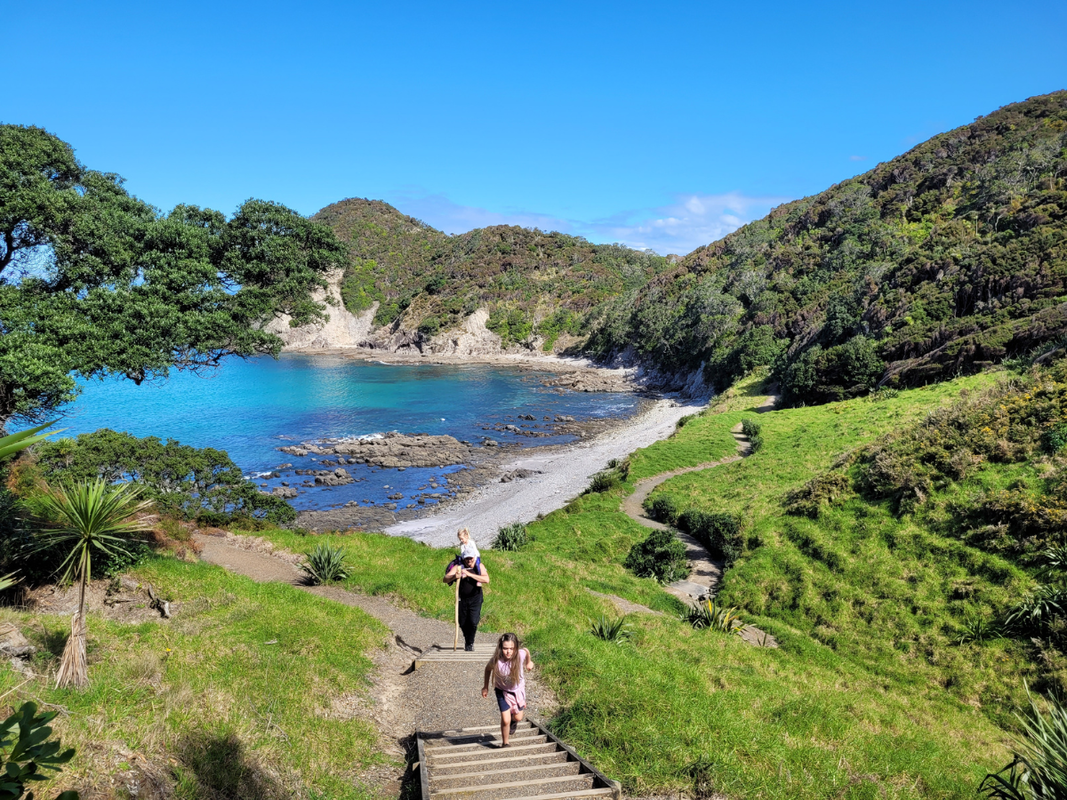
SMUGGLERS BAY LOOP TRACK
NORTHLAND If you want to go to paradise, this is the place! Emerald water, clear rock pools and octopus encounters await you.
|
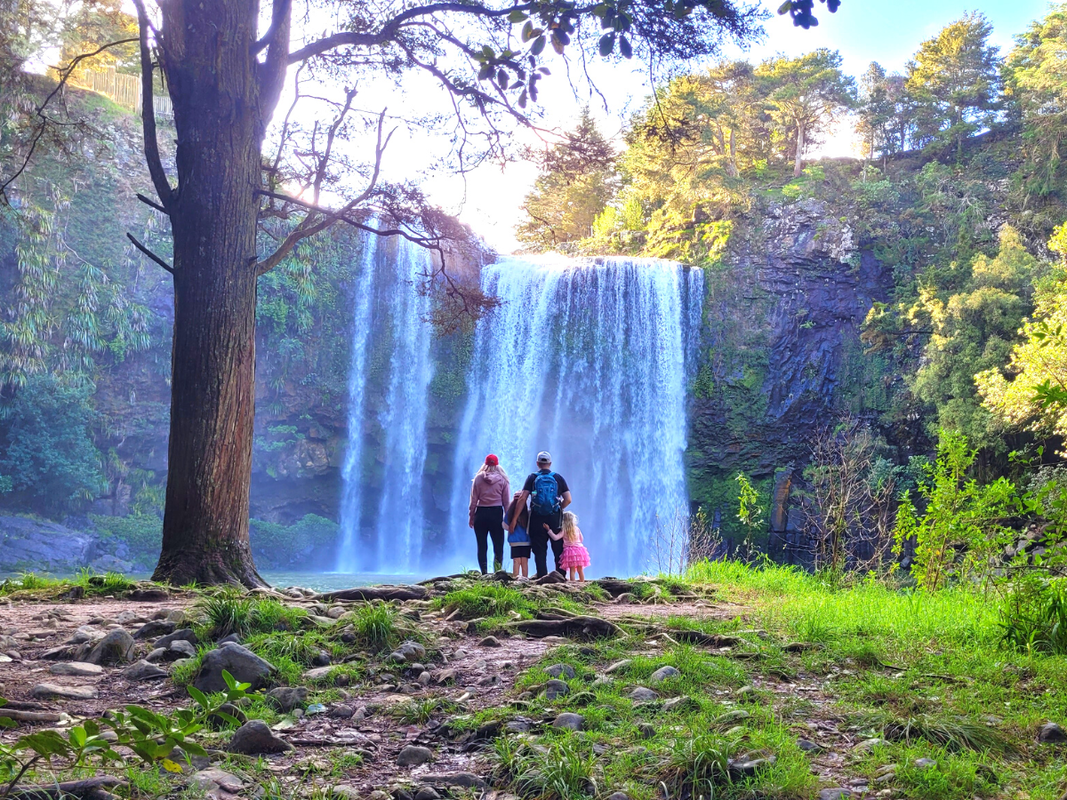
WHANGAREI FALLS
NORTHLAND A powerful 23.6m high waterfall along the Hatea River in central Whangarei. These falls will blow your mind. Remember your raincoat! |
ABBEY CAVES
NORTHLAND A subtropical garden set in an old quarry which has been planted by volunteers. Escape to the tropics with this magical place. |
SEND US A MESSAGE, WE LOVE GETTING MAIL! |
DISCOVER |
FOLLOW US
BORING (BUT IMPORTANT LEGAL) STUFF |
